Lexmark Optra C710 Setup Guide - Page 98
Launch MarkVision. In the MarkVision main, Select PSERVER mode.
 |
View all Lexmark Optra C710 manuals
Add to My Manuals
Save this manual to your list of manuals |
Page 98 highlights
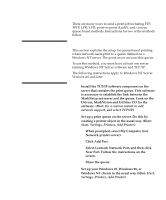
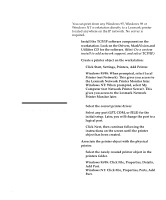
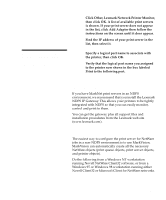
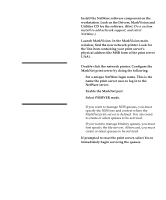
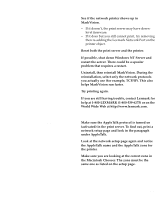
Note: The default login name contains the characters !LEX plus the UAA of the MarkNet print server (for example, !LEX00200022012F). Note: For information about choosing PSERVER or RPRINTER mode, look on the CD. Click View Documentation and look for the MarkNet link. 1 Install the NetWare software component on the workstation. Look on the Drivers, MarkVision and Utilities CD for the software. (Hint: Do a custom install to add network support, and select NetWare.) 2 Launch MarkVision. In the MarkVision main window, find the new network printer. Look for the line item containing your print server's physical address (the MSB form of the print server UAA). 3 Double-click the network printer. Configure the MarkNet print server by doing the following: a Set a unique NetWare login name. This is the name the print server uses to log in to the NetWare server. b Enable the MarkNet port. c Select PSERVER mode. If you want to manage NDS queues, you must specify the NDS tree and context where the MarkNet print server is defined. You also need to create or select queues to be serviced. If you want to manage bindery queues, you must first specify the file servers. Afterward, you must create or select queues to be serviced. 4 If prompted to reset the print server, select Yes to immediately begin servicing the queues. 94 Novell NetWare
-
 1
1 -
2
-
3
-
4
-
5
-
6
-
7
-
8
-
9
-
10
-
11
-
12
-
13
-
14
-
15
-
16
-
17
-
18
-
19
-
20
-
21
-
22
-
23
-
24
-
25
-
26
-
27
-
28
-
29
-
30
-
31
-
32
-
33
-
34
-
35
-
36
-
37
-
38
-
39
-
40
-
41
-
42
-
43
-
44
-
45
-
46
-
47
-
48
-
49
-
50
-
51
-
52
-
53
-
54
-
55
-
56
-
57
-
58
-
59
-
60
-
61
-
62
-
63
-
64
-
65
-
66
-
67
-
68
-
69
-
70
-
71
-
72
-
73
-
74
-
75
-
76
-
77
-
78
-
79
-
80
-
81
-
82
-
83
-
84
-
85
-
86
-
87
-
88
-
89
-
90
-
91
-
92
-
 93
93 -
 94
94 -
 95
95 -
 96
96 -
 97
97 -
 98
98 -
 99
99 -
 100
100 -
 101
101 -
 102
102 -
 103
103 -
104
-
105
-
106
-
107
-
108
-
109
-
110
-
111
 |
 |