Lexmark Optra E plus User's Guide - Page 21
Drivers, MarkVision, and Utilities, CD to install the necessary items. Instructions
 |
View all Lexmark Optra E plus manuals
Add to My Manuals
Save this manual to your list of manuals |
Page 21 highlights
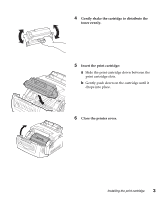
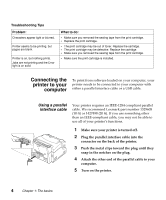
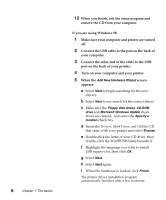
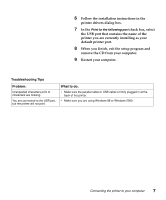
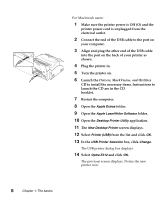
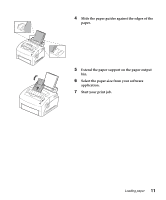
For Macintosh users: 1 Make sure the printer power is Off (O) and the printer power cord is unplugged from the electrical outlet. 2 Connect the end of the USB cable to the port on your computer. 3 Align and plug the other end of the USB cable into the port on the back of your printer as shown. 4 Plug the printer in. 5 Turn the printer on. 6 Launch the Drivers, MarkVision, and Utilities CD to install the necessary items. Instructions to launch the CD are in the CD booklet. 7 Restart the computer. 8 Open the Apple Extras folder. 9 Open the Apple LaserWriter Software folder. 10 Open the Desktop Printer Utility application. 11 The New Desktop Printer screen displays. 12 Select Printer (USB) from the list and click OK. 13 In the USB Printer Selection box, click Change. The USB printer dialog box displays. 14 Select Optra E312 and click OK. The previous screen displays. Notice the new printer icon. 8 Chapter 1: The basics
-
 1
1 -
2
-
3
-
4
-
5
-
6
-
7
-
8
-
9
-
10
-
11
-
12
-
13
-
14
-
15
-
 16
16 -
 17
17 -
 18
18 -
 19
19 -
 20
20 -
 21
21 -
 22
22 -
 23
23 -
 24
24 -
 25
25 -
 26
26 -
27
-
28
-
29
-
30
-
31
-
32
-
33
-
34
-
35
-
36
-
37
-
38
-
39
-
40
-
41
-
42
-
43
-
44
-
45
-
46
-
47
-
48
-
49
-
50
-
51
-
52
-
53
-
54
-
55
-
56
-
57
-
58
-
59
-
60
-
61
-
62
-
63
-
64
-
65
-
66
-
67
-
68
-
69
-
70
-
71
-
72
-
73
-
74
-
75
-
76
-
77
-
78
-
79
-
80
-
81
-
82
-
83
-
84
-
85
-
86
-
87
-
88
-
89
-
90
-
91
-
92
-
93
-
94
-
95
-
96
-
97
-
98
-
99
-
100
-
101
-
102
-
103
-
104
-
105
-
106
-
107
-
108
-
109
-
110
-
111
-
112
-
113
-
114
-
115
-
116
 |
 |
