Lexmark Pro915 Quick Reference - Page 32
Scenario 2: Digital Subscriber Line (DSL) - printer manual
 |
View all Lexmark Pro915 manuals
Add to My Manuals
Save this manual to your list of manuals |
Page 32 highlights
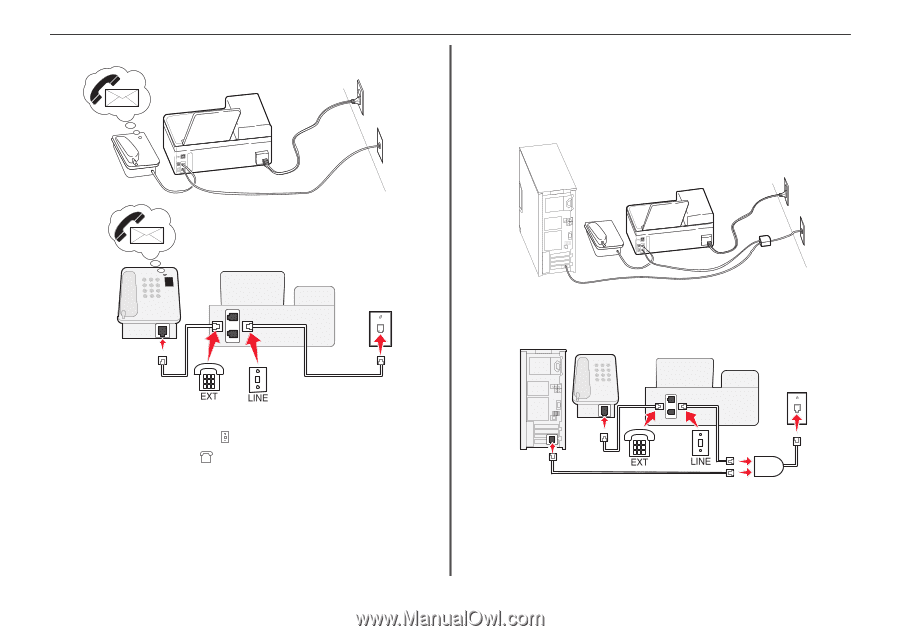
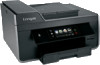
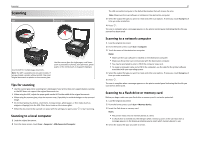
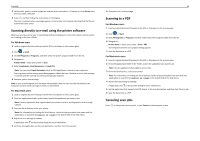
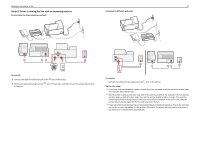
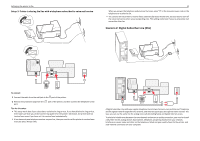
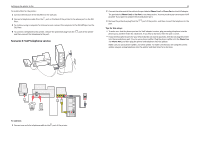
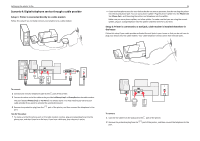
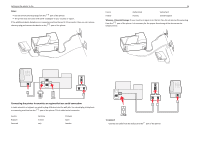
Setting up the printer to fax Setup 3: Printer is sharing the line with a telephone subscribed to voice mail service EXT LINE 32 When you answer the telephone and you hear fax tones, press *9* or the manual answer code on the telephone to receive the fax. • You can also set the printer to receive faxes automatically (Auto Answer On), but you need to turn off the voice mail service when you are expecting a fax. This setting works best if you are using voice mail more often than fax. Scenario 2: Digital Subscriber Line (DSL) EXT LINE 02 To connect: 1 Connect the cable from the wall jack to the port of the printer. 2 Remove the protective plug from the port. port of the printer, and then connect the telephone to the Tips for this setup: • This setup works best if you subscribe to a distinctive ring service. If you have distinctive ring service, then make sure that you set the correct ring pattern for the printer. Otherwise, the printer will not receive faxes even if you have set it to receive faxes automatically. • If you have only one telephone number on your line, then you need to set the printer to receive faxes manually (Auto Answer Off). A Digital Subscriber Line splits your regular telephone line into two channels: voice and Internet. Telephone and fax signals travel through the voice channel, and Internet signals pass through the other channel. This way, you can use the same line for analog voice calls (including faxes) and digital Internet access. To minimize interference between the two channels and ensure a quality connection, you need to install a DSL filter for the analog devices (fax machine, telephone, answering machine) in your network. Interference causes noise and static on the telephone, failed and poor quality faxes for the printer, and slow Internet connection on your computer.
-
 1
1 -
2
-
3
-
4
-
5
-
6
-
7
-
8
-
9
-
10
-
11
-
12
-
13
-
14
-
15
-
16
-
17
-
18
-
19
-
20
-
21
-
22
-
23
-
24
-
25
-
26
-
 27
27 -
 28
28 -
 29
29 -
 30
30 -
 31
31 -
 32
32 -
 33
33 -
 34
34 -
 35
35 -
 36
36 -
 37
37 -
38
-
39
-
40
-
41
-
42
-
43
-
44
-
45
-
46
-
47
-
48
-
49
-
50
-
51
-
52
-
53
-
54
-
55
-
56
-
57
 |
 |