Lexmark T620 Setup Guide - Page 22
Installing an optional firmware card, the two pins on the card with the holes
 |
View all Lexmark T620 manuals
Add to My Manuals
Save this manual to your list of manuals |
Page 22 highlights
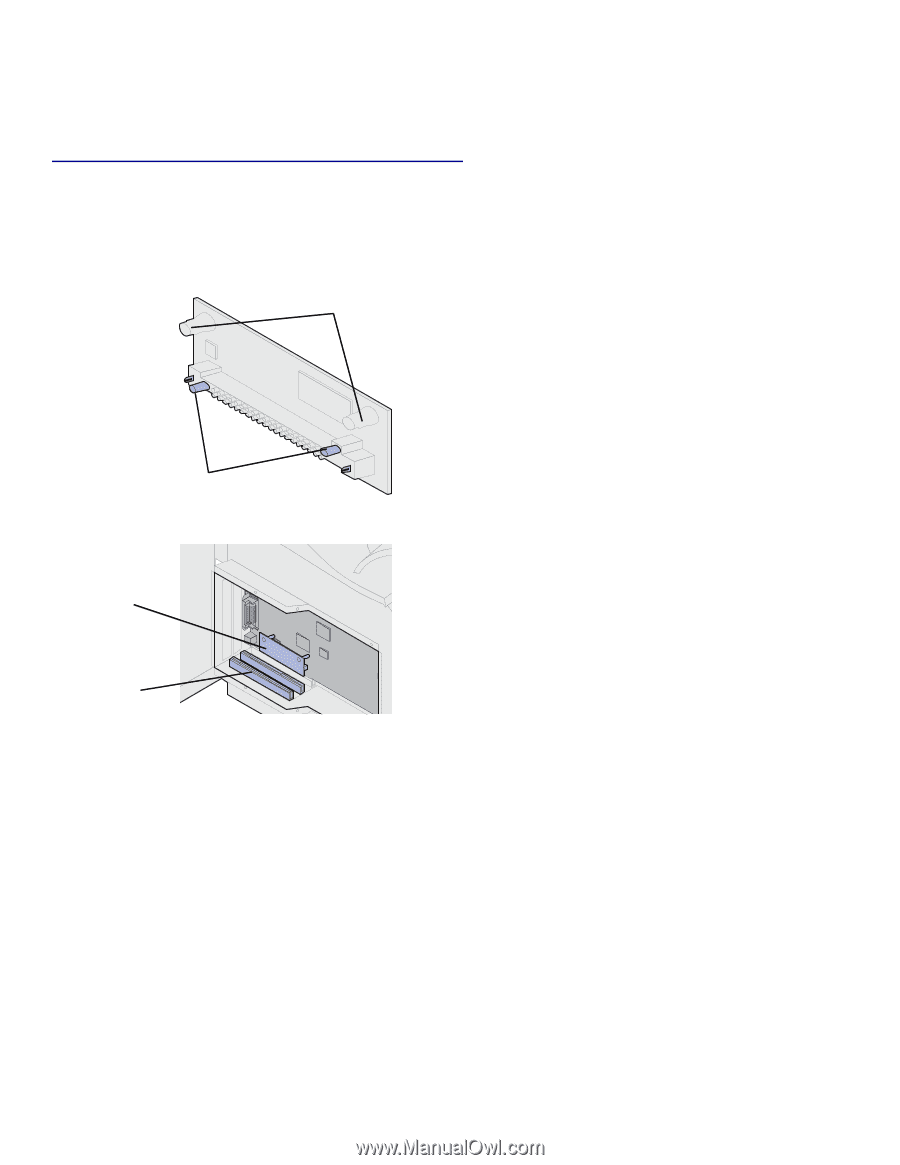
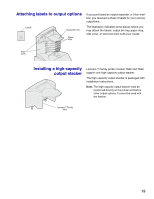
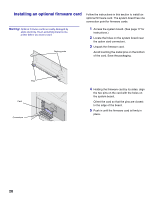
Installing an optional firmware card Follow the instructions in this section to install an optional firmware card. The system board has one connection point for firmware cards. Warning! Optional firmware cards are easily damaged by static electricity. Touch something metal on the printer before you touch a card. Resting posts 1 Access the system board. (See page 17 for instructions.) 2 Locate the holes on the system board near the option card connectors. 3 Unpack the firmware card. Avoid touching the metal pins on the bottom of the card. Save the packaging. Pins Card Connectors 4 Holding the firmware card by its sides, align the two pins on the card with the holes on the system board. Orient the card so that the pins are closest to the edge of the board. 5 Push in until the firmware card is firmly in place. 20
-
 1
1 -
2
-
3
-
4
-
5
-
6
-
7
-
8
-
9
-
10
-
11
-
12
-
13
-
14
-
15
-
16
-
 17
17 -
 18
18 -
 19
19 -
 20
20 -
 21
21 -
 22
22 -
 23
23 -
 24
24 -
 25
25 -
 26
26 -
 27
27 -
28
-
29
-
30
-
31
-
32
-
33
-
34
-
35
-
36
-
37
-
38
 |
 |