Lexmark X4850 User's Guide (Mac) - Page 54
Selecting printers that can scan to your computer
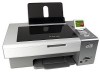 |
UPC - 734646046664
View all Lexmark X4850 manuals
Add to My Manuals
Save this manual to your list of manuals |
Page 54 highlights
Related topics: • "Setting a "scan to network" PIN" on page 54 Setting a "scan to network" PIN Assigning a "scan to network" PIN lets you control the sending of scanned items to your computer. You can assign a "scan to network" PIN when you install the printer software for the first time. You can also change it as needed. 1 From the Finder desktop, double-click the Lexmark 4800 Series folder. 2 Double-click the Lexmark 4800 Series Center icon. 3 From the menu, choose Advanced Œ Network Scan Settings. 4 Select the check box to specify a PIN. 5 Type in a four-digit PIN. Use a combination of numbers from 1-9. 6 Click Save. Related topics: • "Assigning a name to your computer" on page 53 Selecting printers that can scan to your computer 1 From the Finder desktop, double-click the Lexmark 4800 Series folder. 2 Double-click the Lexmark 4800 Series Center icon. 3 From the menu, choose Advanced ŒNetwork Scan Access. The Scan Network Access dialog appears. 4 Press + to search for printers connected to the local subnet. The Network All-in-One Selection dialog appears. 5 In the search field, type the IP address of the print server. Consult your network administrator for help finding the IP address of the print server. If you want to narrow your search to a certain subnet, type the IP address of the print server and the subnet mask in CIDR notation. 6 On your keyboard, press return. 7 From the Network All-in-One Selection dialog, select the printer you want to scan to your computer. 8 Click Select. 9 Repeat step 4 to step 8 for every printer that you want to scan to your computer. 10 When finished, click Done. Note: To remove a printer from the list, select the printer, and then click -. Scanning to a computer over a network using the control panel 1 Make sure: • The printer is connected to a network through a print server or through the wireless network connection. • The printer, the print server (if used), and the computer receiving the scan are all turned on. • The printer is configured to scan over a network. Scanning 54
-
 1
1 -
2
-
3
-
4
-
5
-
6
-
7
-
8
-
9
-
10
-
11
-
12
-
13
-
14
-
15
-
16
-
17
-
18
-
19
-
20
-
21
-
22
-
23
-
24
-
25
-
26
-
27
-
28
-
29
-
30
-
31
-
32
-
33
-
34
-
35
-
36
-
37
-
38
-
39
-
40
-
41
-
42
-
43
-
44
-
45
-
46
-
47
-
48
-
 49
49 -
 50
50 -
 51
51 -
 52
52 -
 53
53 -
 54
54 -
 55
55 -
 56
56 -
 57
57 -
 58
58 -
 59
59 -
60
-
61
-
62
-
63
-
64
-
65
-
66
-
67
-
68
-
69
-
70
-
71
-
72
-
73
-
74
-
75
-
76
-
77
-
78
-
79
-
80
-
81
-
82
-
83
-
84
-
85
-
86
-
87
-
88
-
89
-
90
-
91
-
92
-
93
-
94
-
95
-
96
-
97
-
98
-
99
-
100
-
101
-
102
-
103
-
104
-
105
-
106
-
107
-
108
-
109
-
110
-
111
-
112
-
113
-
114
-
115
-
116
-
117
-
118
-
119
-
120
-
121
-
122
-
123
-
124
-
125
-
126
-
127
-
128
-
129
-
130
-
131
-
132
-
133
-
134
-
135
-
136
-
137
-
138
-
139
-
140
-
141
-
142
-
143
-
144
-
145
-
146
-
147
-
148
-
149
-
150
-
151
-
152
-
153
-
154
-
155
-
156
-
157
-
158
-
159
-
160
-
161
-
162
-
163
-
164
-
165
-
166
 |
 |
