Lexmark X4850 User's Guide (Mac) - Page 84
Removing the printer software, Using the Printer Selection dialog, Using the Setup dialog - printer driver
 |
UPC - 734646046664
View all Lexmark X4850 manuals
Add to My Manuals
Save this manual to your list of manuals |
Page 84 highlights
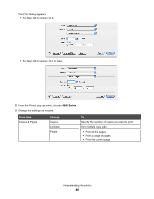
3 Choose the printer and the printer driver for your operating system. 4 Follow the instructions on the computer screen to download the driver and install the printer software. Related topics: • "Removing the printer software" on page 84 • "Removing and reinstalling the software" on page 148 Removing the printer software If the printer software is not installed properly, a communication error message appears when you try to print. Uninstall the printer software, and then reinstall it. 1 From the Finder desktop, double-click the Lexmark 4800 Series folder. If the folder for the printer is not found on the desktop or was accidentally deleted: a Go to the Mac OS X drive where the printer software was installed. b Choose Library Œ Printers Œ Lexmark Œ 2007 Œ Lexmark 4800 Series folder. 2 Double-click the Uninstaller icon for your printer. 3 Complete the user authentication notice, and then click OK. Note: For information on passwords, click to go to the Help Center. 4 Click Uninstall. 5 Click OK. Related topics: • "Installing the printer software" on page 83 Using the Printer Selection dialog The Printer Selection dialog lists all available and shared printers connected to your computer. It also lets you select a printer you want to use. To do this: 1 From the first pop-up menu, choose Available printers or Use Shared (for shared printers). 2 Under the Printer Name window, choose your printer. 3 Click Continue. Related topics: • "Installing the printer software" on page 83 Using the Printer Setup Complete dialog The Printer Setup Complete dialog provides helpful options after successful installation. From here you can: • Check for special offers. • Print a test page. Related topics: • "Installing the printer software" on page 83 Using the Page Setup dialog You can open the Page Setup dialog from almost any application: 1 With a document or photo open, choose File Œ Page Setup. Understanding the printer 84
-
 1
1 -
2
-
3
-
4
-
5
-
6
-
7
-
8
-
9
-
10
-
11
-
12
-
13
-
14
-
15
-
16
-
17
-
18
-
19
-
20
-
21
-
22
-
23
-
24
-
25
-
26
-
27
-
28
-
29
-
30
-
31
-
32
-
33
-
34
-
35
-
36
-
37
-
38
-
39
-
40
-
41
-
42
-
43
-
44
-
45
-
46
-
47
-
48
-
49
-
50
-
51
-
52
-
53
-
54
-
55
-
56
-
57
-
58
-
59
-
60
-
61
-
62
-
63
-
64
-
65
-
66
-
67
-
68
-
69
-
70
-
71
-
72
-
73
-
74
-
75
-
76
-
77
-
78
-
 79
79 -
 80
80 -
 81
81 -
 82
82 -
 83
83 -
 84
84 -
 85
85 -
 86
86 -
 87
87 -
 88
88 -
 89
89 -
90
-
91
-
92
-
93
-
94
-
95
-
96
-
97
-
98
-
99
-
100
-
101
-
102
-
103
-
104
-
105
-
106
-
107
-
108
-
109
-
110
-
111
-
112
-
113
-
114
-
115
-
116
-
117
-
118
-
119
-
120
-
121
-
122
-
123
-
124
-
125
-
126
-
127
-
128
-
129
-
130
-
131
-
132
-
133
-
134
-
135
-
136
-
137
-
138
-
139
-
140
-
141
-
142
-
143
-
144
-
145
-
146
-
147
-
148
-
149
-
150
-
151
-
152
-
153
-
154
-
155
-
156
-
157
-
158
-
159
-
160
-
161
-
162
-
163
-
164
-
165
-
166
 |
 |
