Linksys BEFSR41 User Guide - Page 24
Clients Table, Enable, Apply, Continue, Outgoing Access Log, Incoming Access Log, Disable, DNS - static ip address
 |
UPC - 745883549344
View all Linksys BEFSR41 manuals
Add to My Manuals
Save this manual to your list of manuals |
Page 24 highlights
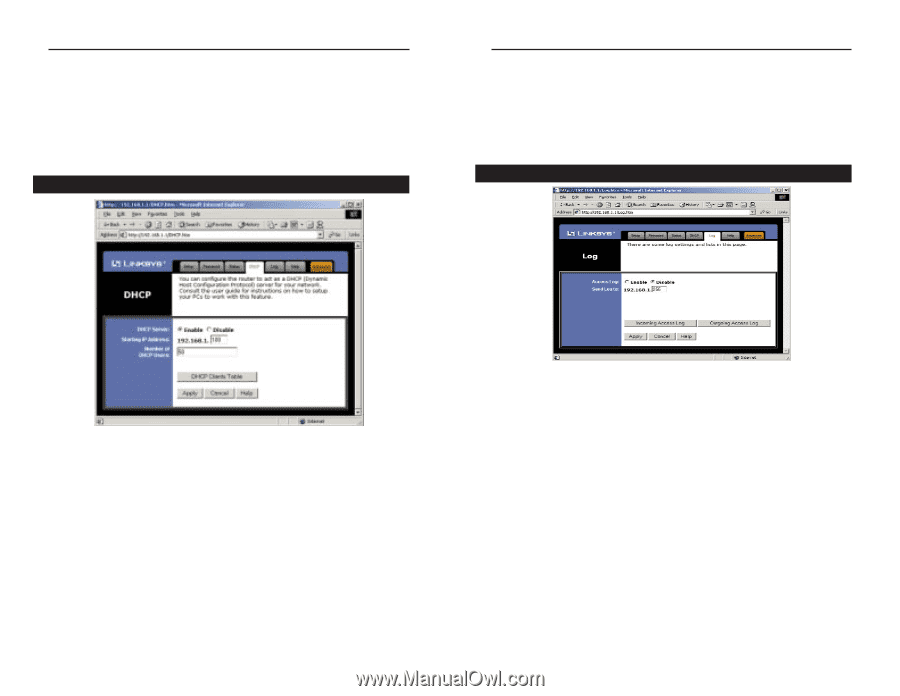
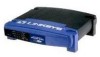
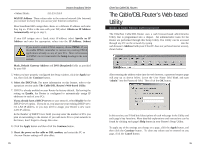
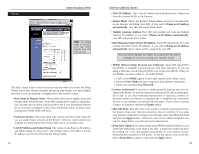
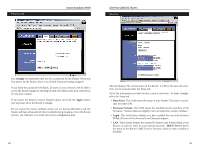
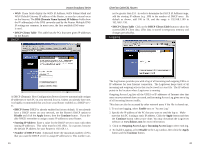
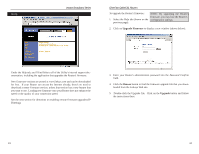
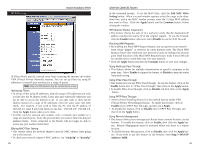
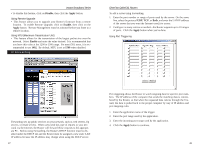
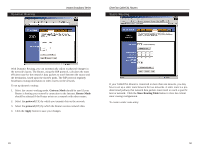
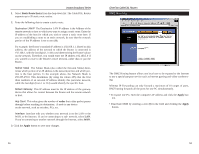
Instant Broadband Series • WAN These fields display the WAN IP Address, WAN Subnet Mask and WAN Default Gateway IP address of the Router, as seen by external users on the Internet. The DNS (Domain Name System) IP Address fields show the IP address(es) of the DNS currently used by the Router. Multiple DNS IP settings are common. In most cases, the first available DNS entry is used. • DHCP Clients Table This table lists the PCs that were given IP addresses by the Router. DHCP EtherFast Cable/DSL Routers not be greater than 253. In order to determine the DHCP IP Address range, add the starting IP address (e.g. 100) to the number of DHCP users. By default as shown, add 100 to 50, and the range is 192.168.1.100 to 192.168.1.150. • DHCP Clients Table Click on the DHCP Clients Table button to show the current DHCP Client data. (This data is stored in temporary memory and changes periodically). Logging A DHCP (Dynamic Host Configuration Protocol) server automatically assigns IP addresses to each PC on your network for you. Unless you already have one, it is highly recommended that you leave your Router enabled as a DHCP server. • DHCP Server DHCP is already enabled by factory default. If you already have a DHCP server on your network, set the Router's DHCP option to Disable and click the Apply button, then the Continue button. If you disable DHCP, remember to assign a static IP address to your Router. • Starting IP Address Enter a value for the DHCP server to start with when issuing IP addresses. This value must be (192.168.1. 2) or greater, because the default IP address for your Router is 192.168.1.1. • Number of DHCP Users (Optional) Enter the maximum number of PCs that you want the DHCP server to assign IP addresses to. This number can- 41 The Log feature provides you with a log of all incoming and outgoing URLs or IP addresses for your Internet connection. The Logviewer keeps track of all incoming and outgoing activity that can be saved in a text file. The IP address points to the location where Logviewer is running. Outgoing Access Log lists all the URLS or IP addresses of Internet sites that users on your network have accessed, and Incoming Access Log gives you a log of all incoming Internet traffic. This data can also be accessed by other network users if the file is shared out. 1. To activate logging, select Enable next to "Access Log." 2. Specify the IP address of the PC that you want to send the log to. Make sure that this PC is using a static IP address. Click the Apply button and then the Continue button when you're done. You may download the Logviewer software at www.linksys.com for more information. 3. Click on Outgoing Access Log or Incoming Access Log to view each log. 4. To disable Logging, select Disable in the Log window, then click the Apply button and the Continue button. 42
-
 1
1 -
2
-
3
-
4
-
5
-
6
-
7
-
8
-
9
-
10
-
11
-
12
-
13
-
14
-
15
-
16
-
17
-
18
-
 19
19 -
 20
20 -
 21
21 -
 22
22 -
 23
23 -
 24
24 -
 25
25 -
 26
26 -
 27
27 -
 28
28 -
 29
29 -
30
-
31
-
32
-
33
-
34
-
35
-
36
-
37
-
38
-
39
-
40
-
41
-
42
-
43
-
44
-
45
 |
 |