Linksys WRE54G Cisco WAP54GP Wireless-G Exterior Access Point User Guide - Page 22
Navigating the Utility - manual
 |
UPC - 745883559046
View all Linksys WRE54G manuals
Add to My Manuals
Save this manual to your list of manuals |
Page 22 highlights
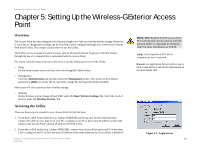
Wireless-G Exterior Access Point address (192.168.1.245). Or if there is DHCP server connected to the switch, configure it to assign the IP address in 192.168.1.0/24 subnet. Your PC will get an IP address in the subnet through the DHCP. 3. It is not recommended to use it this way, but you can connect your PC wirelessly to the Access Point when the DHCP server is connected on the LAN side. It is not recommended because you can easily lose your connection through configuration changes. Launch your web browser, such as Internet Explorer or Mozilla Firefox and enter the Access Point's default IP address, 192.168.1.245, in the Address field. Press the Enter key. Enter admin in the User Name field. The first time you open the Web-based Utility, use the default password, admin. (You can set a new password from the Administration - Management tab.) Then click the OK button. After setting up the Access Point to use DHCP or manually configure a new IP address, move your Access Point to the desired network. You will have to use the new IP address the next time you access the Webbased Utility. Navigating the Utility The Web-based Utility consists of the following five main tabs: Setup, Wireless, AP Mode, Administration, and Status. Additional screens (sub tabs) will be available from most of the main tabs. The following briefly describes the main & sub tabs of the Utility. Setup Enter the Host Name and IP Address settings on this screen. Wireless You will use the Wireless tabs to enter a variety of wireless settings for the Access Point. • Basic Wireless Settings. Choose the wireless network mode (e.g. wireless-G), Virtual Local Area Network (VLAN) settings, SSIDs, and transmit rates on this screen. • Wireless Security. Use this screen to configure the Access Point's security settings. • Wireless Network Access. Use this screen to populate your Access List to permit or block certain MAC address access to your wireless network. Chapter 5: Setting Up the Wireless-G Exterior Access Point 15 Navigating the Utility
-
 1
1 -
2
-
3
-
4
-
5
-
6
-
7
-
8
-
9
-
10
-
11
-
12
-
13
-
14
-
15
-
16
-
 17
17 -
 18
18 -
 19
19 -
 20
20 -
 21
21 -
 22
22 -
 23
23 -
 24
24 -
 25
25 -
 26
26 -
 27
27 -
28
-
29
-
30
-
31
-
32
-
33
-
34
-
35
-
36
-
37
-
38
-
39
-
40
-
41
-
42
-
43
-
44
-
45
-
46
-
47
-
48
-
49
-
50
-
51
-
52
-
53
-
54
-
55
-
56
-
57
-
58
-
59
-
60
-
61
-
62
-
63
-
64
-
65
-
66
-
67
-
68
-
69
-
70
-
71
-
72
-
73
-
74
-
75
-
76
 |
 |
