Linksys WRT160NL User Guide - Page 24
Storage > Administration, Information, Group Management, User Management - ip address
 |
UPC - 745883587650
View all Linksys WRT160NL manuals
Add to My Manuals
Save this manual to your list of manuals |
Page 24 highlights
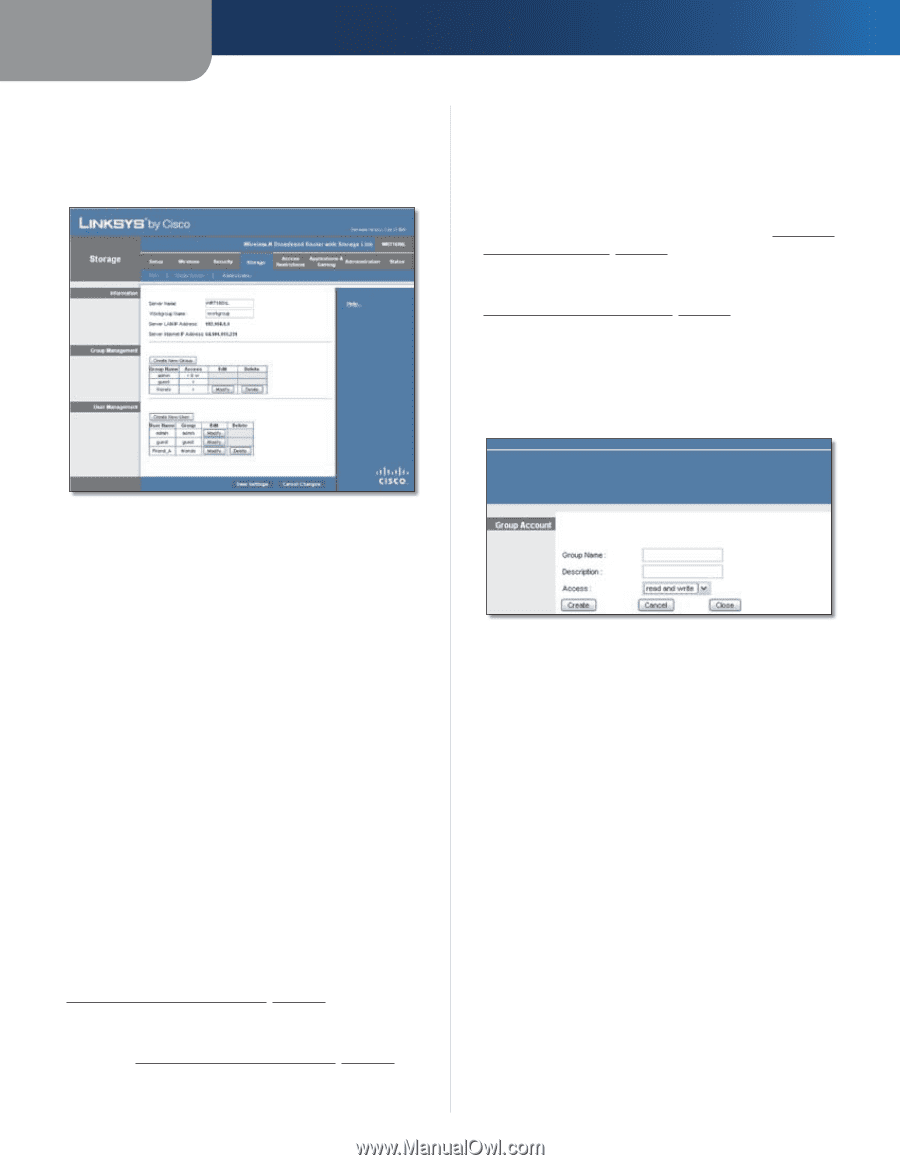
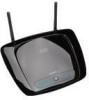
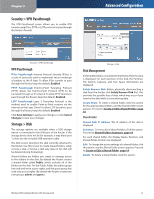
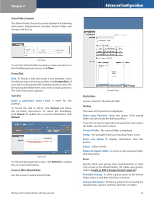
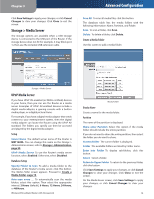
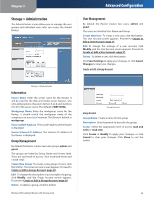
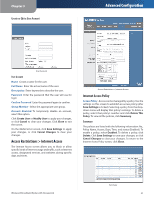
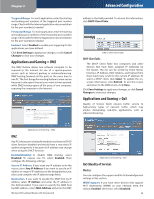
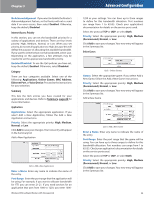
Chapter 3 Storage > Administration The Administration screen allows you to manage the user groups and individual users who can access the shared folders. Advanced Configuration User Management By default the Router creates two users, admin and guest. The users are listed by User Name and Group. Create New User To create a new user, click this button. The User Account screen appears. Proceed to Create or Edit a User Account, page 21. Edit To change the settings of a user account, click Modify, and the User Account screen appears. Proceed to Create or Edit a User Account, page 21. Delete To delete a user, click this button. Click Save Settings to apply your changes, or click Cancel Changes to clear your changes. Create or Edit a Group Account Storage > Administration Information Server Name Enter the server name for the Router; it will be used for the disk and media server features. Use only alphanumeric characters (letters A to Z and numbers 0 to 9) in the server name. The default is WRT160NL. Workgroup Name Enter the workgroup name for the Router; it should match the workgroup name of the computers on your local network. The Router's default is workgroup. Server LAN IP Address The local IP address of the Router is displayed. Server Internet IP Address The Internet IP address of the Router is displayed. Group Management By default the Router creates two user groups, admin and guest. The groups are listed by Group Name and Access level. There are two levels of access, r & w (read-and-write) and r (read-only). Create New Group To create a new group of users, click this button. The Group Account screen appears. Proceed to Create or Edit a Group Account, page 20. Edit To change the description or access rights of a group, click Modify, and the Group Account screen appears. Proceed to Create or Edit a Group Account, page 20. Delete To delete a group, click this button. Wireless-N Broadband Router with Storage Link Group Account Group Account Group Name Create a name for the group. Description Enter keywords to describe the group. Access Select the appropriate level of access, read and write or read only. Click Create or Modify to apply your changes, or click Cancel to clear your changes. Click Close to exit the screen. 20
-
 1
1 -
2
-
3
-
4
-
5
-
6
-
7
-
8
-
9
-
10
-
11
-
12
-
13
-
14
-
15
-
16
-
17
-
18
-
 19
19 -
 20
20 -
 21
21 -
 22
22 -
 23
23 -
 24
24 -
 25
25 -
 26
26 -
 27
27 -
 28
28 -
 29
29 -
30
-
31
-
32
-
33
-
34
-
35
-
36
-
37
-
38
-
39
-
40
-
41
-
42
-
43
-
44
-
45
-
46
-
47
-
48
-
49
-
50
-
51
-
52
-
53
-
54
-
55
-
56
-
57
-
58
-
59
-
60
-
61
-
62
-
63
-
64
-
65
 |
 |