Linksys WRT160NL User Guide - Page 37
Appendix B: How to Install and Access USB Storage, Overview, Install the USB Storage Device - default login
 |
UPC - 745883587650
View all Linksys WRT160NL manuals
Add to My Manuals
Save this manual to your list of manuals |
Page 37 highlights
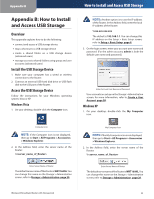
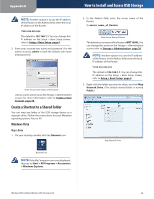
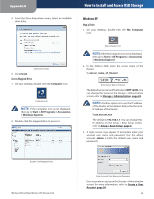
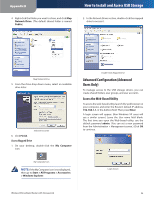
Appendix B Appendix B: How to Install and Access USB Storage Overview This appendix explains how to do the following: •• connect and access a USB storage device •• map a shortcut to a USB storage device •• create a shared folder on a USB storage device (advanced users) •• manage access to shared folders using group and user accounts (advanced users) Install the USB Storage Device 1. Make sure your computer has a wired or wireless connection to the Router. 2. Connect an external USB hard disk drive or USB flash disk to the USB port of the Router. Access the USB Storage Device Follow the instructions for your Windows operating system, Vista or XP. Windows Vista 1. On your desktop, double-click the Computer icon. How to Install and Access USB Storage NOTE: Another option is to use the IP address of the Router. In the Address field, enter the local IP address of the Router: \\xxx.xxx.xxx.xxx The default is 192.168.1.1. You can change this IP address on the Setup > Basic Setup screen; refer to Setup > Basic Setup, page 4. 3. On the login screen, enter your account user name and password. (For the admin account, admin is both the default user name and password.) Enter Account User Name and Password User accounts are set up on the Storage > Administration screen; for more information, refer to Create a User Account, page 38. Windows XP 1. On your desktop, double-click the My Computer icon. Computer Icon NOTE: If the Computer icon is not displayed, then go to Start > All Programs > Accessories > Windows Explorer. 2. In the Address field, enter the server name of the Router: \\ Enter Server Name of Router The default server name of the Router is WRT160NL.You can change this name on the Storage > Administration screen; refer to Storage > Administration, page 20. My Computer Icon NOTE: If the My Computer icon is not displayed, then go to Start > All Programs > Accessories > Windows Explorer. 2. In the Address field, enter the server name of the Router: \\ Enter Server Name of Router The default server name of the Router is WRT160NL.You can change this name on the Storage > Administration screen; refer to Storage > Administration, page 20. Wireless-N Broadband Router with Storage Link 33
-
 1
1 -
2
-
3
-
4
-
5
-
6
-
7
-
8
-
9
-
10
-
11
-
12
-
13
-
14
-
15
-
16
-
17
-
18
-
19
-
20
-
21
-
22
-
23
-
24
-
25
-
26
-
27
-
28
-
29
-
30
-
31
-
 32
32 -
 33
33 -
 34
34 -
 35
35 -
 36
36 -
 37
37 -
 38
38 -
 39
39 -
 40
40 -
 41
41 -
 42
42 -
43
-
44
-
45
-
46
-
47
-
48
-
49
-
50
-
51
-
52
-
53
-
54
-
55
-
56
-
57
-
58
-
59
-
60
-
61
-
62
-
63
-
64
-
65
 |
 |
