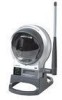
Linksys WVC200 Cisco WVC200 2.4 GHz Wireless-G PTZ Internet Camera with Audio - Page 22
Camera Name, Description, Time Zone, Basic Settings - ip camera
 |
UPC - 745883569045
View all Linksys WVC200 manuals
Add to My Manuals
Save this manual to your list of manuals |
Page 22 highlights
Installing Software 7. On the Basic Settings screen, change the following settings: • Camera Name Enter a unique name for the camera, up to 15 characters in length. Unique names are helpful when you are using multiple cameras on the same network. • Description Enter a description, up to 32 characters in length, with additional information, such as the location of the camera. • Time Zone Select the time zone that corresponds with the camera's location. • Date Enter the current date in the provided fields. • Time Enter the current time in the provided fields. You have now finished identifying the camera and making the basic settings. To continue configuring the camera's IP address, click Next. WVC200-210 User Guide 18
-
 1
1 -
2
-
3
-
4
-
5
-
6
-
7
-
8
-
9
-
10
-
11
-
12
-
13
-
14
-
15
-
16
-
 17
17 -
 18
18 -
 19
19 -
 20
20 -
 21
21 -
 22
22 -
 23
23 -
 24
24 -
 25
25 -
 26
26 -
 27
27 -
28
-
29
-
30
-
31
-
32
-
33
-
34
-
35
-
36
-
37
-
38
-
39
-
40
-
41
-
42
-
43
-
44
-
45
-
46
-
47
-
48
-
49
-
50
-
51
-
52
-
53
-
54
-
55
-
56
-
57
-
58
-
59
-
60
-
61
-
62
-
63
-
64
-
65
-
66
-
67
-
68
-
69
-
70
-
71
-
72
-
73
-
74
-
75
-
76
-
77
-
78
-
79
-
80
 |
 |

WVC200-210 User Guide
18
Installing Software
7.
On the
Basic Settings
screen, change the following settings:
•
Camera Name
Enter a unique name for the camera, up to 15 characters in length.
Unique names are helpful when you are using multiple cameras on the same network.
•
Description
Enter a description, up to 32 characters in length, with additional
information, such as the location of the camera.
•
Time Zone
Select the time zone that corresponds with the camera’s location.
•
Date
Enter the current date in the provided fields.
•
Time
Enter the current time in the provided fields.
You have now finished identifying the camera and making the basic settings. To continue
configuring the camera’s IP address, click
Next
.