Logitech G402 User Manual - Page 60
To edit a profile, Customize G-keys/buttons
 |
View all Logitech G402 manuals
Add to My Manuals
Save this manual to your list of manuals |
Page 60 highlights
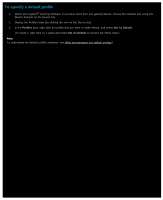
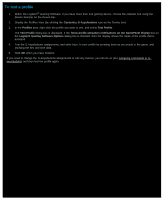
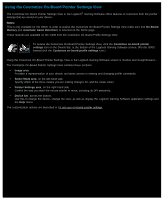
To edit a profile 1. Within the Logitech® Gaming Software, if you have more than one gaming device, choose the relevant one using the Device Selector on the Device bar. 2. Display the Profiles View (by clicking the Customize G-keys/buttons icon on the Device bar). 3. Right-click the profile in the Profiles area or click its arrow, and select Properties. The Profile Properties dialog box is displayed. 4. Edit the Name that you want to give the profile (typically the game's name). This name appears when you point the cursor at the profile in the Profiles area in the Profiles View, and on your device's GamePanel display (if your device has an LCD) for five seconds when you launch a game with this profile linked to it. 5. Optionally enter a Description, for example to clarify which version of the game the profile is set up for. 6. Choose additional executable file(s) for the game(s)/application(s) that this profile is for. To do so, for each one, click the + icon and either: i. Select Add application from GamePanel from the drop-down menu. ii. Launch (or switch to) the game so that it is the current, foreground application. iii. Press the OK button next to the display. -or- i. Select Choose application from the drop-down menu. The Open dialog box is displayed. ii. Select the executable file(s), and click Open. Alternatively, to remove a game/application, click its name and click the - icon. 7. If you want to specify that once the profile has been activated by running the game, it will stay activated until the game ends, then check the Lock profile while game is running box. This guarantees that even if the game loses focus that the profile will remain active. 8. Click OK. The profile is updated and linked to the game(s) you chose. 9. If you want to change the icon associated with the profile, right-click the profile in the Profiles area, and select Choose Icon. The Choose Icon dialog box is displayed, in which you can locate and select an appropriate image file from the common formats supported. 10. Check and change the G-key/button assignments to suit the profile you're editing. See Assigning commands to G-keys/buttons for details. Note: There's also a tool for testing your profiles to make sure they'll work in your games how you expect them to (see To test a profile). Then, if you need to make changes, you can make amendments to commands and assignments (see To edit a command ).
-
 1
1 -
2
-
3
-
4
-
5
-
6
-
7
-
8
-
9
-
10
-
11
-
12
-
13
-
14
-
15
-
16
-
17
-
18
-
19
-
20
-
21
-
22
-
23
-
24
-
25
-
26
-
27
-
28
-
29
-
30
-
31
-
32
-
33
-
34
-
35
-
36
-
37
-
38
-
39
-
40
-
41
-
42
-
43
-
44
-
45
-
46
-
47
-
48
-
49
-
50
-
51
-
52
-
53
-
54
-
 55
55 -
 56
56 -
 57
57 -
 58
58 -
 59
59 -
 60
60 -
 61
61 -
 62
62 -
 63
63 -
 64
64 -
 65
65 -
66
-
67
-
68
-
69
-
70
-
71
-
72
-
73
-
74
-
75
-
76
-
77
-
78
-
79
-
80
-
81
-
82
-
83
-
84
-
85
-
86
-
87
-
88
-
89
-
90
-
91
-
92
-
93
-
94
-
95
-
96
-
97
-
98
-
99
-
100
-
101
-
102
-
103
-
104
-
105
-
106
-
107
-
108
-
109
-
110
-
111
-
112
-
113
-
114
-
115
-
116
-
117
-
118
-
119
-
120
-
121
-
122
-
123
-
124
-
125
-
126
-
127
-
128
-
129
-
130
 |
 |
