Meade TE923W-M User Manual - Page 13
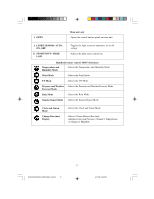
Assembly, Battery installation, Aligning, NORTH, Mounting, Placement tips
 |
View all Meade TE923W-M manuals
Add to My Manuals
Save this manual to your list of manuals |
Page 13 highlights
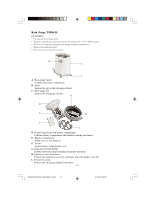
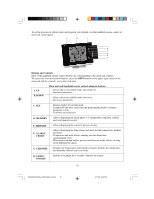
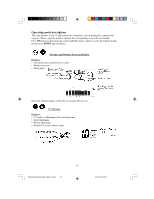
Assembly • Slide the wind cups on to the anemometer rotating shaft. Do not use force. • Insert the Allen Wrench (provided) into the wind cup set screw opening. Tighten the set screw to secure wind cups to the rotating shaft. • Test to ensure cups are securely fastened to the shaft. Battery installation • Remove four (4) screws from the battery compartment with a small Phillips screwdriver. • Open the battery compartment and install 2 "AA" size alkaline batteries (not included) matching the polarities shown. • Replace the battery compartment door and secure the screws. Aligning • Point the wind direction vane to the north (use a compass or map if necessary). • Press the button inside the "SET" opening located inside battery compartment with a paper clip or similar tool. The "SET" selects a new direction for NORTH and, when pressed repeatedly, alternates between the factory default NORTH and user selected NORTH. • Select the factory set mode. It will be also a default setting in the future. • Set current wind direction as NORTH. Note: Repeat this procedure every time when changing the batteries. Mounting Mount the anemometer onto a vertical surface, using the fittings provided. Placement tips: • The anemometer should be mounted in an open area with a free air flow; away from the nearby trees, buildings or other structures. • For optimal performance, mount the anemometer at 33 feet (10meters) above the ground in unobstructed area. 13 TE923W IM1(ENG) HONEYWELL R.pmd 13 4/11/08, 5:26 PM
-
 1
1 -
2
-
3
-
4
-
5
-
6
-
7
-
 8
8 -
 9
9 -
 10
10 -
 11
11 -
 12
12 -
 13
13 -
 14
14 -
 15
15 -
 16
16 -
 17
17 -
 18
18 -
19
-
20
-
21
-
22
-
23
-
24
-
25
-
26
-
27
-
28
-
29
-
30
-
31
-
32
-
33
-
34
-
35
-
36
-
37
-
38
-
39
-
40
-
41
-
42
-
43
-
44
 |
 |
