Meade TE923W-M User Manual - Page 22
Using Different Weather Modes
 |
View all Meade TE923W-M manuals
Add to My Manuals
Save this manual to your list of manuals |
Page 22 highlights
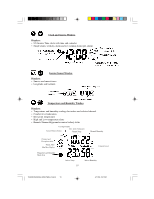
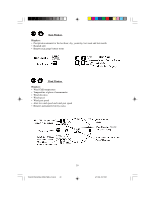
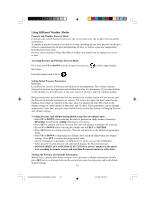
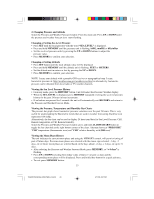
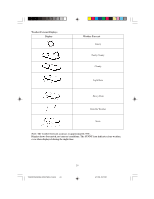
Using Different Weather Modes Pressure and Weather Forecast Mode It indicates the current barometric pressure, the sea level pressure, the weather forecast and the moon phase. A number of historical statistics can also be viewed, including the sea-level pressure for the past 24 hours, moon phase for the past and following 39 days, as well as a pressure/ temperature/ humidity history bar-chart. Pressure can be displayed inHg, hPa/mBar or mmHg, and altitude can be displayed in meters or feet. Accessing Pressure and Weather Forecast Mode Press main unit UP or DOWN until the weather forecast icon left corner. to flash, upper display From the remote control: Press . Setting Initial Pressure Parameters Overview Local Pressure, Sea Level Pressure and Altitude are interdependent. The weather station is designed to measure local pressure and calculate the other two parameters. If you enter altitude, it will calculate sea level pressure, if you enter sea level pressure, and will calculate altitude. During initial power up (within the first two minutes) the weather station will not operate until the Pressure & Altitude parameters are entered. The icon in the upper left hand corner begins flashing. If no values are entered at this time, after two minutes the unit will switch to the default settings of: inHG (Inches of Mercury), and 33 FEET. These parameters can be changed as desired at a later date, using the steps outlined in the section for Setting or Changing Pressure and Altitude settings. 1. Setting Pressure and Altitude during initial setup (first two minute only) • Press UP or DOWN button selecting the units of pressure in: inHg (inches of mercury), hPa/mBar (hectoPascal) mmHg (millimeters of mercury) • Press SET to confirm and store selection. The unit will advance to altitude unit selection. • Press UP or DOWN button selecting the altitude unit in FEET or METERS. • Press SET button to confirm and store. The unit will advance to the altitude programming mode. • Press UP or DOWN to adjust the local altitude. Press and hold either button for "Rapid" settings. Press SET to confirm the programmed value. • (Local information is obtainable via GPS device or online services like GOOGLE.) • After about 30 seconds the unit will calculate & display the Sea Level pressure. • DO NOT PRESS ANY ADDITIONAL BUTTONS for about 5 minutes as the unit is now searching for remote sensors and need time for measurements to settle down. Viewing the Pressure and Altitude Information Wait at least 5 minutes after initial set up to view a pressure or altitude information. Briefly press SET button to alternate between the sea level pressure, local pressure and local altitude altitude settings. 22 TE923W IM1(ENG) HONEYWELL R.pmd 22 4/11/08, 5:27 PM
-
 1
1 -
2
-
3
-
4
-
5
-
6
-
7
-
8
-
9
-
10
-
11
-
12
-
13
-
14
-
15
-
16
-
 17
17 -
 18
18 -
 19
19 -
 20
20 -
 21
21 -
 22
22 -
 23
23 -
 24
24 -
 25
25 -
 26
26 -
 27
27 -
28
-
29
-
30
-
31
-
32
-
33
-
34
-
35
-
36
-
37
-
38
-
39
-
40
-
41
-
42
-
43
-
44
 |
 |