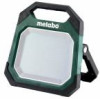
Metabo BSA 18 LED 10000 Operating Instructions - Page 11
Troubleshooting, Cleaning, Repairs, Environmental Protection, Technical Data
 |
View all Metabo BSA 18 LED 10000 manuals
Add to My Manuals
Save this manual to your list of manuals |
Page 11 highlights
11 Hook (for hanging)* 12 screw thread (5/8"-UNC) for fastening the lamp to a stand* 13 Cut-out slot for wall suspension* 14 Hole (16 mm diameter) for fastening to a stand* 15 Cover cap (mains connection)* 16 Socket (mains connection)* 17 Plug (of the mains connection)* 18 Lock ring* * depending on model/equipment/not in scope of delivery 3. Use 3.1 Inserting and removing the battery pack Charge the battery pack (9) (depending on equipment) before use. 1. Press button (8) and fold open the protective cover (7) . 2. Slide on the battery pack (9) or remove it. 3. Close the protective cover (7) . The ideal storage temperature for battery packs is between 10°C and 30°C. 3.2 Switching on/off, setting the light intensity Do not direct the light beam into the eyes of people or animals. 1. Turn on and off at the switch (5). 2. Change the light intensity by turning the ring (6) . When the maximum or minimum light intensity is reached, the light beam flashes briefly. 3.3 Capacity display (4) When the lamp is switched on, the charge level of the battery pack is shown by the LED lights. 3.4 USB connection (only for BSA 18 LED 4000, BSA 18 LED 10000) The charger is suitable for charging/operation of electronic devices with a USB interface (like Smartphones, MP3 Players, tablets, etc.) - no data exchange Only connect USB devices which are compatible with the USB standard. Using incompatible USB devices can lead to malfunctions, damage or injury. 1. Open the cover cap of the USB port (3). 2. Plug the USB device into the USB port (3) using a suitable USB cable. 3. Disconnect the USB cable from the device after charging/use and close the cover cap. Note: IP protection is only guaranteed when the cover of the USB port (3) is closed. 3.5 Mains connection (only for BSA 18 LED 10000) Before commissioning, check that the rated mains voltage and mains frequency stated on the type plate match your power supply. Always install an RCD with a maximum trip current of 30 mA upstream. ENGLISH en Connecting the mains connection: 1. Open cover cap (15). 2. Align the connector (17) of the mains connection in such a way that thee socket (16) and connector (17) fit into each other. 3. Plug the connector (17) into the socket (16) . In doing so, the locking ring (18) turns automatically and locks the connector (17) against being pulled out. Removing the mains connection: 1. Turn the locking ring (18) anti-clockwise and pull off the connector (17) . 2. Close again the cover cap (15) . 4. Troubleshooting Brief flashing of the light beam every 3 minutes signals that the battery pack is almost empty and must be recharged. 5. Cleaning Remove the battery pack from the device or pull the mains plug before carrying out cleaning. Do not clean with aggressive cleaning agents. Ensure that the lamp and the battery contacts are dry before inserting the battery pack. 6. Repairs Repairs to Metabo machines must be carried out by qualified electricians only! If any of your Metabo power tools require repairs, please contact your Metabo service centre. For addresses see www.metabo.com. You can download a list of spare parts from www.metabo.com. 7. Environmental Protection Do not allow battery packs to come into contact with water! Protect the environment and do not dispose of power tools or battery packs in household waste. Observe national regulations on separated collection and recycling of disused machines, packaging and accessories. Before disposal, discharge the battery pack in the tool. Prevent the contacts from short-circuiting (e.g. by protecting them with adhesive tape). 8. Technical Data Use only original Metabo or CAS (Cordless Alliance System) battery packs and accessories. For a complete range of accessories, see www.metabo.com or the catalogue. Only to be used with original Metabo battery packs: 12 V (only 12-18...): 625406000, 625349000, etc. 11
-
 1
1 -
2
-
3
-
4
-
5
-
 6
6 -
 7
7 -
 8
8 -
 9
9 -
 10
10 -
 11
11 -
 12
12 -
 13
13 -
 14
14 -
 15
15 -
 16
16 -
17
-
18
-
19
-
20
-
21
-
22
-
23
-
24
-
25
-
26
-
27
-
28
-
29
-
30
-
31
-
32
-
33
-
34
-
35
-
36
-
37
-
38
-
39
-
40
-
41
-
42
-
43
-
44
-
45
-
46
-
47
-
48
-
49
-
50
-
51
-
52
-
53
-
54
-
55
-
56
-
57
-
58
-
59
-
60
-
61
-
62
-
63
-
64
-
65
-
66
-
67
-
68
 |
 |
