Miele G 4998 Vi AM Operating instructions/Installation instructions - Page 69
GROUNDING INSTRUCTIONS, V, 60 Hz, 15 A fuse rating
 |
View all Miele G 4998 Vi AM manuals
Add to My Manuals
Save this manual to your list of manuals |
Page 69 highlights
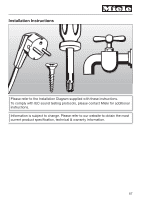
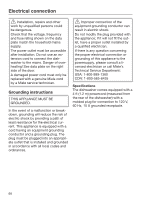
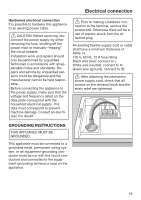
Electrical connection Hardwired electrical connection It is possible to hardwire this appliance to an existing power cable. CAUTION: Before servicing, dis- connect the power supply by either removing the fuse, shutting off the power main or manually "tripping" the circuit breaker. Installation work and repairs should only be performed by a qualified technician in accordance with all applicable codes and standards. Repairs and service by unqualified persons could be dangerous and the manufacturer cannot be held responsible. Before connecting the appliance to the power supply, make sure that the voltage and frequency listed on the data plate correspond with the household electrical supply. This data must correspond to prevent machine damage. Consult an electrician if in doubt. Prior to making a hardwire con- nection to the terminal, remove the powercord. Otherwise there will be a risk of electric shock from the attached plug. An existing flexible supply cord or cable shall have a minimum thickness of AWG 14. 120 V, 60 Hz, 15 A fuse rating Black wire (live): connect to L White wire (neutral): connect to N Green wire (ground): connect to After attaching the permanent power supply cord, check that all screws on the terminal block and the strain relief are tightened. GROUNDING INSTRUCTIONS THIS APPLIANCE MUST BE GROUNDED. This appliance must be connected to a grounded metal, permanent wiring system, or an equipment-grounding conductor must be run with the circuit conductors and connected to the equipment-grounding terminal or lead on the appliance. 69
-
 1
1 -
2
-
3
-
4
-
5
-
6
-
7
-
8
-
9
-
10
-
11
-
12
-
13
-
14
-
15
-
16
-
17
-
18
-
19
-
20
-
21
-
22
-
23
-
24
-
25
-
26
-
27
-
28
-
29
-
30
-
31
-
32
-
33
-
34
-
35
-
36
-
37
-
38
-
39
-
40
-
41
-
42
-
43
-
44
-
45
-
46
-
47
-
48
-
49
-
50
-
51
-
52
-
53
-
54
-
55
-
56
-
57
-
58
-
59
-
60
-
61
-
62
-
63
-
 64
64 -
 65
65 -
 66
66 -
 67
67 -
 68
68 -
 69
69 -
 70
70 -
 71
71 -
 72
72 -
 73
73 -
 74
74 -
75
-
76
 |
 |
