Motorola RDU2020 User Guide - Page 47
Example of Programming Auto-Scan, Auto-Scan is the last Programming Mode
 |
UPC - 723755539921
View all Motorola RDU2020 manuals
Add to My Manuals
Save this manual to your list of manuals |
Page 47 highlights
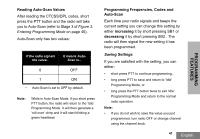
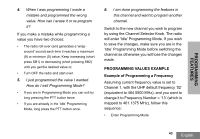
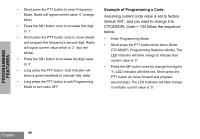
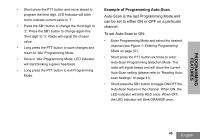
PROGRAMMING FEATURES • Short press the PTT button and move ahead to program the third digit. LED Indicator will blink red to indicate current value is '1'. • Press the SB1 button to change the 'third digit' to '2'. Press the SB1 button to change again this 'third digit' to '3'. Radio will signal the chosen value. • Long press the PTT button to save changes and return to 'Idle' Programming Mode. • Once in 'Idle' Programming Mode, LED Indicator will start blinking a green heartbeat. • Long press the PTT button to exit Programming Mode. Example of Programming Auto-Scan Auto-Scan is the last Programming Mode and can be set to either ON or OFF on a particular channel. To set Auto-Scan to ON: • Enter Programming Mode and select the desired channel (see Figure 1: Entering Programming Mode on page 37). • Short press the PTT button six times to enter Auto-Scan Programming Selection Mode. The radio will signal beeps and will show the current Auto-Scan setting (please refer to "Reading Autoscan Settings" on page 41). • Short press the SB1 button to toggle ON/OFF the Auto-Scan feature in the channel. When ON, the LED Indicator will blink RED once. When OFF, the LED Indicator will blink ORANGE once. 45 English
-
 1
1 -
2
-
3
-
4
-
5
-
6
-
7
-
8
-
9
-
10
-
11
-
12
-
13
-
14
-
15
-
16
-
17
-
18
-
19
-
20
-
21
-
22
-
23
-
24
-
25
-
26
-
27
-
28
-
29
-
30
-
31
-
32
-
33
-
34
-
35
-
36
-
37
-
38
-
39
-
40
-
41
-
 42
42 -
 43
43 -
 44
44 -
 45
45 -
 46
46 -
 47
47 -
 48
48 -
 49
49 -
 50
50 -
 51
51 -
 52
52 -
53
-
54
-
55
-
56
-
57
-
58
-
59
-
60
-
61
-
62
-
63
-
64
-
65
-
66
-
67
-
68
-
69
-
70
-
71
-
72
-
73
-
74
-
75
-
76
-
77
-
78
-
79
-
80
-
81
-
82
-
83
-
84
-
85
-
86
-
87
-
88
-
89
-
90
-
91
-
92
-
93
-
94
-
95
-
96
-
97
-
98
-
99
 |
 |