Motorola RDU4160D User Guide
Motorola RDU4160D - RDX UHF - Radio Manual
 |
UPC - 723755540309
View all Motorola RDU4160D manuals
Add to My Manuals
Save this manual to your list of manuals |
Motorola RDU4160D manual content summary:
- Motorola RDU4160D | User Guide - Page 1
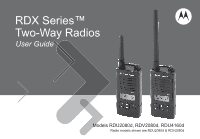
RDX Series™ Two-Way Radios User Guide Models RDU2080d, RDV2080d, RDU4160d Radio models shown are RDU2080d & RDV2080d - Motorola RDU4160D | User Guide - Page 2
- Motorola RDU4160D | User Guide - Page 3
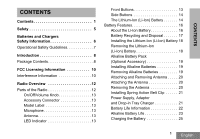
Battery Pack (Optional Accessory 19 Installing Alkaline Batteries 19 Removing Alkaline Batteries 19 Attaching and Removing Antenna . . . . . 20 Attaching the Antenna 20 Removing the Antenna 20 Installing Spring Action Belt Clip 21 Power Supply, Adaptor and Drop-in Tray Charger 21 Battery - Motorola RDU4160D | User Guide - Page 4
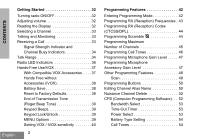
. . 47 Programming Microphone Accessory Gain Level 47 Other Programming Features 48 Scan 48 Programming Buttons 50 Editing Channel Alias Name 50 Nuisance Channel Delete 52 CPS (Computer Programming Software) . . . 52 Bandwidth Select 53 Time-Out Timer 53 Power Select 53 Battery Type Setting - Motorola RDU4160D | User Guide - Page 5
76 Programming Customized Frequencies on 4W/5W RDX models 80 Motorola Limited Warranty for the United States and Canada 81 Accessories 85 Antennas 85 Audio Accessories 85 Battery 85 Carry Accessories 86 Power Supplies AC Pin Adaptors 86 Software Applications 86 Cables 86 Chargers 86 - Motorola RDU4160D | User Guide - Page 6
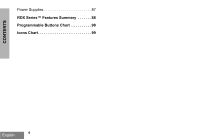
CONTENTS Power Supplies 87 RDX Series™ Features Summary 88 Programmable Buttons Chart 98 Icons Chart 99 English 4 - Motorola RDU4160D | User Guide - Page 7
instructions and RF energy awareness information contained in the Product Safety and RF Exposure booklet enclosed with your radio. ATTENTION! This radio is restricted to occupational use only to satisfy FCC RF energy exposure requirements. For a list of Motorola-approved antennas, batteries - Motorola RDU4160D | User Guide - Page 8
reference. Before using the battery charger, read all the instructions and cautionary markings on • the charger, • the battery, and • the radio using the battery. 1. To reduce risk of injury, charge only the rechargeable Motorola-authorized batteries. Other batteries may explode, causing personal - Motorola RDU4160D | User Guide - Page 9
SAFETY GUIDELINES • Turn the radio OFF when charging battery. • The charger is not suitable for outdoor use. Use only in dry locations/conditions. • Connect charger only to an appropriately fused and wired supply of the correct voltage (as specified on the product). • Disconnect charger from line - Motorola RDU4160D | User Guide - Page 10
before use. Business Radios, RPSD 1C15, Motorola 8000 West Sunrise Boulevard Plantation, Florida 33322 PACKAGE CONTENTS • Radio • Antenna (only for RDU4160d) • Spring Action Belt-Clip • Lithium-Ion Battery • Power Supply • User Guide • Warranty Card • Drop-in Tray Charger • Product Safety & RF - Motorola RDU4160D | User Guide - Page 11
INTRODUCTION For a copy of a large-print version of this user guide or for product-related questions, contact: 1-800-448-6686 in the USA 1-800-461-4575 in Canada 1-866-522-5210 on your TTY (Text Telephone) For product information visit us at: www.motorolasolutions.com/RDX 9 English - Motorola RDU4160D | User Guide - Page 12
INFORMATION INTERFERENCE INFORMATION This device complies with Part 15 of the FCC Rules. Operation is subject to the condition that this device does not cause harmful interference. RDX Series™ Business two-way radios operate on radio frequencies that are regulated by the Federal Communications - Motorola RDU4160D | User Guide - Page 13
and Code Charts". For questions on determining the radio frequency, call Motorola Product Services at: 1-800-448-6686 Changes or modifications not expressly approved by Motorola may void the user's authority granted by the FCC to operate this radio and should not be made. To comply with FCC - Motorola RDU4160D | User Guide - Page 14
RADIO OVERVIEW PARTS OF THE RADIO Antenna Microphone Use 'Menu' button to lock keypad On/Off/ Volume Knob LED Indicator Accessory Connector Lithium-Ion Battery Model Label Use and to scroll up/ down through channels and menu setting RADIO OVERVIEW English Front Buttons 12 PTT (Push-to- - Motorola RDU4160D | User Guide - Page 15
audio accessories. Model Label Indicates the model of the radio. Microphone Speaks clearly into the microphone when sending a message. Antenna For Models RDU2080d and RDV2080d, the antennas are non-removable antenna. For RDU4160d, the antenna is removable. LED Indicator Used to give battery status - Motorola RDU4160D | User Guide - Page 16
Backlight Time Out, Reverse Burst, Power Select, Scan/ Nuisance Channel Delete, Monitor and Call Tones. To learn more about how to program these buttons refer to "Entering Programming Mode" on page 42 and "CPS (Computer Programming Software)" on page 52. Side Buttons Push-to-Talk (PTT) Button Press - Motorola RDU4160D | User Guide - Page 17
This User Guide covers multiple RDX Series™ models, and may detail some features your radio does not have. The radio's model is shown on the front of the radio, underneath the speaker, and tells you the following information: Model RDV2080d RDU2080d RDU4160d Frequency Band VHF UHF UHF Transmit - Motorola RDU4160D | User Guide - Page 18
and ultimately in failure of the battery. Charging a hot battery (above 95°F [35°C]) results in reduced discharge capacity, affecting the performance of the radio. Motorola rapid-rate battery chargers contain a temperature-sensing circuit to ensure that batteries are charged within the temperature - Motorola RDU4160D | User Guide - Page 19
Canada, Motorola participates in the nationwide Rechargeable Battery Recycling Corporation (RBRC) program for Li-Ion battery collection and recycling. Many retailers and dealers participate in this program. For the location of the drop-off facility closest to you, access RBRC's Internet web site at - Motorola RDU4160D | User Guide - Page 20
-Ion (Li-Ion) Battery Battery Latch slots RADIO OVERVIEW 1. Turn OFF the radio. 2. With the Motorola logo side up on the battery pack, fit the tabs at the bottom of the battery into the slots at the bottom of the radio's body. 3. Press the top part of the battery towards the radio until a click - Motorola RDU4160D | User Guide - Page 21
Alkaline Battery Pack (Optional Accessory) Installing Alkaline Batteries Removing Alkaline Batteries RADIO OVERVIEW Alkaline Battery Door Alkaline Battery Door 1. Turn OFF the radio, if it is turned ON. 2. Remove Li-Ion battery. 3. Assemble alkaline battery pack in the same steps as installing - Motorola RDU4160D | User Guide - Page 22
Antenna These instructions apply ONLY for RDU4160d radio. Do not attempt to remove the antenna if your radio is not one of these models. Attaching the Antenna Removing the Antenna RADIO OVERVIEW 1. Align the threaded end of the antenna with the radio's antenna connector. 2. Turn the antenna - Motorola RDU4160D | User Guide - Page 23
clip rails into the belt clip grooves on the back of the battery pack and slide it down until the belt clip tab snaps into place. 2. To remove, pull back the metal release tab on the belt clip tab and push the spring action belt clip upward to remove. Power Supply Drop-in Tray Charger The radio - Motorola RDU4160D | User Guide - Page 24
feature ON Battery Type 5 Watts 4 Watts 2 Watts Standard 8.5 hours 8.5 hours 12 hours High 17 hours 17 hours 24 hours Ultra High 18.5 hours 18.5 hours 26 hours Note: Battery life is estimated based on 5% transmit/ 5% receive/ 90% standby standard duty cycle. RADIO OVERVIEW English - Motorola RDU4160D | User Guide - Page 25
the Alkaline battery life: Alkaline Battery Life Battery Save Feature 5 Watts 4 Watts 2 Watts ON 26 hours* 26 hours* 26 hours Notes: • Battery life are being estimated based on 5% transmit/ 5% receive/ 90% standby standard duty cycle. • * When using Alkaline battery, the radio is set - Motorola RDU4160D | User Guide - Page 26
Battery Meter The battery meter located in the upper left corner of the display indicates how much battery power you have remaining. Battery Type RDX Series™ Battery Meter 3 Bars 2 Bars Li-Ion AA 100%-70% 100%-70% 70%-30% 70%-30% 1 Bar 30%-0% 30%-0% RADIO OVERVIEW English 24 - Motorola RDU4160D | User Guide - Page 27
the Battery RDX Series™ offers two types of chargers : • Standard Charger and, • Rapid Charger. The radio comes equipped with a Standard Charger. To charge the battery (with the radio attached), place it in a Motorola-approved Drop-in Tray Single Unit Charger or Drop-in Tray Multi Unit Charger - Motorola RDU4160D | User Guide - Page 28
. See "Charging a Standard Battery" on page 26 Charging a Standard Battery The drop-in tray charger has a removable bracket that is adjustable depending on the type of battery that needs to be charged. It is designed to charge either the battery (with the radio) or a standalone battery. The drop-in - Motorola RDU4160D | User Guide - Page 29
Repeat same procedure to return to the charging a Standard Battery position. Label on the removable bracket should show 'Standard Battery' facing front. Note: Make sure the bracket is assembled correctly for both standalone battery and battery (with radio). RADIO OVERVIEW To convert the charger - Motorola RDU4160D | User Guide - Page 30
red (slow) Steady red indication Blinking red (fast) Comments The charger has powered up The charger is currently charging Battery is fully charged Battery had a fault when battery was inserted Notes: • (*) Normally re-seating the battery pack will correct this issue. RADIO OVERVIEW English 28 - Motorola RDU4160D | User Guide - Page 31
Waiting to Charge (**) Double-blink yellow indications Battery charging conditions not suitable Notes: • (*) Normally re-seating the battery pack will correct this issue. • (**) Battery temperature is too warm or too cold or wrong power supply is being used. RADIO OVERVIEW 29 English - Motorola RDU4160D | User Guide - Page 32
The following table provides the estimated charging time of the battery. For further details, see "Battery" on page 85. Charging Solution Standard Charging Solution Rapid Charging Solution Estimated Charging Time Battery Type Standard High Capacity 7 hours 12 hours 1.5 hours 3 hours Ultra - Motorola RDU4160D | User Guide - Page 33
This Multi Unit Charger also allows you to clone up to 3 radios (3 Source radios and 3 Target radios). Refer to page 55 for details. • Further details on MUC's operation are explained in the Instructions Sheet provided with the MUC. For part number details, refer to the Accessories section. MUC LED - Motorola RDU4160D | User Guide - Page 34
. READING THE DISPLAY Scan Battery Level Keypad Hi Power Lock Vox / iVox Scramble Repeater/Talkaround Signal Strength Channel Number Channel Programming Frequency Indicator Mode Indicator Indicator Interference Eliminator Code Indicator Notes: • The radio display shown here is for - Motorola RDU4160D | User Guide - Page 35
STARTED SELECTING A CHANNEL Your radio offers different number of conventional channels depending on the model number. To select a channel, press the toggle / buttons until you reach the desired channel. Program each channel separately. Each channel has its own Frequency, Interference Eliminator - Motorola RDU4160D | User Guide - Page 36
TALK RANGE TALK RANGE Model two-way radio, the channel, frequency, and interference eliminator code must be the same on both radios, which will depend on the stored profile that has been preprogrammed on the radio: 1. Channel: Current channel that the radio is using, depending upon radio model - Motorola RDU4160D | User Guide - Page 37
2. Frequency: The frequency your radio uses to transmit/receive. 3. Interference Eliminator Code: These codes help minimize interference specific code. For details of how to set up frequencies and CTCSS/DPL codes in your channels refer to the 'Programming Mode' Section. 35 English GETTING STARTED - Motorola RDU4160D | User Guide - Page 38
GETTING STARTED RADIO LED INDICATORS RADIO STATUS Channel Alias Edit Channel Busy Cloning Mode Cloning In Progress Fatal Error at Power up Low Battery Low Battery Shutdown Monitor Power-Up 'Idle' Programming Mode / Channel Mode Scan Mode Transmit (Tx)/Receive (RX) Transmit in Low Power Select LED - Motorola RDU4160D | User Guide - Page 39
Accessory Connector VOX Accessory Motorola RDX™ radios can operate hands-free (VOX) when used with compatible VOX accessories. With Compatible VOX Accessories Turn the radio OFF. 2. Open accessory cover. 3. Insert audio accessory's plug firmly into accessory port. 4. Turn the radio ON. Radio will - Motorola RDU4160D | User Guide - Page 40
without Accessories (iVOX) • Enable iVOX by pressing the PTT button while turning the radio ON and the icon will blink. • iVOX operation can be temporarily disabled by pressing the PTT button. Note: • The iVOX feature is available only on display models RDU2080d, RDV2080d, and RDU4160d. • To - Motorola RDU4160D | User Guide - Page 41
/disabled by short pressing SB2 button (until radio 'chirps') while turning ON the radio. Keypad Lock/Unlock You can lock the keypad to avoid accidentally changing your radio settings. Press and hold MENU for 4 seconds to lock the radio keypad. To unlock, press MENU for 4 seconds. Note: The only - Motorola RDU4160D | User Guide - Page 42
the sensitivity level, use the / buttons: 0 = OFF (For VOX accessories only) 1 = Low sensitivity 2 = Medium sensitivity 3 = High sensitivity Once you have selected the value you want, press MENU again to go to the next step or turn OFF radio to exit without saving changes. Default value for VOX - Motorola RDU4160D | User Guide - Page 43
choose either 'LITHIUM' or 'ALKALINE'. Once you have selected the value you want, press MENU again to save and go to the next step or turn OFF radio to exit without saving changes. Battery Type can also be programmed using the CPS. LITHIUM 41 English - Motorola RDU4160D | User Guide - Page 44
can scroll up/down to select the different channels by pressing the / buttons. In 'Programming Mode' your radio is capable of setting values for each channel by moving between the different programming modes available: Frequencies, CTCSS/DPL codes (Interference Eliminator Code), Scramble, Maximum - Motorola RDU4160D | User Guide - Page 45
saved, even if you turn OFF the radio. • You can exit any Programming Mode without saving changes (as long as the radio has not return to the beginning) by turning the radio OFF. PROGRAMMING RX (RECEPTION) FREQUENCIES Once you have chosen the channel you want to program, short press the PTT - Motorola RDU4160D | User Guide - Page 46
(CTCSS/DPL) Once you have chosen the channel you want to program, short press the PTT button or MENU to scroll through the options until you reach the 'Code Programming Mode'. The radio display will show the blinking CTCSS/DPL code as follows: RX To program the desired code, scroll up/down with the - Motorola RDU4160D | User Guide - Page 47
You can configure the maximum number of channels for the radio. Once you have entered 'Programming Mode' scroll up/down by short pressing the PTT button until you reach the 'Max Channel Programming Mode': To program the maximum number of channels use the / buttons until you locate the desired - Motorola RDU4160D | User Guide - Page 48
group in such way that you can alert them that you are about to talk or alert them without speaking. In 'Call Tone Selection Mode', you can configure the call tone type for the radio. The settings available will depend on the maximum number of call tones your radio supports. To program Call Tones - Motorola RDU4160D | User Guide - Page 49
available for microphone gain level are dependent upon maximum levels the radio supports. PROGRAMMING MICROPHONE ACCESSORY GAIN LEVEL To configure the Accessory Microphone Gain Level, enter 'Programming Mode' and scroll through the programming options by short pressing the PTT button. The current - Motorola RDU4160D | User Guide - Page 50
without saving. Note: The values available for accessory microphone gain level are dependent upon maximum levels the radio supports. OTHER PROGRAMMING FEATURES Scan Scan allows you to monitor other channels to detect conversations. When the radio detects a transmission, it will stop scanning and - Motorola RDU4160D | User Guide - Page 51
start scanning, as the radio will do it automatically. Programming Scan List You can enable/disable the Channel Scanning feature for each channel in your radio. To do so, enter 'Programming Mode' and select the channel you want to program. Scroll through the programming options by short pressing the - Motorola RDU4160D | User Guide - Page 52
, a short press of either preset button will change the home channel to the preset channel. The radio will display FREQ/PL and will continue to scan from the new home channel. EDITING CHANNEL ALIAS NAME To edit a channel's alias, turn ON the radio and press and hold the PTT button and the button for - Motorola RDU4160D | User Guide - Page 53
PROGRAMMING FEATURES button B and the cursor is positioned in a valid character, the to the 'Channel Aliasing Selection Mode' to choose other channel to edit the alias name or exit without saving changes by turning OFF the radio. Notes: • If the channel alias name is left blank, the radio will play - Motorola RDU4160D | User Guide - Page 54
radio is turned OFF. Note: (*)Assumes the SB2 button is not programmed to another function different from the default. English 52 CPS (COMPUTER PROGRAMMING SOFTWARE) Radio to be programmed CPS Software Drop-in Charger Tray Mini-connector USB Connector CPS Programming Cable The easiest way - Motorola RDU4160D | User Guide - Page 55
end of the user guide for details. Notes: • (*) CPS Programming Cable (P/N RKN4155) is an accessory sold separately. Please contact your Motorola Point of Purchase for more information. Bandwidth Select Default setting for Bandwidth Select depends on the specific frequency and channel. For details - Motorola RDU4160D | User Guide - Page 56
clone RDX™ Series radio profiles from one radio (the 'Source' radio) to a second radio (the 'Target' radio) by using any one of these 3 methods: • One Multi Unit Charger (optional accessory) • Two Single Unit Chargers and a Radio-toRadio cloning cable (optional accessory) • the CPS (free software - Motorola RDU4160D | User Guide - Page 57
with a Multi-Unit Charger (MUC) The MUC is capable of cloning radios. To do so, there must be at least two radios, • a Source radio (radio which profiles will be cloned or copied from) and • a Target radio (the radio which profile will be cloned from the source radio). The Source radio has to be in - Motorola RDU4160D | User Guide - Page 58
Cable (optional accessory) Operating Instructions Source Radio: Radio to be cloned. Target Radio: Radio to which the configuration of the "Source Radio" will be copied (cloned). 1. Before beginning the cloning process, make sure you have: • A fully charged battery on each one of the radios. • Two - Motorola RDU4160D | User Guide - Page 59
of the cloning cable mini connector to one SUC. Plug the other end to the second SUC. Note: During the cloning process no power is being applied to the SUC. The batteries will not be charged. A data communication is being established between the two radios. 4. Turn ON the "Target Radio" and place - Motorola RDU4160D | User Guide - Page 60
RLN6304 (Rapid) Single Unit Chargers. When ordering Cloning Cable please refer to P/ N RLN6303. For details about accessories refer to Accessories section. English 58 Cloning Radios using the CPS (Computer Programming Software) To clone RDX™ radios using the CPS software, you will need to have - Motorola RDU4160D | User Guide - Page 61
indicates that you can use the repeater 'button' to toggle ON/OFF repeater. If repeater is not enabled in the radio this icon will not be displayed. To program the Frequency TX, scroll through the radio options until your display shows: TX Once you have selected the channel you want to set up for - Motorola RDU4160D | User Guide - Page 62
the CTCSS/DPL code, scroll through the programming options by short pressing the PTT button until your radio display shows: To program the Bandwidth TX scroll down/up with the / buttons until you get the following screen: TX TX BW To program the desired code, scroll using / buttons until you - Motorola RDU4160D | User Guide - Page 63
TROUBLESHOOTING Symptom No Power Hearing other noises or conversation on a channel Message Scrambled Try This... Recharge or replace the Li-Ion battery. Reposition or replace AA batteries. Extreme operating temperatures may affect battery life. Refer to See "About the Li-Ion Battery" on page 16. - Motorola RDU4160D | User Guide - Page 64
Battery" section on page 16. Obstructions and operating indoors, or in vehicles, may interfere. Change location. Refer to "Talking and Monitoring" Section on page 33. Verify that the radio is not in Scan. Refer to "Scan" on page 48 and "Nuisance Channel Delete" on page 52. TROUBLESHOOTING English - Motorola RDU4160D | User Guide - Page 65
the Lithium-Ion Battery" section on page 18. Verify that the radio is set to the correct battery type. Refer to "Installing the Li-Ion Battery" section on page 18, "Installing Alkaline Batteries" section on page 19 and "About your Li-Ion Battery" section on page 16. TROUBLESHOOTING 63 English - Motorola RDU4160D | User Guide - Page 66
the battery has a problem. Refer to "Drop-in Tray Charger LED Indicators" section on page 28. Note: Whenever a feature in the radio seems to not correspond to the default or preprogrammed values, check to see if the radio has been programmed using the CPS with a customized profile. TROUBLESHOOTING - Motorola RDU4160D | User Guide - Page 67
USE AND CARE USE AND CARE Use a soft damp cloth to clean the exterior Do not immerse in water If the radio is submerged in water... Do not use alcohol or cleaning solutions Turn radio OFF and remove batteries Dry with soft cloth Do not use radio until completely dry 65 English - Motorola RDU4160D | User Guide - Page 68
information. These charts are useful when using Motorola RDX Series™ two-way radios with other business radios. Most of the frequency's positions are the same as Spirit M, GT, S, and XTN Series Frequencies. RDX VHF Frequencies Frequency # Frequency (MHz) Bandwidth 1 151.6250 12.5 kHz 2 151 - Motorola RDU4160D | User Guide - Page 69
THE CHANNEL BANDWITH OF YOUR OLDER RDX RADIO FROM 25 KHZ TO 12.5 KHZ YOU MAY USE THE CUSTOMER PROGRAMMING SOFTWARE AVAILABLE FOR FREE DOWNLOAD AT HYPERLINK "http://www.motorola.com/RDX" WWW.MOTOROLASOLUTIONS.COM/RDX (PROGRAMMING CABLE REQUIRED) OR YOU CAN FOLLOW DIRECTIONS IN THE USER GUIDE UNDER - Motorola RDU4160D | User Guide - Page 70
AND CODE RDV2080d - VHF DEFAULT FREQUENCIES CHART RDX VHF 8CH Radios Default Frequencies - RDV2080d Channel Frequency # Frequency (MHz) Code # Code Bandwidth 1 20 154.4900 1 67.0 Hz 12.5 kHz 2 21 154.5150 1 67.0 Hz 12.5 kHz 3 1 151.6250 1 67.0 Hz 12.5 kHz 4 2 151 - Motorola RDU4160D | User Guide - Page 71
AND CODE RDX UHF FREQUENCIES CHART RDX UHF Frequencies Frequency # Frequency (MHz) Bandwidth Frequency # Frequency (MHz) 1 464.5000 12.5 kHz 14 461.1625 2 464.5500 12.5 kHz 15 461.1875 *3 467.7625 12.5 kHz 16 461.2125 *4 467.8125 12.5 - Motorola RDU4160D | User Guide - Page 72
AND CODE RDX UHF Frequencies (Continued) Frequency # Frequency (MHz) Bandwidth Frequency # Frequency (MHz) *27 462.8625 12.5 kHz 38 466.1375 *28 462.8875 12.5 kHz 39 466.1625 *29 462.9125 12.5 kHz 40 466.1875 - Motorola RDU4160D | User Guide - Page 73
AND CODE RDX UHF Frequencies (Continued) Frequency # Frequency (MHz) Bandwidth Frequency # Frequency (MHz) *49 467.8375 12.5 kHz 61 467.1875 *50 467.8625 12.5 kHz 62 467.4625 *51 467.8875 12.5 kHz 63 467.4875 * - Motorola RDU4160D | User Guide - Page 74
AND CODE RDX UHF Frequencies (Continued) Frequency # Frequency (MHz) Bandwidth Frequency # Frequency (MHz) 73 452. kHz 12.5 kHz 12.5 kHz Notes: • (*) Frequency limited to 2W maximum power output • When referring to XTN radios, note that frequencies from # 57 to # 89 are 33 new additional - Motorola RDU4160D | User Guide - Page 75
AND CODE RDU2080d - UHF DEFAULT FREQUENCIES CHART RDX UHF 8 CH Radios Default Frequencies - RDU2080d Channel Frequency # Frequency (MHz) Code # Code Bandwidth 1 2 464.5500 1 67.0 Hz 12.5 kHz 2 8 467.9250 1 67.0 Hz 12.5 kHz 3 5 467.8500 1 67.0 Hz 12.5 kHz 4 6 467.8750 - Motorola RDU4160D | User Guide - Page 76
AND CODE RDU4160d - UHF DEFAULT FREQUENCIES CHART RDX UHF 16 CH Radios Default Frequencies - RDU4160d Channel Frequency # Frequency (MHz) Code # Code Bandwidth 1 1 464.5000 1 67.0 Hz 12.5 kHz 2 1 464.5000 4 77.0 Hz 12.5 kHz 3 1 464.5000 8 88.5 Hz 12.5 kHz 4 1 464 - Motorola RDU4160D | User Guide - Page 77
RDX UHF 16 CH Radios Default Frequencies - RDU4160d (Continued) Channel Frequency # Frequency (MHz) Code # Code Bandwidth 11 22 461.3625 3 74.4 Hz 12.5 kHz 12 30 462.4875 5 79.7 464.0875 11 97.4 Hz 12.5 kHz 16 38 464.1375 13 103.5 Hz 12.5 kHz FREQUENCY AND CODE 75 English - Motorola RDU4160D | User Guide - Page 78
FREQUENCY AND CODE CTCSS AND PL/DPL CODES CTCSS Hz 1 67.0 2 71.9 3 74.4 4 77.0 5 79.7 6 82.5 7 85.4 8 88.5 9 91.5 10 94.8 11 97.4 12 100.0 13 - Motorola RDU4160D | User Guide - Page 79
81 82 83 84 85 86 Code 243 244 245 251 261 263 265 271 306 311 315 331 343 346 351 364 77 English FREQUENCY AND CODE - Motorola RDU4160D | User Guide - Page 80
FREQUENCY AND CODE DPL 87 88 89 90 91 92 93 94 95 96 97 125 126 127 128 129 130 131 132 133 134 135 136 137 138 Code 754 645 Customized PL Customized PL Customized PL Customized PL Customized PL Customized PL Inverted DPL 39 Inverted DPL 40 Inverted DPL 41 Inverted DPL 42 Inverted DPL 43 Inverted - Motorola RDU4160D | User Guide - Page 81
DPL 91 Inverted DPL 92 Inverted DPL 93 Inverted DPL 94 Inverted DPL 95 Inverted DPL 96 Inverted DPL 97 Inverted DPL 98 79 English FREQUENCY AND CODE - Motorola RDU4160D | User Guide - Page 82
4W/5W RDX MODELS 4W/5W Models can be programmed to have customized frequencies (different from the ones shown in the VHF and UHF charts in previous pages). VHF range is 146 -174 MHz and UHF 438 - 470 MHz. 4W/5W models can also be programmed to work with repeaters. Please contact your Motorola point - Motorola RDU4160D | User Guide - Page 83
consumer and business two-way radios (excluding commercial, government or industrial radios) that operate via Family Radio Service or General Mobile Radio Service, Motorola-branded or certified accessories sold for use with these Products ("Accessories") and Motorola software contained on CD-ROMs - Motorola RDU4160D | User Guide - Page 84
Periodic maintenance, repair and replacement of parts due to normal wear and tear are excluded from coverage. Batteries. Only batteries whose fully charged capacity falls below 80% of their rated capacity and batteries that leak are covered by this limited warranty. Abuse & Misuse. Defects or damage - Motorola RDU4160D | User Guide - Page 85
, and is not transferable. HOW TO OBTAIN WARRANTY SERVICE OR OTHER INFORMATION? Contact your Motorola point of purchase. SOFTWARE COPYRIGHT NOTICE The Motorola products described in this manual may include copyrighted Motorola and third party software stored in semiconductor memories or other media - Motorola RDU4160D | User Guide - Page 86
, or otherwise, any license under the copyrights, patents, or patent applications of Motorola or any third party software provider, except for the normal, nonexclusive, royalty-free license to use that arises . For further information contact the U.S. Department of Commerce. WARRANTY English 84 - Motorola RDU4160D | User Guide - Page 87
Whip Antenna 438 - 470 MHz AUDIO ACCESSORIES Part No. Description 53815 HMN9026 HKLN4477 Headset w/Boom Mic BR Remote Speaker Mic BR Surveillance Earpiece BR Part No. Description 53865 53866 56517 RLN6423 BATTERY Part No. Headset w/Swivel Boom Mic Earbud w/Clip PTT Mic BR Earpiece w/Inline - Motorola RDU4160D | User Guide - Page 88
Clip POWER SUPPLIES AC PIN ADAPTORS Part No. Description RLN6349 North America AC Pin Adaptor SOFTWARE APPLICATIONS Part No. Description RVN5147 Computer Programming Software (CPS) CABLES Part No. Description RLN6303 RKN4155 Radio to Radio Cloning Cable CPS Programming Cable CHARGERS - Motorola RDU4160D | User Guide - Page 89
Supply Attention: Certain accessories may be or may not be available at the time of purchase. For latest information on accessories, contact your Motorola point of purchase or visit: www.motorolasolutions.com/RDX (*) Americas Rapid Charging Kit includes Power Supply, Drop-in Tray Charger, and AC - Motorola RDU4160D | User Guide - Page 90
. Refer to the Frequencies and Code Charts Section for details. Battery Save (2) Yes Yes Yes Yes To enable/disable Battery Save, press SB1 and SB2 ON simultaneously while turning ON the radio. Battery Type Yes No Yes Yes Li-Ion Front panel radio programming is available in display - Motorola RDU4160D | User Guide - Page 91
PTT and buttons simultaneously while turning radio ON for 3 sec. After editing, to exit and save, long press PTT. Note: To edit, refer to Programming Features/ Editing Channels. Channels You can select channels using the Channel Selector Knob (non-display models) or the MENU button (display - Motorola RDU4160D | User Guide - Page 92
Cloning Cable or Multi-Unit Charger). Press PTT, SB2 while turning radio ON. Note: You can clone radios using the CPS. CPS Manager Lock No No Yes Yes This feature is referred in the CPS software as "Codeplug Password". It prevents unauthorized N/A access to the CPS to the radio's programmed - Motorola RDU4160D | User Guide - Page 93
Programmable via CPS Display NonDisplay Default Value Programming Tips Any value within Allows you to customize frequencies in your radio. No No Yes Yes radio frequency Available only for certain 4W/5W radio models. band Bandwidth Range Radios Bandwidth is fixed and non-programmable - Motorola RDU4160D | User Guide - Page 94
loud and high beep tones to ON alert battery level is low. LED will blink orange several times. This a non-programmable feature. Front panel radio programming (only Display Model and CPS models): Set radio to Programming Mode(1) to get Maximum Channels (2) Yes No Yes Yes programmable the - Motorola RDU4160D | User Guide - Page 95
should be disabled in order to monitor. Press SB2 to start scanning and wait until the radio lands on the channel you want to delete. Long press SB2 to delete the channel. Note: The nuisance deleted channel will be restored into the scan list when the radio is turned OFF or you exit SCAN. 93 - Motorola RDU4160D | User Guide - Page 96
depends on maximum power the radio supports. Note: There may be power restrictions depending on the frequency chosen in each channel. Text that shows up in the radio display when turned ON. Default text is MOTOROLA. Programmable via CPS. Available only for RDU4160d model. Enabled Allows to restore - Motorola RDU4160D | User Guide - Page 97
Features Programmable Via RADIO PANEL Display NonDisplay Programmable via CPS Display NonDisplay Reverse Burst No No Yes Yes Default Value Programming Tips Reverse Burst eliminates unwanted noise (squelch 180 tail) during loss of carrier detection. Use CPS to select values 180 or - Motorola RDU4160D | User Guide - Page 98
only: you can add/delete channels in the scan list using front panel by going into Programming Mode(1). Feature available only for Non Display Models. For front programming using front panel radio enter Programming Mode(1). Display models only: you can program scramble using front panel by going - Motorola RDU4160D | User Guide - Page 99
for 3-5 seconds while turning radio ON (LED will start to blink green). Short press PTT to get to the different programming options. For setting values, press and buttons. (2) Using CPS you can prevent this feature to be programmed via front panel radio. (3) Contact your Motorola Point of purchase - Motorola RDU4160D | User Guide - Page 100
/ Nuisance Delete Call Tone Power Select Scramble Backlight Channel Preset 1 Channel Preset 2 No Operation N/A N/A N/A SB2 Default N/A N/A N/A BUTTON A (*) Default BUTTON B (*) Default BUTTON C (*) Default Notes: • Buttons come programmed to default functions. Using CPS you can - Motorola RDU4160D | User Guide - Page 101
Chart Icon Battery Level Channel Code Frequency Keypad lock Program Scan Scramble Symbol Comments Displayed during normal radio mode operation, displays battery life remaining. Displayed during normal radio operation and when programming channel features. Displayed during normal radio operation - Motorola RDU4160D | User Guide - Page 102
numbers of bars will indicate the strength of the received signal. Displayed whenever the repeater feature is enabled. Vox/IVox Displayed when IVOX/VOX enabled or when programming MIC / MIC gain features. (*) Available only for 4160d model. To enable, contact your Motorola point of purchase. 100 - Motorola RDU4160D | User Guide - Page 103
- Motorola RDU4160D | User Guide - Page 104
and the Stylized M logo are trademarks or registered trademarks of Motorola Trademark Holdings, LLC and are used under license. All other trademarks are the property of their respective owners. © 2007, 2011 Motorola Solutions, Inc. All rights reserved. *NNTN8303A* NNTN8303A *6880309T01* 6880309T01
-
 1
1 -
 2
2 -
 3
3 -
 4
4 -
 5
5 -
 6
6 -
 7
7 -
8
-
9
-
10
-
11
-
12
-
13
-
14
-
15
-
16
-
17
-
18
-
19
-
20
-
21
-
22
-
23
-
24
-
25
-
26
-
27
-
28
-
29
-
30
-
31
-
32
-
33
-
34
-
35
-
36
-
37
-
38
-
39
-
40
-
41
-
42
-
43
-
44
-
45
-
46
-
47
-
48
-
49
-
50
-
51
-
52
-
53
-
54
-
55
-
56
-
57
-
58
-
59
-
60
-
61
-
62
-
63
-
64
-
65
-
66
-
67
-
68
-
69
-
70
-
71
-
72
-
73
-
74
-
75
-
76
-
77
-
78
-
79
-
80
-
81
-
82
-
83
-
84
-
85
-
86
-
87
-
88
-
89
-
90
-
91
-
92
-
93
-
94
-
95
-
96
-
97
-
98
-
99
-
100
-
101
-
102
-
103
-
104
 |
 |
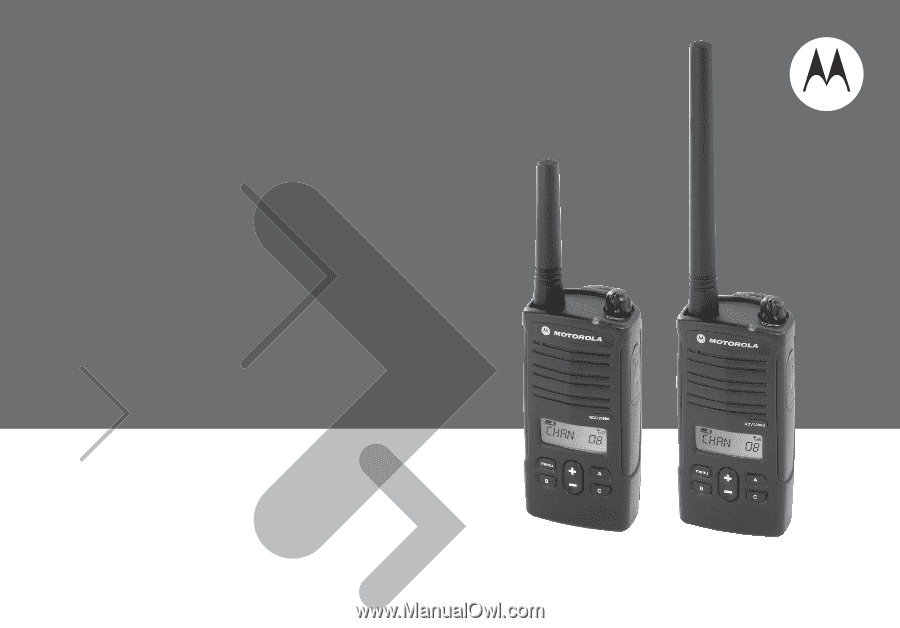
Models RDU2080d, RDV2080d, RDU4160d
Radio models shown are RDU2080d & RDV2080d
User Guide
RDX Series™
Two-Way Radios