Motorola RDU4160D User Guide - Page 52
PROGRAMMING BUTTONS, EDITING CHANNEL ALIAS NAME, button for 3 seconds. Upon entering
 |
UPC - 723755540309
View all Motorola RDU4160D manuals
Add to My Manuals
Save this manual to your list of manuals |
Page 52 highlights
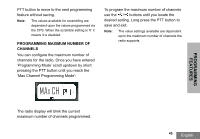
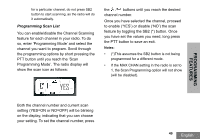
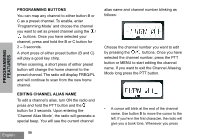
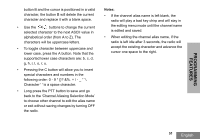
PROGRAMMING FEATURES PROGRAMMING BUTTONS You can map any channel to either button B or C as a preset channel. To enable, enter 'Programming Mode' and choose the channel you want to set as preset channel using the / buttons. Once you have selected your channel, press and hold the B or C button for 2 - 3 seconds. A short press of either preset button (B and C) will play a good key chirp. When scanning, a short press of either preset button will change the home channel to the preset channel. The radio will display FREQ/PL and will continue to scan from the new home channel. EDITING CHANNEL ALIAS NAME To edit a channel's alias, turn ON the radio and press and hold the PTT button and the button for 3 seconds. Upon entering the 'Channel Alias Mode', the radio will generate a special beep. You will see the current channel English 50 alias name and channel number blinking as follows: Choose the channel number you want to edit by pressing the / buttons. Once you have selected the channel number, press the PTT button or MENU to start editing the channel name. If you want to exit the Channel Aliasing Mode long press the PTT button. • A cursor will blink at the end of the channel name. Use button B to move the cursor to the left. If you're in the first character, the radio will give you a bonk tone. Whenever you press
-
 1
1 -
2
-
3
-
4
-
5
-
6
-
7
-
8
-
9
-
10
-
11
-
12
-
13
-
14
-
15
-
16
-
17
-
18
-
19
-
20
-
21
-
22
-
23
-
24
-
25
-
26
-
27
-
28
-
29
-
30
-
31
-
32
-
33
-
34
-
35
-
36
-
37
-
38
-
39
-
40
-
41
-
42
-
43
-
44
-
45
-
46
-
 47
47 -
 48
48 -
 49
49 -
 50
50 -
 51
51 -
 52
52 -
 53
53 -
 54
54 -
 55
55 -
 56
56 -
 57
57 -
58
-
59
-
60
-
61
-
62
-
63
-
64
-
65
-
66
-
67
-
68
-
69
-
70
-
71
-
72
-
73
-
74
-
75
-
76
-
77
-
78
-
79
-
80
-
81
-
82
-
83
-
84
-
85
-
86
-
87
-
88
-
89
-
90
-
91
-
92
-
93
-
94
-
95
-
96
-
97
-
98
-
99
-
100
-
101
-
102
-
103
-
104
 |
 |
