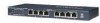
Netgear GS108T GS108T Setup Manual
Netgear GS108T - ProSafe - Gigabit Smart Switch Manual
 |
UPC - 606449051377
View all Netgear GS108T manuals
Add to My Manuals
Save this manual to your list of manuals |
Netgear GS108T manual content summary:
- Netgear GS108T | GS108T Setup Manual - Page 1
GS108T Smart Switch Software Administration Manual NETGEAR, Inc. 4500 Great America Parkway Santa Clara, CA 95054 USA 202-10337-01 December 2007 - Netgear GS108T | GS108T Setup Manual - Page 2
names are trademarks or registered trademarks of their respective holders. Statement of Conditions In the interest of improving internal design, operational function, and/or reliability, NETGEAR that the GS108T Gigabit Smart Switch has been suppressed in accordance with the conditions set out in - Netgear GS108T | GS108T Setup Manual - Page 3
(NETGEAR GS108T Gigabit Smart Switch) respecte les limites de bruits radioélectriques visant les appareils numériques de classe A prescrites dans le Règlement sur le brouillage radioélectrique du ministère des Communications du Canada. Customer Support For assistance with installing and configuring - Netgear GS108T | GS108T Setup Manual - Page 4
be co-located or operating in conjunction with any other antenna or transmitter. FCC Declaration Of Conformity: We, NETGEAR, Inc., 4500 Great America Parkway, Santa Clara, CA 95054, declare under our sole responsibility that the model GS108T: ProSafe™ 8 Port 10/100/1000 smart switch complies with - Netgear GS108T | GS108T Setup Manual - Page 5
1-4 Manually Assigning Network Settings 1-5 NIC Setting on the Host That Accesses the GS108T Gigabit Smart Switch 1-5 Web Access ...1-6 Additional Utilities ...1-7 Password Change ...1-8 Firmware Upgrade 1-8 Exit ...1-9 Chapter 2 Introduction to the Web Browser Interface Logging In to the NETGEAR - Netgear GS108T | GS108T Setup Manual - Page 6
GS108T Smart Switch Software Administration Manual System Information 3-2 IP Configuration ...3-3 Time ...3-4 SNMP ...3-6 SNMP V1/V2 ...3-6 LLDP ...3-7 Basic-LLDP Configuration 3-7 Advanced-LLDP Configuration 3-9 Advanced-LLDP Port Settings 3-9 Advanced-Local Information 3-11 Advanced- - Netgear GS108T | GS108T Setup Manual - Page 7
Smart Switch Software Administration Manual Advanced-Port Configuration 4-18 Multicast ...4-20 IGMP Snooping ...4-20 Static Multicasting 4-22 Multicast Group Membership 4-23 Switch Configuration ...4-24 Jumbo Frame Configuration 4-24 Address Table ...4-25 Static Address ...4-25 Dynamic Address - Netgear GS108T | GS108T Setup Manual - Page 8
Tab 6-16 Reset ...6-17 Device Reboot ...6-17 Factory Default ...6-18 Upload ...6-19 File Upload ...6-19 Download ...6-20 File Download ...6-20 Using the Help Tab ...6-22 Online Help ...6-23 Support ...6-23 User Guide ...6-23 Appendix A Specifications and Default Values GS108T Gigabit Smart Switch - Netgear GS108T | GS108T Setup Manual - Page 9
GS108T Smart Switch Software Administration Manual IEEE 802.1Q VLAN Example Configuration B-2 Port-Based VLANs ...B-3 Port-Based VLAN Example Configuration B-4 Appendix C Network Cabling Fast Ethernet Cable Guidelines C-1 Category 5 Cable ...C-1 Category 5 Cable Specifications C-2 Twisted Pair - Netgear GS108T | GS108T Setup Manual - Page 10
Book This document describes configuration menu commands for the GS108T Smart Switch software. The commands can all be accessed from the Web interface. • Chapter 1, "Getting Started with Switch Management," describes how to use the Smart Wizard Discovery utility to set up your switch so that you can - Netgear GS108T | GS108T Setup Manual - Page 11
describes the logs, the reset functions, the firmware upgrade procedure, and the help options. • Appendix A, "Specifications and Default Values," gives GS108T Smart Switch specifications and lists default feature values. • Appendix B, "Virtual Local Area Networks (VLANs)," describes some concepts of - Netgear GS108T | GS108T Setup Manual - Page 12
written for the GS108T Smart Switch according to these specifications: Product Version Manual Publication Date GS108T Gigabit Smart Switch December 2007 . Note: Product updates are available on the NETGEAR, Inc. website at http://www.netgear.com/support. How to Use This Manual The HTML version - Netgear GS108T | GS108T Setup Manual - Page 13
GS108T Smart Switch Software Administration Manual - Printing a PDF chapter. • Click the PDF of This Chapter link at the top left of any page in the chapter you want to print. The PDF version of the chapter you were viewing opens in a browser window. • Click the print icon in the upper left of your - Netgear GS108T | GS108T Setup Manual - Page 14
GS108T Smart Switch Software Administration Manual xiv About This Manual v1.0, December 2007 - Netgear GS108T | GS108T Setup Manual - Page 15
your NETGEAR GS108T Gigabit Smart Switch. It also leads you through the steps necessary to get started, using the Smart Wizard Discovery utility. The information is discussed in the following sections: • "System Requirements" • "Switch Management Interface" • "Network with a DHCP Server" • "Network - Netgear GS108T | GS108T Setup Manual - Page 16
Interface. Table 1-1. Switch Management Methods Management Method Features Smart Wizard Discovery utility Web browser No IP address or subnet mask setup needed. Discover all switches on the network. User-friendly interface under Microsoft Windows. Firmware upgrade capability. Password - Netgear GS108T | GS108T Setup Manual - Page 17
GS108T Smart Switch Software Administration Manual For a more detailed discussion of the Smart Wizard Discovery utility, continue with the following section, "Network with a DHCP Server," or "Network without a DHCP Server" on page 1-4. For a detailed discussion of the Web browser interface, see - Netgear GS108T | GS108T Setup Manual - Page 18
GS108T Smart Switch Software Administration Manual 6. Make a note of the displayed IP address assigned by the DHCP server. You will need this value to access the switch directly from a Web browser (without using the Smart Wizard Discovery utility). 7. Select your switch by clicking the line that - Netgear GS108T | GS108T Setup Manual - Page 19
a static IP address even if your network has DHCP service. Proceed as follows: 1. Connect the GS108T Gigabit Smart Switch to your existing network. 2. Power on the switch by plugging in the AC-DC power adapter (the default IP is 192.168.0.239). 3. Install the Smart Wizard Discovery utility on your - Netgear GS108T | GS108T Setup Manual - Page 20
be identical to that set in the switch. The PC IP address must be different from that of the switch but must be in the same subnet. 3. Click Web Access in the Smart Wizard Discovery utility to enable the management screens described in the following section. Web Access For Web access, you do either - Netgear GS108T | GS108T Setup Manual - Page 21
Smart Switch Software Administration Manual If you are starting with an "out-of-the-box" switch and are not using the Smart Wizard Discovery utility, you must initially configure your host PC to be on a network segment to match the default settings of the switch, which are as follows: • IP address - Netgear GS108T | GS108T Setup Manual - Page 22
GS108T Smart Switch Software Administration Manual Password Change You can set a new password of up to 20 ASCII characters. 1. Click Password Change in the Switch Setting section. The Password Change screen displays. You can set a new password. 2. Enter the old password. 3. Enter the new password, - Netgear GS108T | GS108T Setup Manual - Page 23
the upgrade. The system software is automatically loaded to all members of a switch stack. When the process is complete, the switch automatically reboots. Exit Click Exit in the Switch Setting section to close the Smart Wizard Discovery utility. Getting Started with Switch Management 1-9 v1 - Netgear GS108T | GS108T Setup Manual - Page 24
GS108T Smart Switch Software Administration Manual 1-10 Getting Started with Switch Management v1.0, December 2007 - Netgear GS108T | GS108T Setup Manual - Page 25
of the GS108T Smart Switch browser interface by logging in: 1. Start the application, either through the Smart Wizard Discovery utility or directly by entering the switch's IP address, as described in Chapter 1, "Getting Started with Switch Management." 2. Press Enter. The Login screen displays - Netgear GS108T | GS108T Setup Manual - Page 26
Switch Software Administration Manual Figure 2-1 3. Enter the password (the factory default is password), and click Login. The first screen of the GS108T Smart Switch browser interface is displayed. Navigation Tabs Logging in displays the browser interface. . Figure 2-2 2-2 Introduction to the Web - Netgear GS108T | GS108T Setup Manual - Page 27
GS108T Smart Switch Software Administration Manual The navigation tabs across the top provide access to all the configuration functions of the switch, and remain constant. The menu items in the blue bar change according to the navigation tab that is selected. For further description of the functions - Netgear GS108T | GS108T Setup Manual - Page 28
GS108T Smart Switch Software Administration Manual 2-4 Introduction to the Web Browser Interface v1.0, December 2007 - Netgear GS108T | GS108T Setup Manual - Page 29
you manage your GS108T Gigabit Smart Switch using features under the following main menu commands and subcommnands: • "Management" • "System Information" • "IP Configuration" • "Time" • "SNMP" • "SNMP V1/V2" • "LLDP" • "Basic-LLDP Configuration" • "Advanced-LLDP Configuration" • "Advanced-LLDP Port - Netgear GS108T | GS108T Setup Manual - Page 30
GS108T Smart Switch Software Administration Manual System Information The System Information screen displays the system settings and lets you to change some of the configurable settings of the switch: 1. Select System > Management > System Information. A screen similar to the following displays. . - Netgear GS108T | GS108T Setup Manual - Page 31
name. • Hardware Version. Shows the switch hardware version. • Boot Version. Shows the boot code version of the switch. • Software Version. Shows the software version of the switch. IP Configuration The IP Configuration screen lets you set the system IP address source and optional management VLAN - Netgear GS108T | GS108T Setup Manual - Page 32
switch must obtain the IP address through a BootP server. • Static IP Address. Specifies that the IP address, subnet mask, and default gateway must be manually configured. Enter this information in the fields below this radio button. 3. Select the management VLAN ID (the default is 0 for all VLANs - Netgear GS108T | GS108T Setup Manual - Page 33
the IP address of the primary NTP/SNTP server for the switch to use when synchronizing time. b. In the NTP Server IP - 2 field, specify the IP address of alternate NTP/SNTP server for the switch to use when synchronizing time. 6. Click Apply to confirm any settings changes. Managing System Settings - Netgear GS108T | GS108T Setup Manual - Page 34
GS108T Smart Switch Software Administration Manual SNMP The SNMP screen lets you specify a Simple Network Management Protocol (SNMP) management station and related SNMP settings, and set an authentication fail trap. SNMP V1/V2 The SNMP V1/V2 screen lets you limit the IP addresses that can access the - Netgear GS108T | GS108T Setup Manual - Page 35
GS108T Smart Switch Software Administration Manual • Trap (T3). Enables the switch to generate an SNMP trap when one of its ports changes its link status. • Status. Enables or disables the management station. 3. If you have added a management station, click Add. If you have selected one or more - Netgear GS108T | GS108T Setup Manual - Page 36
GS108T Smart Switch Software Administration Manual . Figure 3-5 2. Select a radio button to enable or disable LLDP: • Disable. LLDP is disabled (default). • Enable. LLDP is enabled. 3. When LLDP is disabled, select how LLDP packets are processed from the LLDPDU Handling drop-down list: • Flooding. - Netgear GS108T | GS108T Setup Manual - Page 37
GS108T Smart Switch Software Administration Manual • Notification Interval (5-3600 sec). The interval at which notifications are generated when remote MSAP information changes. The default value is 5 seconds. • Fast Start Count (2-10). The number of successive LLDP frame transmissions for one - Netgear GS108T | GS108T Setup Manual - Page 38
GS108T Smart Switch Software Administration Manual • To change the LLDP settings for a group of ports, select the check boxes to the left of their port numbers, and then select the LLDP port settings. • To change the LLDP settings for all ports simultaneously, select the check box at the top of the - Netgear GS108T | GS108T Setup Manual - Page 39
GS108T Smart Switch Software Administration Manual Advanced-Local Information When LDDP is enabled, you can view the LLDP local information in the Local Information screen, which is also referred to as the LLDP Local Device Information screen: Select System > LLDP > Advanced > LLDP Port Settings. A - Netgear GS108T | GS108T Setup Manual - Page 40
-layer entities to assist discovery by network management. Table 3-1. Management Address Item Address Sub-type Address Interface Sub-type Interface Number OID Description Shows the type of address that is listed in the management address field. Shows the management IP address. Shows the numbering - Netgear GS108T | GS108T Setup Manual - Page 41
GS108T Smart Switch Software Administration Manual Under Port Information, click a port number in the Port column. A screen similar to the following displays. Figure 3-8 The following LLDP local port information is displayed: Table 3-2. MSAP Details Item Port ID SubType Port ID Description The - Netgear GS108T | GS108T Setup Manual - Page 42
GS108T Smart Switch Software Administration Manual Table 3-4. 802.3 Set Details Item Auto-Negotiation Aggregator Status Aggregator Id Maximum Frame Size Description If autonegotiation supported and enabled in both the systems, there should be no speed difference. Whether the port through which - Netgear GS108T | GS108T Setup Manual - Page 43
GS108T Smart Switch Software Administration Manual Table 3-5. MED Set configuration. Network Policies Network policy is associated with multiple sets of application types supported on a given port • Local Port. Shows the local port on which the LLDPDU was received. Managing System Settings v1.0, - Netgear GS108T | GS108T Setup Manual - Page 44
GS108T Smart Switch Software Administration Manual • Chassis ID SubType. Shows the basis for the chassis ID that is listed in the Chassis ID field. • Chassis ID. Shows the chassis ID of the system from which the LLDPPU was transmitted. • Port ID SubType. Shows the basis for the identifier that is - Netgear GS108T | GS108T Setup Manual - Page 45
you manage your GS108T Gigabit Smart Switch using features under the following main menu commands and subcommnands: • "Ports" • "Port Configuration" • "LAG" • "Basic-LAG Configuration" • "Basic-LAG Membership" • "Advanced-LAG Configuration" • "Advanced-LAG Membership" • "Advanced-LACP Configuration - Netgear GS108T | GS108T Setup Manual - Page 46
Manual • "Switch Configuration" • "Jumbo Frame Configuration" • "Address Table" • "Static Address" • "Dynamic Address" The sections that follow in this chapter cover these features and tell you how to configure them in the GS108T Smart Switch. Ports You can define speed, duplexing, and flow control - Netgear GS108T | GS108T Setup Manual - Page 47
only when the port speed is 10 Mbps or 100 Mbps. • Flow Control. Specifies whether flow control support is enabled or disabled: - Enable. Specifies that flow control is enabled. If the port is oversubscribed, it sends a pause frame or a jam packet. If the port receives a pause frame, it halts for - Netgear GS108T | GS108T Setup Manual - Page 48
3. Click Apply to confirm any settings changes. LAG Two types of link aggregation groups (LAGs) are supported: • Static Trunking. Ports are grouped manually. • Link Aggregation Control Protocol (LACP). Part of IEEE specification (802.3ad) that allows several physical ports to be bundled together to - Netgear GS108T | GS108T Setup Manual - Page 49
GS108T Smart Switch Software Administration Manual 2. You can make changes to the LAG settings for an individual LAG or for both LAGs simultaneously: • To change the LAG settings for an individual LAG, select the check box to the left of its LAG ID, and then select the LAG settings. • To change the - Netgear GS108T | GS108T Setup Manual - Page 50
GS108T Smart Switch Software Administration Manual . Figure 4-3 2. From the LAG ID drop-down list, select 1 or 2. 3. Click Unit 1. A screen similar to the following displays. Figure 4-4 4. Select up to four ports for membership in the LAG by selecting the check boxes below the port numbers. 5. - Netgear GS108T | GS108T Setup Manual - Page 51
GS108T Smart Switch Software Administration Manual Advanced-LACP Configuration The LACP Configuration screen lets you set the LACP system priority, which specifies the device's link aggregation priority relative to the devices at the other ends of the links on which link aggregation is enabled. To - Netgear GS108T | GS108T Setup Manual - Page 52
GS108T Smart Switch Software Administration Manual Figure 4-6 2. You can make changes to the LACP port priority settings for an individual port, for a group of ports, or for all ports simultaneously: • To change the LACP port priority settings for an individual port, select the check box to the - Netgear GS108T | GS108T Setup Manual - Page 53
ports on a single switch. When you use a VLAN, users can be grouped by logical function instead of physical location. The GS108T Smart Switch supports IEEE 802.1Q VLANs and port-based VLANs, but not combination of both: • IEEE 802.1Q VLANs The settings on the IEEE 802.1Q VLAN screen control the VLAN - Netgear GS108T | GS108T Setup Manual - Page 54
GS108T Smart Switch Software Administration Manual . Figure 4-7 2. Select the IEEE 802.1Q radio button to specify the IEEE 802.1Q VLAN type. Warning: Changing the VLAN type erases all existing VLAN settings, static multicast groups, and trusted MAC addresses. 3. The Warning screen displays. Click - Netgear GS108T | GS108T Setup Manual - Page 55
GS108T Smart Switch Software Administration Manual To change a VLAN name: a. Select the check box to the left of the VLAN ID that you want to change. b. Enter a new name in the VLAN Name field. c. Click Apply. Port-Based VLAN Configuration To configure the port-based VLAN type: 1. Select Switching > - Netgear GS108T | GS108T Setup Manual - Page 56
GS108T Smart Switch Software Administration Manual 5. Perform one of the following actions: • To add a VLAN: - Select the check box to the left of one of the VLAN IDs. - Enter a VLAN name in the VLAN Name field. - Click Add. • To delete a VLAN: - Select the check box to the left of the VLAN ID that - Netgear GS108T | GS108T Setup Manual - Page 57
GS108T Smart Switch Software Administration Manual Figure 4-9 2. From the VLAN Identifier drop-down list, select the number that represents the VLAN you want to view or modify. You can either assign the same tag setting to or remove it from all ports in the VLAN in step 3, or assign a tag setting - Netgear GS108T | GS108T Setup Manual - Page 58
GS108T Smart Switch Software Administration Manual b. Assign a tag setting to or remove it from a port by toggling the check box under an individual port number. The tag settings determine if packets that are transmitted from the port are tagged with the VLAN ID and other information. The possible - Netgear GS108T | GS108T Setup Manual - Page 59
GS108T Smart Switch Software Administration Manual Figure 4-12 b. To assign a port to or remove it from the VLAN, select the check box under an individual port number. 5. Click Apply to confirm any settings changes. Note: When the port-based VLAN type is configured, an ingress (incoming) packet - Netgear GS108T | GS108T Setup Manual - Page 60
GS108T Smart Switch Software Administration Manual To configure PVIDs: 1. Select Switching > VLAN > Advanced > Port PVID Configuration. A screen similar to the following displays. Figure 4-13 2. You can make changes to the port PVID settings for an individual port or for a group of ports: • To - Netgear GS108T | GS108T Setup Manual - Page 61
GS108T Smart Switch Software Administration Manual The Rapid Spanning Tree Protocol (RSTP) provides rapid convergence of the spanning tree by assigning port roles and by determining the active topology. The RSTP builds upon the IEEE 802.1D STP protocol to select the switch with the highest switch - Netgear GS108T | GS108T Setup Manual - Page 62
GS108T Smart Switch Software Administration Manual Figure 4-15 2. Under Bridge Settings, view or modify the bridge settings. The following configurable fields are displayed with their possible ranges and default values: • Bridge Priority. Specifies the priority of the current bridge. After - Netgear GS108T | GS108T Setup Manual - Page 63
GS108T Smart Switch Software Administration Manual Figure 4-16 2. You can make changes to the RSTP port settings for an individual port, for a group of ports, or for all ports simultaneously: • To change the RSTP port settings for an individual port, select the check box to the left of its port - Netgear GS108T | GS108T Setup Manual - Page 64
GS108T Smart Switch Software Administration Manual The following RSTP port information is displayed. Except for the Interface and State fields, all fields are configurable: • Interface. Shows the port number. • Path Cost. Specifies the cost of the port. Cost means the contribution of this port to - Netgear GS108T | GS108T Setup Manual - Page 65
Smart Switch Software Administration Manual To configure IGMP snooping: 1. Select Switching > Multicast > IGMP Snooping. A screen similar to the following displays. . Figure 4-17 2. Select a radio button to enable or disable IGMP snooping: • Disable. IGMP snooping is disabled. This is the default - Netgear GS108T | GS108T Setup Manual - Page 66
GS108T Smart Switch Software Administration Manual • Multicast Entry. Shows the Layer 2 group multicast address. • Port Members. Shows the membership that is associated with the group. 5. Click Apply to confirm any settings changes. Static Multicasting Static multicast addressing provides a way to - Netgear GS108T | GS108T Setup Manual - Page 67
GS108T Smart Switch Software Administration Manual To delete a static multicast ID: a. Select the check box to the left of the static multicast ID that you want to remove. b. Click Delete. To change a Layer 2 multicast address: a. Select the VID of the static multicast ID that you want to change. b. - Netgear GS108T | GS108T Setup Manual - Page 68
check box under an individual port number. 5. Click Apply to confirm any settings changes. Switch Configuration The Switch Configuration menu lets you to enable or disable the Jumbo Frame support. The default frame size is 1518 bytes. When jumbo frame support is enabled, the frame size can vary from - Netgear GS108T | GS108T Setup Manual - Page 69
GS108T Smart Switch Software Administration Manual 2. Select a radio button to enable or disable jumbo frames: • Disable. Jumbo frames are disabled. This is the default setting. • Enable. Jumbo frames are enabled. 3. Click Apply to confirm any settings changes. Address Table The Static Address table - Netgear GS108T | GS108T Setup Manual - Page 70
GS108T Smart Switch Software Administration Manual 3. Perform one of the following actions: To add a static entry: a. Select an interface from the drop-down list. b. Enter a MAC address. c. Select a VLAN ID from the drop-down list. d. Click Add. To delete a static entry: a. Select the check box to - Netgear GS108T | GS108T Setup Manual - Page 71
GS108T Smart Switch Software Administration Manual 2. Select a check box to specify how the table is to be queried. The possible field types are: • Port. Specifies the interface for which the table is queried. Select an interface from the drop-down list. • VLAN ID. Specifies the VLAN ID for which - Netgear GS108T | GS108T Setup Manual - Page 72
GS108T Smart Switch Software Administration Manual 4-28 v1.0, December 2007 Configuring Switching - Netgear GS108T | GS108T Setup Manual - Page 73
them in the GS108T Smart Switch. CoS The class of service (CoS) menu lets you classify specific traffic at the Layer 2 level by manipulating the CoS bits, thereby allowing you to configure quality of service (QoS). Basic-QoS Global Configuration There are two possible priority tag settings for the - Netgear GS108T | GS108T Setup Manual - Page 74
GS108T Smart Switch Software Administration Manual • DSCP-based. The six most significant bits of the DiffServ field are called the Differentiated Services Code Point (DSCP) bits. You can map the DSCP value to one of the eight priority levels (p0 to P7) of IEEE 802.1p. Then, you can assign the IEEE - Netgear GS108T | GS108T Setup Manual - Page 75
GS108T Smart Switch Software Administration Manual . Figure 5-2 2. You can make changes to the bandwidth limits for an individual port, for a group of ports, or for all ports simultaneously: • To change the bandwidth limits for an individual port, select the check box to the left of its port number - Netgear GS108T | GS108T Setup Manual - Page 76
GS108T Smart Switch Software Administration Manual • Egress Rate. Specifies the rate limitation of outgoing traffic in this port. The possible values in bps are: - 512K bps, 2M bps, 4M bbps, 10M bps, 20M bps, 40M bps, 60M bps, 100M bps, 200M bps, 400M - Netgear GS108T | GS108T Setup Manual - Page 77
GS108T Smart Switch Software Administration Manual . Figure 5-4 2. Assign a priority from 0 to 7 to a DSCP value by using the Priority drop-down lists. The following DSCP values are configurable . 3. Click Apply to confirm any settings changes. Configuring QoS and Security 5-5 v1.0, December 2007 - Netgear GS108T | GS108T Setup Manual - Page 78
manage your GS108T Gigabit Smart Switch using features under the following main menu commands and subcommnands: • "Management Security" • "User Configuration-Change Password" • "RADIUS" • "Authentication Type" • "Port Authentication" • "Basic-802.1x Configuration" • "Advanced-802.1x Configuration - Netgear GS108T | GS108T Setup Manual - Page 79
press the Factory Reset button on the switch, and the password will return to the default value of password. c. Confirm New Password. Re-enter the new password. 3. Click Apply to update the password. RADIUS The RADIUS server refers to Remote Authentication Dial-In User Service (RADIUS), defined - Netgear GS108T | GS108T Setup Manual - Page 80
GS108T Smart Switch Software Administration Manual Figure 5-6 2. The following fields are displayed, all of which are configurable: • Host IP Address. Specifies the IP address of the RADIUS server. • Authentication Port. Specifies the User Datagram Protocol (UDP) port number of the Extensible - Netgear GS108T | GS108T Setup Manual - Page 81
GS108T Smart Switch Software Administration Manual 3. Perform one of the following actions: To add a RADIUS server: a. Define all fields that are listed in step 2. b. Click Add. To delete a RADIUS server: a. Select the check box to the left of the host IP address of the RADIUS server that you want - Netgear GS108T | GS108T Setup Manual - Page 82
port authentication to control network access. Basic-802.1x Configuration The 802.1x Configuration screen lets you configure port authentication settings and guest VLANs, and lets you specify whether port authentication is applied to a port: 1. Select Security > Port Authentication > Basic > 802.1x - Netgear GS108T | GS108T Setup Manual - Page 83
GS108T Smart Switch Software Administration Manual . Figure 5-8 2. Under 802.1x Configuration, the following fields are displayed, all of which are configurable: • Port Based Authentication State. Specifies whether port authentication is enabled on the device. Select one of the following radio - Netgear GS108T | GS108T Setup Manual - Page 84
is disabled. This is the default value. - Enable. Specifies that EAPOL flooding is enabled. 3. Click Apply to confirm any settings changes to the 802.1x configuration. 4. Under Port Settings, you can make changes to the port authentication setting for an individual port, for a group of ports, or - Netgear GS108T | GS108T Setup Manual - Page 85
GS108T Smart Switch Software Administration Manual - Disable. Specifies that port authentication is disabled for the port. No authentication process is required for the port; traffic can be forwarded normally. This is the default value. - Enable. Specifies that port authentication is enabled for the - Netgear GS108T | GS108T Setup Manual - Page 86
GS108T Smart Switch Software Administration Manual The following figure displays the right side of the Advanced Port Authentication screen: Figure 5-10 2. You can make changes to the port authentication setting for an individual port, for a group of ports, or for all ports simultaneously: • To - Netgear GS108T | GS108T Setup Manual - Page 87
GS108T Smart Switch Software Administration Manual • Current Port Control. Specifies the current port authorization state. The possible field values are: - Auto. Specifies that the port control is automatic and that a single client with the proper credentials has been authenticated through the port. - Netgear GS108T | GS108T Setup Manual - Page 88
GS108T Smart Switch Software Administration Manual Traffic Control The Traffic Control menu lets you to configure storm control and port learning settings. When storm control is enabled, ports are not disrupted by a flood of traffic (a storm) that otherwise might degrade network performance. Storm - Netgear GS108T | GS108T Setup Manual - Page 89
GS108T Smart Switch Software Administration Manual 2. Under Storm Control Settings, the following fields are displayed, both of which are configurable: • Ingress Control Mode. Specifies the type of the packet storm. The possible field values are: - Disable. Specifies that storm control is disabled. - Netgear GS108T | GS108T Setup Manual - Page 90
GS108T Smart Switch Software Administration Manual Port Security The Port Security screen lets you to configure port learning for unknown source MAC address packets. If the learning mode is disabled, you can specify an action that must be taken for unknown source MAC address packets. To configure - Netgear GS108T | GS108T Setup Manual - Page 91
GS108T Smart Switch Software Administration Manual The following fields are displayed. Except for the Port field, all fields are configurable: • Port. Shows the port number. • Learning Mode. Specifies whether the learning mode is enabled on the port. The possible field values are: - Lock Disable. - Netgear GS108T | GS108T Setup Manual - Page 92
GS108T Smart Switch Software Administration Manual Figure 5-13 2. The following fields are displayed. Except for the ID field, all fields are configurable: • ID. Shows the identifier for the IP access list. • IP Address. Specifies the IP address for the IP access list. • Subnet Mask. Specifies the - Netgear GS108T | GS108T Setup Manual - Page 93
GS108T Smart Switch Software Administration Manual Trusted MAC A trusted MAC address protects the switch from an untrusted intruder that attempts to invade the system. Only the source address (SA) of the packet in the trusted MAC table can be switched to the destination port. You can add a total of - Netgear GS108T | GS108T Setup Manual - Page 94
GS108T Smart Switch Software Administration Manual 3. Perform one of the following actions: To add a trusted MAC address: a. Select an interface from the drop-down list. b. Enter a MAC address. c. When the VLAN is in IEEE 802.1Q mode, select a VLAN ID from the drop-down list. d. Click Add. To delete - Netgear GS108T | GS108T Setup Manual - Page 95
tab that lets you manage your GS108T Gigabit Smart Switch using features under the following main menu commands and subcommands: • "Ports" • "Port Statistics" • "EAP Statistics" • "802.1x Accounting Statistics" • "Mirroring" • "Port Mirroring" • "Log" • "Configuration" • "Memory Logs" • "Flash Logs - Netgear GS108T | GS108T Setup Manual - Page 96
GS108T Smart Switch Software Administration Manual Ports The Ports menu lets you display the statistics for individual ports and for all ports. You can display the internal traffic counters, information about processed EAP packets, and information about processed IEEE 802.1x packets. Port Statistics - Netgear GS108T | GS108T Setup Manual - Page 97
GS108T Smart Switch Software Administration Manual 2. Under Port Selection, select a port from the Port drop-down list. 3. Click Apply. Under Statistics, the following information is shown for the selected port: • TX statistics for packets transmitted from the port maximum received frame length. - - Netgear GS108T | GS108T Setup Manual - Page 98
GS108T Smart Switch Software Administration Manual - 128 to 255 BytePkts. Shows the number of transmitted packets with Summary Statistics, the following information is shown for all ports (1-8): • TX statistics for packets transmitted from the ports: - Bytes. Shows the number of transmitted bytes. - Netgear GS108T | GS108T Setup Manual - Page 99
GS108T Smart Switch Software Administration Manual • RX statistics for packets received on the ports: - Bytes. Shows port of the switch.) 4. Perform one of the following optional actions: • To reset all counters to zero, click Clear Counters. • To retrieve the current count from the switch and update - Netgear GS108T | GS108T Setup Manual - Page 100
GS108T Smart Switch Software Administration Manual 2. Under Port Selection, the following fields are displayed, both of which are configurable: • Port. Specifies the port for which the EAP statistics are to be shown. Select a port from the drop-down list. • Refresh Rate. Specifies the period that - Netgear GS108T | GS108T Setup Manual - Page 101
GS108T Smart Switch Software Administration Manual 802.1x Accounting Statistics The 802.1x Accounting Statistics screen displays information about IEEE 802.1x packets that were processed on a specific port: 1. Select Monitoring > Ports > 802.1x Accounting Statistics. A screen similar to the - Netgear GS108T | GS108T Setup Manual - Page 102
GS108T Smart Switch Software Administration Manual Mirroring The Mirroring menu lets you mirror the incoming (ingress) and outgoing (egress) traffic of one or more ports (the source ports) to a predefined destination port. Port Mirroring To configure port mirroring: 1. Select Monitoring > Mirroring - Netgear GS108T | GS108T Setup Manual - Page 103
Log GS108T Smart Switch Software Administration Manual Logs are used to record various events in the system. The Log menu lets you display memory, flash, and server logs, and lets you configure what type of events are logged. Three types of media are provided for saving the logs: • The RAM medium - Netgear GS108T | GS108T Setup Manual - Page 104
GS108T Smart Switch Software Administration Manual 2. Under Logs Configuration, the following fields are displayed. All fields are configurable: • Logging. Specifies whether RAM and flash logging is enabled on the device. Select one of the following radio buttons: - Enable. Specifies that RAM and - Netgear GS108T | GS108T Setup Manual - Page 105
GS108T Smart Switch Software Administration Manual • Info. Specifies whether informational messages are logged. . - Off. Specifies that debug messages are not logged. 3. Click Apply to confirm any settings changes. Memory Logs The Memory Logs screen displays the messages that are logged in the RAM - Netgear GS108T | GS108T Setup Manual - Page 106
GS108T Smart Switch Software Administration Manual 2. Perform one of the following optional actions: • To retrieve the current count from the switch and update the screen, click Refresh. • To reset the log, click Clear. Flash Logs The Flash Logs screen displays the messages that are logged in the - Netgear GS108T | GS108T Setup Manual - Page 107
GS108T Smart Switch Software Administration Manual Server Logs The server medium is a remote host with a BSD syslogd compliant daemon running. This medium uses the User Datagram Protocol (UDP) to send log messages to the remote server. The Server Logs screen lets you control how many and what type - Netgear GS108T | GS108T Setup Manual - Page 108
GS108T Smart Switch Software Administration Manual a remote log server: a. Enter the server IP address. b. Enter a UDP port. c. Select a facility from the drop-down list ID for the remote log server address that you want to remove. b. Click Delete. To change the configuration for a remote log server: - Netgear GS108T | GS108T Setup Manual - Page 109
LLDP GS108T Smart Switch Software Administration Manual The Link Layer Discovery Protocol (LLDP) menu lets you display the LLDP statistics: Statistics To display the LLDP statistics: 1. Select Monitoring > LLDP > Statistics. A screen similar to the following displays. . Figure 6-10 Under - Netgear GS108T | GS108T Setup Manual - Page 110
GS108T Gigabit Smart Switch using features under the following main menu commands and subcommands: • "Reset" • "Device Reboot" • "Factory Default" • "Upload" • "File Upload" • "Download" • "File Download" The sections that follow in this chapter cover these features and tell you how to configure - Netgear GS108T | GS108T Setup Manual - Page 111
Reset GS108T Smart Switch Software Administration Manual The Reset menu lets you reset the switch with its current configuration or its factory default values. Device Reboot The Device Reboot screen lets you restart the switch with its current configuration. To reset and restart the switch: 1. - Netgear GS108T | GS108T Setup Manual - Page 112
DHCP server on the network, the IP address becomes 192.168.0.239. Warning: The password returns to the factory default password. 3. Click Apply to restart the switch. Note: You can also use the Factory Defaults button on the front panel of the Smart Switch to reset the switch to its factory default - Netgear GS108T | GS108T Setup Manual - Page 113
Upload GS108T Smart Switch Software Administration Manual The Upload menu lets you upload the current firmware and configuration switch files to a TFTP server or HTTP host so that you can back up the switch. File Upload You can upload files either to a TFTP server or to an HTTP host. To upload - Netgear GS108T | GS108T Setup Manual - Page 114
or HTTP host to the switch so that you can restore or update the switch. File Download You can download files either from a TFTP server or from an HTTP host. Note: You can also update the firmware using the in the Smart Wizard Discovery utility (see "Firmware Upgrade" on page 1-8). 6-20 Monitoring - Netgear GS108T | GS108T Setup Manual - Page 115
from the drop-down list. - TFTP Server IP Address. Specifies the IP address of the TFTP server. - Source File Name. Specifies the name of the firmware or configuration source file in the TFTP server. Go to step 3. • If you select the HTTP radio button to download files from an HTTP host, a screen - Netgear GS108T | GS108T Setup Manual - Page 116
the location and name of the firmware or configuration source file in the HTTP server. Click Browse to select the file. 3. Click Apply to start the download. Using the Help Tab The navigation tabs on the top of the home page include a Help tab that lets you manage your GS108T Gigabit Smart Switch - Netgear GS108T | GS108T Setup Manual - Page 117
Online Help GS108T Smart Switch Software Administration Manual The Online Help menu lets you connect to the NETGEAR web site and access the user guide. Support To connect to the NETGEAR web site: 1. Select Maintenance > Online Help > Support. A screen similar to the following displays. Figure 6- - Netgear GS108T | GS108T Setup Manual - Page 118
GS108T Smart Switch Software Administration Manual 2. To access a PDF of the user guide, click Apply. The user guide is also referred to as the Software Administration Manual. 6-24 Monitoring, Maintenance, and Help v1.0, December 2007 - Netgear GS108T | GS108T Setup Manual - Page 119
Appendix A Specifications and Default Values GS108T Gigabit Smart Switch Specifications The GS108T Gigabit Smart Switch conforms to the TCP/IP, UDP, HTTP, ICMP, TFTP, DHCP, 802.1D, 802.1p, and 802.1Q standards. Table A-1. GS108T Gigabit Smart Switch Specifications Feature Interfaces PoE Flash - Netgear GS108T | GS108T Setup Manual - Page 120
GS108T Smart Switch Software Administration Manual GS108T Gigabit Smart Switch Features and Defaults Table A-3. Port Characteristics Feature Autonegotiation / static speed / duplex Auto MDI/MDIX 802.3x flow control / back pressure Port mirroring Port trunking (aggregation) 802.1D spanning tree 802 - Netgear GS108T | GS108T Setup Manual - Page 121
Default Disabled Disabled 0 Table A-6. Traffic Control Feature Rate control Storm control Jumbo frame Sets Supported 8 (per port) 8 (per port) 1 (per system) Table A-7. System Setup Feature Sets Supported DHCP / Manual IP 1 System name configuration 1 Configuration save/restore 1 Firmware - Netgear GS108T | GS108T Setup Manual - Page 122
GS108T Smart Switch Software Administration Manual Table A-9. Management (continued) Feature Smart Wizard Statistics Sets Supported N/A 31 (per port) Default Enabled N/A A-4 Specifications and Default Values v1.0, December 2007 - Netgear GS108T | GS108T Setup Manual - Page 123
the traffic to the appropriate port. A virtual LAN (VLAN) is a local area network with a definition that maps workstations on some basis other than geographic location (for example, by department, type of user, or primary application). To enable traffic to flow between VLANs, traffic must go through - Netgear GS108T | GS108T Setup Manual - Page 124
GS108T Smart Switch Software Administration Manual IEEE 802.1Q VLANs Packets received by the switch are treated in the following way: • When an untagged packet enters a port, it is automatically tagged with the port's default VLAN ID tag number. Each port has a default VLAN ID setting that is user - Netgear GS108T | GS108T Setup Manual - Page 125
GS108T Smart Switch Software Administration Manual - For the VLAN with VID 10, specify the following members: port 1 (U), port 2 (U), and port 3 (T). - For the VLAN with VID 20, specify the following members: port 4 (U), port 5 (T), and port 6 (U). 3. With the VLAN configuration that you set up, the - Netgear GS108T | GS108T Setup Manual - Page 126
GS108T Smart Switch Software Administration Manual Port-Based VLAN Example Configuration This example demonstrates how the port-based VLANs work to meet your needs. In this example, you create four new VLANS, you change the port membership for default VLAN 1, and you assign port members to the four - Netgear GS108T | GS108T Setup Manual - Page 127
GS108T Smart Switch Software Administration Manual 3. With the VLAN configuration that you set up, the following situations produce results as described: • If a packet comes in on port 1, it can go to ports 1, 2, 3, and 8, as these ports are the only ports in the VLAN out on their ports. Only the - Netgear GS108T | GS108T Setup Manual - Page 128
GS108T Smart Switch Software Administration Manual B-6 Virtual Local Area Networks (VLANs) v1.0, December 2007 - Netgear GS108T | GS108T Setup Manual - Page 129
Appendix C Network Cabling This appendix provides specifications for cables used with a NETGEAR GS108T Gigabit Smart Switch. Fast Ethernet Cable Guidelines Fast Ethernet uses UTP cable, as specified in the IEEE 802.3u standard for 100BASE-TX. The specification requires Category 5 UTP cable - Netgear GS108T | GS108T Setup Manual - Page 130
GS108T Smart Switch Software Administration Manual Category 5 Cable Specifications Ensure that the fiber cable is crossed over to guarantee link. Table C-1 lists the electrical requirements of Category 5 UTP cable. Table C-1. Electrical Requirements of Category 5 Cable Specifications Number of - Netgear GS108T | GS108T Setup Manual - Page 131
GS108T Smart Switch Software Administration Manual Figure C-1 illustrates straight-through twisted-pair cable. Figure C-1 Figure C-2 illustrates crossover twisted-pair cable. Figure 5 UTP cables with an RJ-45 plug at each end, as shown in Figure C-3. Network Cabling C-3 v1.0, December 2007 - Netgear GS108T | GS108T Setup Manual - Page 132
Smart Switch Software Administration Manual Figure C-3 Note: Flat "silver satin" telephone cable might have the same RJ-45 plug. However, using telephone cable results in excessive collisions, causing the attached port to be partitioned or disconnected from the network. Using 1000BASE-T Gigabit - Netgear GS108T | GS108T Setup Manual - Page 133
GS108T Smart Switch Software Administration Manual If installing new cable, NETGEAR -568A-3. If not correctly implemented, this can adversely affect all cabling settings. Near End Cross Talk Near End Cross Talk (NEXT) is link-the end where the transmitter is Network Cabling C-5 v1.0, December 2007 - Netgear GS108T | GS108T Setup Manual - Page 134
GS108T Smart Switch Software Administration Manual located hubs, and switches through UTP cable; it supports 10 Mbps, 100 Mbps, or 1000 Mbps data 10/100 Mbps RJ-45 plug and the RJ-45 connector. Table C-2. 10/100 Mbps RJ-45 Plug and RJ-45 Connector Pin Assignments Pin Normal Assignment on Ports - Netgear GS108T | GS108T Setup Manual - Page 135
GS108T Smart Switch Software Administration Manual Table C-2. 10/100 Mbps RJ-45 Plug and RJ-45 Connector Pin Assignments (continued) Pin Normal Assignment on Ports 1 to 8 Uplink Assignment on Port 8 6 Output transmit data - Input receive data - 4, 5, 7, 8 Internal termination, not used for - Netgear GS108T | GS108T Setup Manual - Page 136
GS108T Smart Switch Software Administration Manual C-8 Network Cabling v1.0, December 2007 - Netgear GS108T | GS108T Setup Manual - Page 137
setting the network parameters 1-5 spanning tree configuration 4-17 switching configuration 4-1 system configuration 3-1 VLAN configuration examples B-2 connectors C-6 CoS 5-1 D defaults default IP address 1-7 default subnet mask 1-7 factory default configuration 6-18 switch defaults A-2 DHCP DHCP - Netgear GS108T | GS108T Setup Manual - Page 138
5-10 RADIUS server 5-7 reset resetting the switch with its current configuration 617 restoring the switch to the factory default configuration 6-18 RSTP configuration 4-17 S security 5-6, 5-18 SNMP 3-6 SNTP 3-4 spanning tree 4-17 specifications A-1 static MAC address 4-25 statistics 802.1x - Netgear GS108T | GS108T Setup Manual - Page 139
Wizard Discovery 1-2 switch configuration 4-1 system menu 3-1 V VLAN advantages of VLANs B-1 configuring VLANs 4-9 IEEE 802.1Q VLANS 4-9 management VLAN 3-4 port-based VLANs 4-9 PVID 4-15 VLAN configuration examples B-2 GS108T Smart Switch Software Administration Manual VLAN membership 4-12 W Web - Netgear GS108T | GS108T Setup Manual - Page 140
GS108T Smart Switch Software Administration Manual Index-4 v1.0, December 2007
-
 1
1 -
 2
2 -
 3
3 -
 4
4 -
 5
5 -
 6
6 -
 7
7 -
8
-
9
-
10
-
11
-
12
-
13
-
14
-
15
-
16
-
17
-
18
-
19
-
20
-
21
-
22
-
23
-
24
-
25
-
26
-
27
-
28
-
29
-
30
-
31
-
32
-
33
-
34
-
35
-
36
-
37
-
38
-
39
-
40
-
41
-
42
-
43
-
44
-
45
-
46
-
47
-
48
-
49
-
50
-
51
-
52
-
53
-
54
-
55
-
56
-
57
-
58
-
59
-
60
-
61
-
62
-
63
-
64
-
65
-
66
-
67
-
68
-
69
-
70
-
71
-
72
-
73
-
74
-
75
-
76
-
77
-
78
-
79
-
80
-
81
-
82
-
83
-
84
-
85
-
86
-
87
-
88
-
89
-
90
-
91
-
92
-
93
-
94
-
95
-
96
-
97
-
98
-
99
-
100
-
101
-
102
-
103
-
104
-
105
-
106
-
107
-
108
-
109
-
110
-
111
-
112
-
113
-
114
-
115
-
116
-
117
-
118
-
119
-
120
-
121
-
122
-
123
-
124
-
125
-
126
-
127
-
128
-
129
-
130
-
131
-
132
-
133
-
134
-
135
-
136
-
137
-
138
-
139
-
140
 |
 |
202-10337-01
December 2007
NETGEAR
, Inc.
4500 Great America Parkway
Santa Clara, CA 95054 USA
GS108T Smart Switch
Software Administration
Manual