Netgear GS108T GS108T Setup Manual - Page 19
Manually Assigning Network Settings - configurations
 |
UPC - 606449051377
View all Netgear GS108T manuals
Add to My Manuals
Save this manual to your list of manuals |
Page 19 highlights
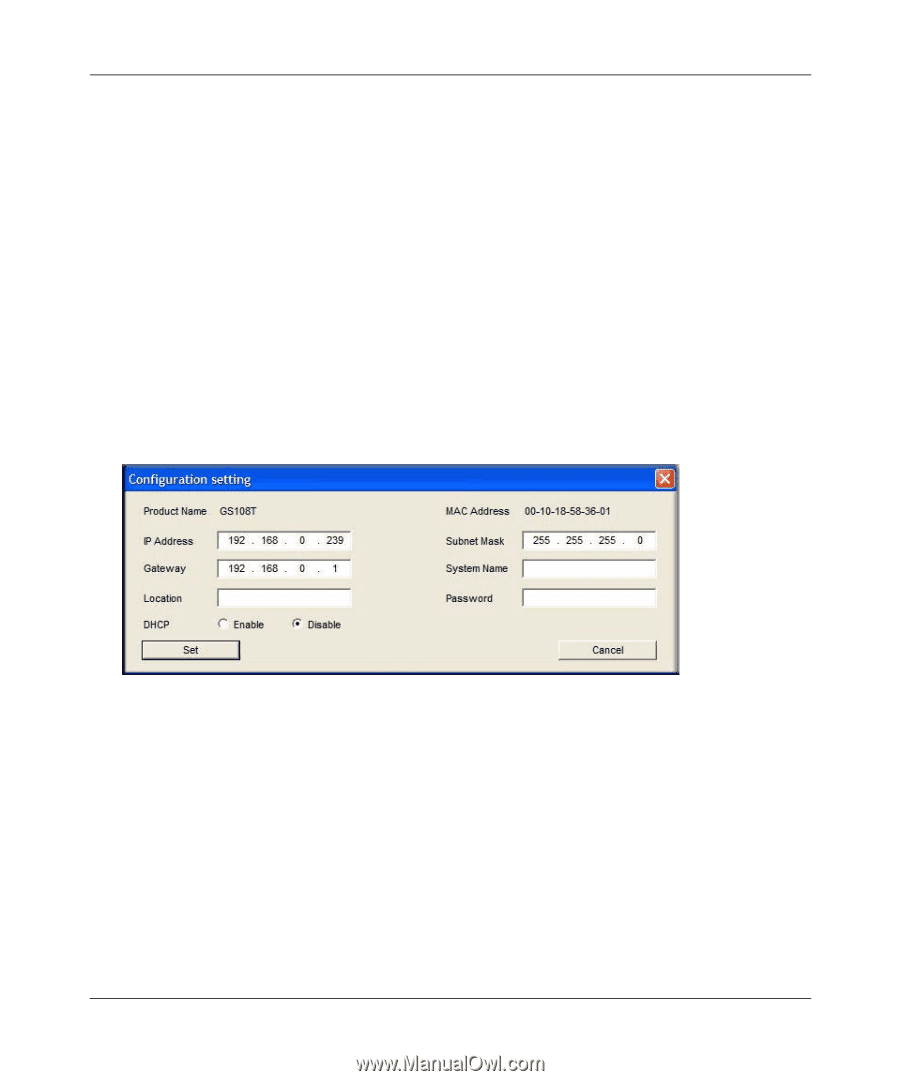
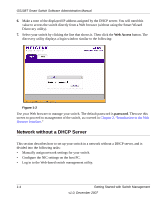
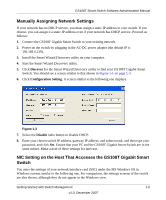
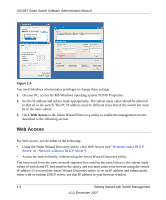
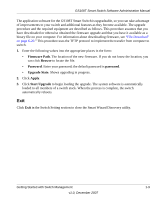
GS108T Smart Switch Software Administration Manual Manually Assigning Network Settings If your network has no DHCP service, you must assign a static IP address to your switch. If you choose, you can assign it a static IP address even if your network has DHCP service. Proceed as follows: 1. Connect the GS108T Gigabit Smart Switch to your existing network. 2. Power on the switch by plugging in the AC-DC power adapter (the default IP is 192.168.0.239). 3. Install the Smart Wizard Discovery utility on your computer. 4. Start the Smart Wizard Discovery utility. 5. Click Discover for the Smart Wizard Discovery utility to find your GS108T Gigabit Smart Switch. You should see a screen similar to that shown in Figure 1-1 on page 1-3. 6. Click Configuration Setting. A screen similar to the following one displays. . Figure 1-3 7. Select the Disable radio button to disable DHCP. 8. Enter your chosen switch IP address, gateway IP address, and subnet mask, and then type your password, and click Set. Ensure that your PC and the GS108T Gigabit Smart Switch are in the same subnet. Make a note of these settings for later use. NIC Setting on the Host That Accesses the GS108T Gigabit Smart Switch You enter the settings of your network interface card (NIC) under the MS Windows OS in Windows screens similar to the following one. For comparison, the settings screens of the switch are also shown, although they do not appear in the Windows view. Getting Started with Switch Management 1-5 v1.0, December 2007
-
 1
1 -
2
-
3
-
4
-
5
-
6
-
7
-
8
-
9
-
10
-
11
-
12
-
13
-
 14
14 -
 15
15 -
 16
16 -
 17
17 -
 18
18 -
 19
19 -
 20
20 -
 21
21 -
 22
22 -
 23
23 -
 24
24 -
25
-
26
-
27
-
28
-
29
-
30
-
31
-
32
-
33
-
34
-
35
-
36
-
37
-
38
-
39
-
40
-
41
-
42
-
43
-
44
-
45
-
46
-
47
-
48
-
49
-
50
-
51
-
52
-
53
-
54
-
55
-
56
-
57
-
58
-
59
-
60
-
61
-
62
-
63
-
64
-
65
-
66
-
67
-
68
-
69
-
70
-
71
-
72
-
73
-
74
-
75
-
76
-
77
-
78
-
79
-
80
-
81
-
82
-
83
-
84
-
85
-
86
-
87
-
88
-
89
-
90
-
91
-
92
-
93
-
94
-
95
-
96
-
97
-
98
-
99
-
100
-
101
-
102
-
103
-
104
-
105
-
106
-
107
-
108
-
109
-
110
-
111
-
112
-
113
-
114
-
115
-
116
-
117
-
118
-
119
-
120
-
121
-
122
-
123
-
124
-
125
-
126
-
127
-
128
-
129
-
130
-
131
-
132
-
133
-
134
-
135
-
136
-
137
-
138
-
139
-
140
 |
 |