Netgear GSM712F FSM726 User Manual - Page 18
Software Upgrade Procedure - reset
 |
UPC - 606449026870
View all Netgear GSM712F manuals
Add to My Manuals
Save this manual to your list of manuals |
Page 18 highlights
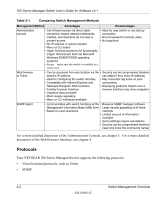
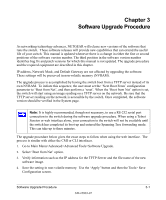
Chapter 3 Software Upgrade Procedure As networking technology advances, NETGEAR will release new versions of the software that runs the switch. These software releases will provide new capabilities that can extend the useful life of your switch. This manual is updated whenever there is a change in either the first or second positions of the software version number. The third position in the software version number identifies bug fix and patch versions for which this manual is not updated. The upgrade procedure and the required equipment are described in this chapter. IP address, Network Mask, and Default Gateway are not affected by upgrading the software. These settings will be preserved in non-volatile memory (NVRAM). The upgrade process is accomplished by having the switch boot from a TFTP server instead of its own NVRAM. To initiate this sequence, the user must set the 'Next Boot From' configuration parameter to 'Boot from Net', and then perform a 'reset'. When the 'Boot from Net' option is set, the switch will start using an image residing on a TFTP server on the network. Be sure that the TFTP server residing on the network is accessible by the switch. Once completed, the software version should be verified in the System page. Note: It is highly recommended, though not necessary, to use a RS-232 serial port connection to the switch during the software upgrade procedure. When using a Telnet Session or web interface alone, your connection to the switch will not be available until the switch has completed its boot up and entered the Spanning Tree forwarding mode. This can take up to three minutes. The upgrade procedure below gives the exact steps to follow when using the web interface. The process is similar with either the CMI or CLI interfaces. 1. Go to Main Menu>Advanced>Advanced Tools>Software Upgrade. 2. Select 'Boot from Net' option. 3. Verify information such as the IP address for the TFTP Server and the file name of the new software image. 4. Save the setting in non-volatile memory. Use the 'Apply' button and then the Tools> Save Configuration screen. Software Upgrade Procedure 3-1 SM-10004-02
-
 1
1 -
2
-
3
-
4
-
5
-
6
-
7
-
8
-
9
-
10
-
11
-
12
-
 13
13 -
 14
14 -
 15
15 -
 16
16 -
 17
17 -
 18
18 -
 19
19 -
 20
20 -
 21
21 -
 22
22 -
 23
23 -
24
-
25
-
26
-
27
-
28
-
29
-
30
-
31
-
32
-
33
-
34
-
35
-
36
-
37
-
38
-
39
-
40
-
41
-
42
-
43
-
44
-
45
-
46
-
47
-
48
-
49
-
50
-
51
-
52
-
53
-
54
-
55
-
56
-
57
-
58
-
59
-
60
-
61
-
62
-
63
-
64
-
65
-
66
-
67
-
68
-
69
-
70
-
71
-
72
-
73
-
74
-
75
-
76
-
77
-
78
-
79
-
80
-
81
-
82
-
83
-
84
-
85
-
86
-
87
-
88
-
89
-
90
-
91
-
92
-
93
-
94
-
95
-
96
-
97
-
98
-
99
-
100
-
101
-
102
-
103
-
104
-
105
-
106
-
107
-
108
-
109
-
110
-
111
-
112
-
113
-
114
-
115
-
116
-
117
-
118
-
119
-
120
-
121
-
122
-
123
-
124
-
125
-
126
-
127
-
128
-
129
-
130
-
131
-
132
-
133
-
134
-
135
-
136
-
137
-
138
-
139
-
140
-
141
-
142
-
143
-
144
-
145
-
146
-
147
-
148
-
149
-
150
-
151
-
152
 |
 |