Netgear WC7660SKT Reference Manual - Page 52
Connect Your Computer to the Wireless Controller, Log In to the Wireless Controller
 |
View all Netgear WC7660SKT manuals
Add to My Manuals
Save this manual to your list of manuals |
Page 52 highlights
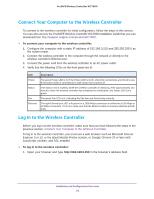
ProSAFE Wireless Controller WC7600 Connect Your Computer to the Wireless Controller To connect to the wireless controller for initial configuration, follow the steps in this section. You can also access the ProSAFE Wireless Controller WC7600 Installation Guide that you can download from http://support.netgear.com/product/WC7600. To connect your computer to the wireless controller: 1. Configure the computer with a static IP address of 192.168.0.210 and 255.255.255.0 as the subnet mask. 2. Connect the wireless controller to the computer through the network or directly to the wireless controller's Ethernet port. 3. Connect the power cord from the wireless controller to an AC power outlet. 4. Verify that the following LEDs on the front panel are lit: LED Power Status Fan Ethernet Description The green Power LED is lit. If the Power LED is not lit, check the connections and check to see if the power outlet is controlled by a wall switch that is turned off. The Status LED is lit yellow while the wireless controller is initializing. After approximately two minutes, when the wireless controller has completed its initialization, the Status LED turns green. The green Fan LED is lit, indicating that the fans are functioning correctly. The right Ethernet port LED is lit green for a 1000 Mbps connection or yellow for a 100 Mbps or 10 Mbps connection. If it is not, make sure that the Ethernet cable is securely attached at both ends. Log In to the Wireless Controller Before you log in to the wireless controller, make sure that you have followed the steps in the previous section, Connect Your Computer to the Wireless Controller. To log in to the wireless controller, you must use a web browser such as Microsoft Internet Explorer 9 or 10, or the latest Mozilla Firefox version, or Google Chrome 24 or later with JavaScript, cookies, and SSL enabled. To log in to the wireless controller: 1. Open your browser and type http://192.168.0.250 in the browser's address field. Installation and Configuration Overview 52
-
 1
1 -
2
-
3
-
4
-
5
-
6
-
7
-
8
-
9
-
10
-
11
-
12
-
13
-
14
-
15
-
16
-
17
-
18
-
19
-
20
-
21
-
22
-
23
-
24
-
25
-
26
-
27
-
28
-
29
-
30
-
31
-
32
-
33
-
34
-
35
-
36
-
37
-
38
-
39
-
40
-
41
-
42
-
43
-
44
-
45
-
46
-
 47
47 -
 48
48 -
 49
49 -
 50
50 -
 51
51 -
 52
52 -
 53
53 -
 54
54 -
 55
55 -
 56
56 -
 57
57 -
58
-
59
-
60
-
61
-
62
-
63
-
64
-
65
-
66
-
67
-
68
-
69
-
70
-
71
-
72
-
73
-
74
-
75
-
76
-
77
-
78
-
79
-
80
-
81
-
82
-
83
-
84
-
85
-
86
-
87
-
88
-
89
-
90
-
91
-
92
-
93
-
94
-
95
-
96
-
97
-
98
-
99
-
100
-
101
-
102
-
103
-
104
-
105
-
106
-
107
-
108
-
109
-
110
-
111
-
112
-
113
-
114
-
115
-
116
-
117
-
118
-
119
-
120
-
121
-
122
-
123
-
124
-
125
-
126
-
127
-
128
-
129
-
130
-
131
-
132
-
133
-
134
-
135
-
136
-
137
-
138
-
139
-
140
-
141
-
142
-
143
-
144
-
145
-
146
-
147
-
148
-
149
-
150
-
151
-
152
-
153
-
154
-
155
-
156
-
157
-
158
-
159
-
160
-
161
-
162
-
163
-
164
-
165
-
166
-
167
-
168
-
169
-
170
-
171
-
172
-
173
-
174
-
175
-
176
-
177
-
178
-
179
-
180
-
181
-
182
-
183
-
184
-
185
-
186
-
187
-
188
-
189
-
190
-
191
-
192
-
193
-
194
-
195
-
196
-
197
-
198
-
199
-
200
-
201
-
202
-
203
-
204
-
205
-
206
-
207
-
208
-
209
-
210
-
211
-
212
-
213
-
214
-
215
-
216
-
217
-
218
-
219
-
220
-
221
-
222
-
223
-
224
-
225
-
226
-
227
-
228
-
229
-
230
-
231
-
232
-
233
-
234
-
235
-
236
-
237
-
238
-
239
-
240
-
241
-
242
-
243
-
244
-
245
-
246
-
247
-
248
-
249
-
250
-
251
-
252
-
253
-
254
-
255
-
256
-
257
-
258
-
259
-
260
-
261
-
262
-
263
-
264
-
265
-
266
-
267
-
268
-
269
-
270
-
271
-
272
-
273
-
274
-
275
-
276
-
277
-
278
-
279
-
280
-
281
-
282
-
283
-
284
-
285
-
286
-
287
-
288
-
289
-
290
-
291
-
292
-
293
-
294
-
295
-
296
-
297
-
298
-
299
-
300
-
301
-
302
-
303
-
304
-
305
-
306
-
307
 |
 |