Nokia 100i Installation Guide - Page 49
Installing a NIC on the Nokia 100i Gateway
 |
View all Nokia 100i manuals
Add to My Manuals
Save this manual to your list of manuals |
Page 49 highlights
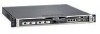
Installing a Network Interface Card Installing a NIC on the Nokia 100i Gateway Note f you cannot access the power switch, you can still perform this procedure. When the slide tray assembly is removed from the chassis assembly, power to a Nokia 100i is automatically disconnected. To physically install a NIC on the Nokia 100i gateway 1. Identify the location (PMC carrier and slot) of the NIC to be replaced. 2. Turn off the power switch on the rear of the gateway and unplug the power cord. 3. IUse your fingers or a screwdriver to loosen the retaining screws that hold the chassis assembly. Chassis assembly retaining screws 00248a Nokia 100i Installation Guide 49
-
 1
1 -
2
-
3
-
4
-
5
-
6
-
7
-
8
-
9
-
10
-
11
-
12
-
13
-
14
-
15
-
16
-
17
-
18
-
19
-
20
-
21
-
22
-
23
-
24
-
25
-
26
-
27
-
28
-
29
-
30
-
31
-
32
-
33
-
34
-
35
-
36
-
37
-
38
-
39
-
40
-
41
-
42
-
43
-
 44
44 -
 45
45 -
 46
46 -
 47
47 -
 48
48 -
 49
49 -
 50
50 -
 51
51 -
 52
52 -
 53
53 -
 54
54 -
55
-
56
-
57
-
58
-
59
-
60
-
61
-
62
-
63
-
64
-
65
-
66
-
67
-
68
-
69
-
70
-
71
-
72
 |
 |

Installing a Network Interface Card
Nokia 100i Installation Guide
49
Installing a NIC on the Nokia 100i Gateway
Note
f you cannot access the power switch, you can still perform this
procedure. When the slide tray assembly is removed from the chassis
assembly, power to a Nokia 100i is automatically disconnected.
To physically install a NIC on the Nokia 100i gateway
1.
Identify the location (PMC carrier and slot) of the NIC to be replaced.
2.
Turn off the power switch on the rear of the gateway and unplug the
power cord.
3.
IUse your fingers or a screwdriver to loosen the retaining screws that hold
the chassis assembly.
00248a
Chassis assembly retaining screws