Nokia 6340i User Guide - Page 33
Wireless modem setup - accessories
 |
View all Nokia 6340i manuals
Add to My Manuals
Save this manual to your list of manuals |
Page 33 highlights
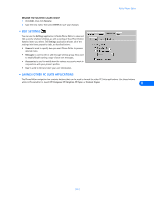
Wireless modem setup 9 Wireless modem setup Important: This feature is available only if your service provider's network supports digital data and fax services using circuit-switched data (CSD). A subscription to these services may also be necessary. Please check with your service provider for more details. Your phone can function as a wireless modem when connected to your PC (using IR or cable). Once your phone is installed and configured properly, your phone works in conjunction with your PC data or fax software, allowing you to connect to a corporate network, the Internet, or check e-mail wherever you are. Important: If you wish to connect your phone and PC using IR, make sure that your PC IR port is functioning properly and that there are no device conflicts. Windows cannot detect your phone if the IR port is not functioning properly or conflicting with another device. • DOWNLOAD MODEM SOFTWARE During the modem installation process, Windows looks for software specific to the new device being installed. The modem software for your phone can be found in the software downloads section of the Nokia Web site: http://www.nokia.com/us Since the Add New Hardware Wizard for all Windows operating systems searches the A:\ drive for device drivers first, Nokia recommends that you download this file and save it to a floppy diskette. Note: If you choose to save the file to your hard drive, please make note of the path to the file as this information is required to complete the installation successfully. Depending on your operating system, locating this file on your hard drive may add additional steps to the installation process. Choose the correct file The software downloads section of the Nokia Web site contains the following modem software drivers for your phone: 9 n6340iCable.inf - used for a cable connection n6340iIrDA.inf - used for an infrared connection Important: Windows 2000 Professional operating system users who wish to connect to a PC using IR, see "Learn about IR and Windows 2000 Professional operating system" on page 31 for more information on modem setup for your operating system. Perform multiple modem installations To provide yourself with the option of using either a DLR-3P data cable or IR to make your connection, you must perform the modem installation process twice (once for each connection method). Example: You have chosen IR as your connection method, yet you cannot find a flat work surface so you can align the IR ports of your phone and PC. You decide to connect using the data cable instead. Before you can use the cable, you must already have an additional modem installation using the driver for the data cable. • GETTING CONNECTED FOR THE FIRST TIME: DLR-3P DATA CABLE (ALL WINDOWS VERSIONS) 1 Connect the data cable to the serial port on the back of your laptop or desktop computer. Note: If you are using a serial mouse, you need to purchase a RS232-to-PS/2 adapter and move your mouse to an existing PS/2 port, or purchase a PS/2 mouse. Check with your local computer dealer for these accessories. 2 Connect the DLR-3P data cable to your Nokia phone. Your phone displays a message indicating you have connected the data cable successfully, then returns to the Start screen. 3 Click Start, point to Settings, then click Control Panel. 4 Double click the Modems or Phone and Modem Options control panel icon. 5 Click Add. Windows 2000 users, please click the Modems tab, then click Add. [ 29 ]
-
 1
1 -
2
-
3
-
4
-
5
-
6
-
7
-
8
-
9
-
10
-
11
-
12
-
13
-
14
-
15
-
16
-
17
-
18
-
19
-
20
-
21
-
22
-
23
-
24
-
25
-
26
-
27
-
 28
28 -
 29
29 -
 30
30 -
 31
31 -
 32
32 -
 33
33 -
 34
34 -
 35
35 -
 36
36 -
 37
37 -
 38
38 -
39
-
40
-
41
-
42
-
43
-
44
-
45
-
46
-
47
-
48
-
49
-
50
-
51
 |
 |