Nokia 8801 Nokia 8801 User Guide in English - Page 11
Getting started, SIM card installation - unlocked
 |
View all Nokia 8801 manuals
Add to My Manuals
Save this manual to your list of manuals |
Page 11 highlights
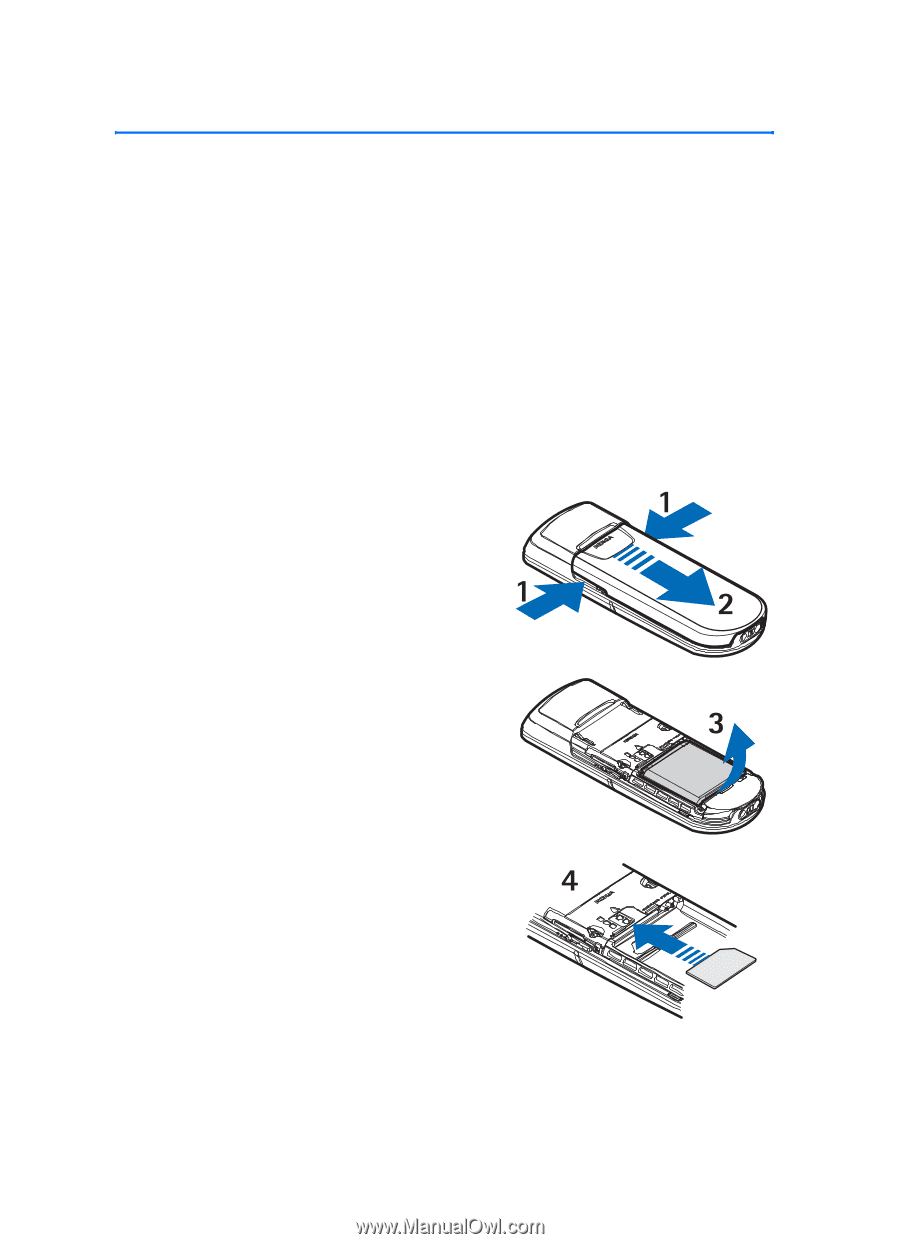
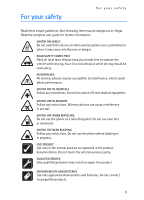
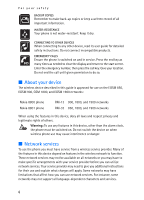
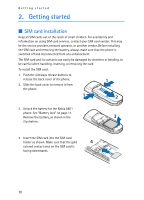
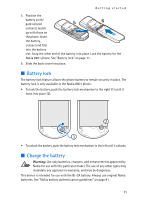
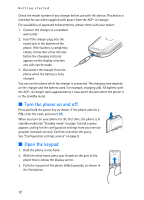
Getting started 2. Getting started ■ SIM card installation Keep all SIM cards out of the reach of small children. For availability and information on using SIM card services, contact your SIM card vendor. This may be the service provider, network operator, or another vendor. Before installing the SIM card and removing the battery, always make sure that the phone is switched off and disconnected from any enhancement. The SIM card and its contacts can easily be damaged by scratches or bending, so be careful when handling, inserting, or removing the card. To install the SIM card: 1. Push the sideways release buttons to release the back cover of the phone. 2. Slide the back cover to remove it from the phone. 3. Unlock the battery for the Nokia 8801 phone. See "Battery lock" on page 11. Remove the battery, as shown in the illustration. 4. Insert the SIM card into the SIM card holder as shown. Make sure that the gold colored contact area on the SIM card is facing downwards. 10
-
 1
1 -
2
-
3
-
4
-
5
-
 6
6 -
 7
7 -
 8
8 -
 9
9 -
 10
10 -
 11
11 -
 12
12 -
 13
13 -
 14
14 -
 15
15 -
 16
16 -
17
-
18
-
19
-
20
-
21
-
22
-
23
-
24
-
25
-
26
-
27
-
28
-
29
-
30
-
31
-
32
-
33
-
34
-
35
-
36
-
37
-
38
-
39
-
40
-
41
-
42
-
43
-
44
-
45
-
46
-
47
-
48
-
49
-
50
-
51
-
52
-
53
-
54
-
55
-
56
-
57
-
58
-
59
-
60
-
61
-
62
-
63
-
64
-
65
-
66
-
67
-
68
-
69
-
70
-
71
-
72
-
73
-
74
-
75
-
76
-
77
-
78
-
79
-
80
-
81
-
82
-
83
-
84
-
85
-
86
-
87
-
88
-
89
-
90
-
91
-
92
-
93
-
94
-
95
-
96
-
97
-
98
-
99
-
100
-
101
-
102
-
103
-
104
-
105
-
106
-
107
-
108
-
109
-
110
-
111
-
112
-
113
-
114
-
115
-
116
-
117
-
118
-
119
-
120
-
121
-
122
-
123
-
124
-
125
-
126
-
127
-
128
-
129
-
130
-
131
-
132
-
133
-
134
-
135
-
136
-
137
-
138
-
139
-
140
-
141
-
142
-
143
-
144
-
145
-
146
-
147
-
148
-
149
-
150
-
151
-
152
-
153
-
154
-
155
-
156
-
157
-
158
-
159
-
160
-
161
-
162
-
163
-
164
-
165
-
166
-
167
-
168
-
169
-
170
-
171
-
172
-
173
-
174
-
175
-
176
-
177
-
178
-
179
-
180
-
181
-
182
-
183
-
184
-
185
-
186
-
187
-
188
-
189
-
190
-
191
-
192
-
193
-
194
-
195
-
196
-
197
-
198
-
199
-
200
-
201
-
202
-
203
-
204
-
205
-
206
-
207
-
208
-
209
 |
 |