Nokia CARK 132 User Guide - Page 22
until it locks into its place 11.
 |
View all Nokia CARK 132 manuals
Add to My Manuals
Save this manual to your list of manuals |
Page 22 highlights
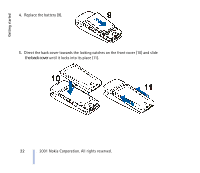
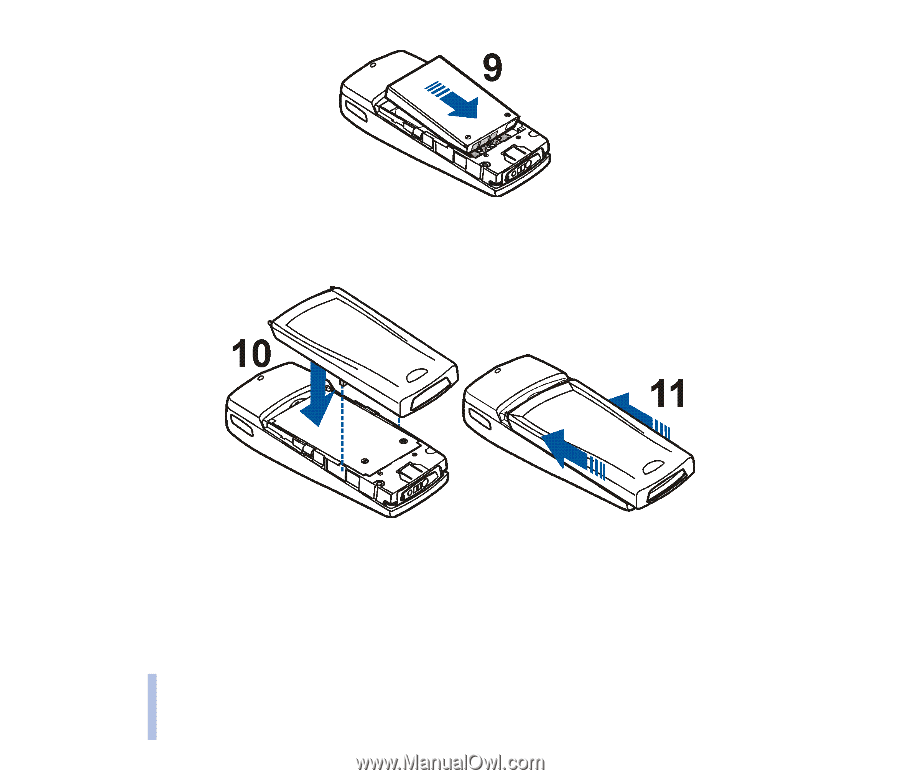
Getting started 4. Replace the battery (9). 5. Direct the back cover towards the locking catches on the front cover (10) and slide the back cover until it locks into its place (11). 22 ©2001 Nokia Corporation. All rights reserved.
-
 1
1 -
2
-
3
-
4
-
5
-
6
-
7
-
8
-
9
-
10
-
11
-
12
-
13
-
14
-
15
-
16
-
 17
17 -
 18
18 -
 19
19 -
 20
20 -
 21
21 -
 22
22 -
 23
23 -
 24
24 -
 25
25 -
 26
26 -
 27
27 -
28
-
29
-
30
-
31
-
32
-
33
-
34
-
35
-
36
-
37
-
38
-
39
-
40
-
41
-
42
-
43
-
44
-
45
-
46
-
47
-
48
-
49
-
50
-
51
-
52
-
53
-
54
-
55
-
56
-
57
-
58
-
59
-
60
-
61
-
62
-
63
-
64
-
65
-
66
-
67
-
68
-
69
-
70
-
71
-
72
-
73
-
74
-
75
-
76
-
77
-
78
-
79
-
80
-
81
-
82
-
83
-
84
-
85
-
86
-
87
-
88
-
89
-
90
-
91
-
92
-
93
-
94
-
95
-
96
-
97
-
98
-
99
-
100
-
101
-
102
-
103
-
104
-
105
-
106
-
107
 |
 |
©
2001 Nokia Corporation. All rights reserved.
Getting started
22
4.
Replace the battery (9).
5. Direct the back cover towards the locking catches on the front cover (10) and slide
the back cover
until it locks into its place (11).