Nokia E65 User Guide - Page 26
Change the barring password, Send DTMF tones, Video calls, Net calls, Define the net call settings - voip
 |
UPC - 641718271896
View all Nokia E65 manuals
Add to My Manuals
Save this manual to your list of manuals |
Page 26 highlights
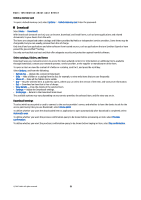
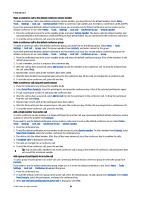
Telephone Change the barring password To change the password used for barring voice, fax, and data calls, select Menu > Tools > Settings > Call barring > Cellular call barring > Options > Edit barrings passw.. Enter the current code, then the new code twice. The barring password must be four digits long. For details, contact your service provider. Send DTMF tones You can send dual tone multi-frequency (DTMF) tones during an active call to control your voice mailbox or other automated phone services. To send a DTMF tone sequence, make a call, and wait until the other end answers. Select Menu > Options > Send DTMF. Type the DTMF tone sequence, or select a predefined sequence. To attach DTMF tone sequences to contact cards, press the contacts key. Open a contact, and select Options > Edit > Options > Add detail > DTMF. Enter the tone sequence. Press * three times to insert p, a pause of about 2 seconds before or between DTMF tones. Select Done. To set the device to send the DTMF tones only after you select Send DTMF during a call, press * four times to insert w. Video calls To be able to make a video call, you must be within coverage of a UMTS network. For availability of and subscription to video call services, contact your network operator or service provider. While talking, you can send a real-time video to the recipient's compatible mobile phone and see a real-time video sent by the recipient, if the recipient has a compatible mobile phone with a video camera. A video call can only be made between two parties. Warning: Do not hold the device near your ear when the loudspeaker is in use, because the volume may be extremely loud. To make a video call, enter the phone number or select the recipient of the call from Contacts, and select Options > Call > Video call. You cannot convert the video call to a normal voice call. To answer a video call, press the call key or open the slide. If Allow video image to be sent to caller? is shown on the display, select Yes to send a video to the caller or No to disable video sending. Tip: In case you do not want to send a video during video calls, you can send a still image instead. Select the still image to be sent in Menu > Tools > Settings > Call > Image in video call > Use selected. During the call, select Options and from the following: • Audio - Talk to the recipient of the call. • Use video - See video without audio. • Loudsp. - Select to use the loudspeaker for receiving audio. • Handset - Mute the loudspeaker and use the handset. Net calls With the net call service (network service), you can make and receive calls over the internet. Your device supports voice calls over the internet (net calls). Your device attempts emergency calls primarily over cellular networks. If an emergency call using cellular networks is not successful, your device attempts an emergency call through your net call provider. Due to the established nature of cellular telephony, you should use cellular networks for emergency calls, if possible. If you have cellular network coverage available, make sure that your cellular phone is switched on and ready to make calls before you attempt an emergency call. The capability for an emergency call using internet telephony depends on the availability of a WLAN network and your net call provider's implementation of emergency call capabilities. Contact your net call provider to check the internet telephony emergency call capability. VoIP (voice over internet protocol) technology is a set of protocols that facilitate phone calls over an IP network, such as the internet. VoIP phone calls can be established between computers, between mobile phones, and between a VoIP device and a traditional telephone. To make or receive a VoIP call, your device must be within WLAN coverage, for example. The availability of the net call service may vary according to your country or sales area. Define the net call settings Before you can make net calls, you need to define the net call settings. After you have defined the net call settings with these instructions, your device logs in to the net call service automatically when you select Menu > Connect. > Internet tel.. First: define a SIP profile 1. Select Menu > Tools > Settings > Connection > SIP settings > Options > Add new, and enter the required information. See "Edit SIP profiles," p. 79. You must define all available SIP settings, but ensure that Registration is set to Always on. Contact your net call provider for the correct information. 2. Select Proxy server, and set Transport type to Auto. © 2007 Nokia. All rights reserved. 26
-
 1
1 -
2
-
3
-
4
-
5
-
6
-
7
-
8
-
9
-
10
-
11
-
12
-
13
-
14
-
15
-
16
-
17
-
18
-
19
-
20
-
 21
21 -
 22
22 -
 23
23 -
 24
24 -
 25
25 -
 26
26 -
 27
27 -
 28
28 -
 29
29 -
 30
30 -
 31
31 -
32
-
33
-
34
-
35
-
36
-
37
-
38
-
39
-
40
-
41
-
42
-
43
-
44
-
45
-
46
-
47
-
48
-
49
-
50
-
51
-
52
-
53
-
54
-
55
-
56
-
57
-
58
-
59
-
60
-
61
-
62
-
63
-
64
-
65
-
66
-
67
-
68
-
69
-
70
-
71
-
72
-
73
-
74
-
75
-
76
-
77
-
78
-
79
-
80
-
81
-
82
-
83
-
84
-
85
-
86
-
87
-
88
-
89
-
90
-
91
-
92
-
93
-
94
-
95
-
96
-
97
-
98
-
99
 |
 |
