Oki C711WT C711WT Users Guide - Page 69
Nstalling, Upgrades
 |
View all Oki C711WT manuals
Add to My Manuals
Save this manual to your list of manuals |
Page 69 highlights
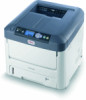
INSTALLING UPGRADES This section explains how to install optional equipment into your printer. This includes: > additional RAM memory > additional paper tray(s) > cabinet MEMORY UPGRADE The basic printer model comes equipped with 256MB of main memory. This can be upgraded with an additional memory board of 256MB or 512MB, giving a maximum total memory capacity of 768MB. 1. Switch the printer off and disconnect the AC power cable. 2. Press the cover release and open the printer's top cover fully. WARNING! If the printer has been powered on recently, the fuser will be hot. This area is clearly labelled. Do not touch. 3. Pull down the MP Tray using the depressions. Lift the front cover release lever and lower the front cover. 4. Loosen the screw (a) securing the right-hand side cover. Installing upgrades > 69
-
 1
1 -
2
-
3
-
4
-
5
-
6
-
7
-
8
-
9
-
10
-
11
-
12
-
13
-
14
-
15
-
16
-
17
-
18
-
19
-
20
-
21
-
22
-
23
-
24
-
25
-
26
-
27
-
28
-
29
-
30
-
31
-
32
-
33
-
34
-
35
-
36
-
37
-
38
-
39
-
40
-
41
-
42
-
43
-
44
-
45
-
46
-
47
-
48
-
49
-
50
-
51
-
52
-
53
-
54
-
55
-
56
-
57
-
58
-
59
-
60
-
61
-
62
-
63
-
 64
64 -
 65
65 -
 66
66 -
 67
67 -
 68
68 -
 69
69 -
 70
70 -
 71
71 -
 72
72 -
 73
73 -
 74
74 -
75
-
76
-
77
-
78
-
79
-
80
-
81
-
82
-
83
-
84
 |
 |
