Onkyo TX SR576 Owner Manual - Page 66
Listening Mode Presets (TX-SR576 only), A/PCM, Dolby, DF2ch, MCH P
 |
UPC - 751398008078
View all Onkyo TX SR576 manuals
Add to My Manuals
Save this manual to your list of manuals |
Page 66 highlights
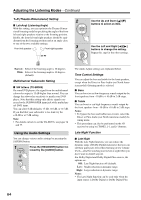
Adjusting the Listening Modes-Continued Listening Mode Presets (TX-SR576 only) On the Listening Mode Preset menu, you can specify a default listening mode for each of the audio formats supported by each input selector. The AV receiver will then select the listening mode automatically depending on the format of the input signal. You can still select the other listening modes, although the default listening mode will be used the next time you turn on the AV receiver. 1 Press the [RECEIVER] REMOTE MODE button, followed by the [SETUP] button. 2 Use the Up and Down [ ]/[ ] buttons to select "5.Listening- Mode," and then press [ENTER]. 3 Use the Up and Down [ ]/[ ] buttons to select an input selec- tor, and then press [ENTER]. The audio formats supported by that input selector appear. For the TUNER input selector, Anlg (Analog) is the only format available. 4 Use the Up and Down [ ]/[ ] buttons to select an audio for- mat, and use the Left and Right [ ]/[ ] buttons to select a lis- tening mode. Only listening modes compatible with the audio format can be selected (see pages 56-58). A/PCM: Specifies the default listening mode for analog and PCM sources. Dolby: Specifies the default listening mode for Dolby Digital sources. DTS: Specifies the default listening mode for DTS sources. DF2ch: Specifies the default listening mode for 2-channel (2/0) stereo sources in a digital format, such as Dolby Digital or DTS. Mono: Specifies the default listening mode for mono sources in a digital format, such as Dolby Digital or DTS. MCH P: Specifies the default listening mode for multichannel PCM sources, such as DVD-Audio (input via HDMI). 192k: Specifies the default listening mode for high resolution 192kHz and 176.4kHz digital sources, such as DVD-Audio. 5 When you've finished, press the [SETUP] button. Setup closes. Note: • This procedure can also be performed on the AV receiver by using its [SETUP], [ENTER], and arrow buttons. 66
-
 1
1 -
2
-
3
-
4
-
5
-
6
-
7
-
8
-
9
-
10
-
11
-
12
-
13
-
14
-
15
-
16
-
17
-
18
-
19
-
20
-
21
-
22
-
23
-
24
-
25
-
26
-
27
-
28
-
29
-
30
-
31
-
32
-
33
-
34
-
35
-
36
-
37
-
38
-
39
-
40
-
41
-
42
-
43
-
44
-
45
-
46
-
47
-
48
-
49
-
50
-
51
-
52
-
53
-
54
-
55
-
56
-
57
-
58
-
59
-
60
-
 61
61 -
 62
62 -
 63
63 -
 64
64 -
 65
65 -
 66
66 -
 67
67 -
 68
68 -
 69
69 -
 70
70 -
 71
71 -
72
-
73
-
74
-
75
-
76
-
77
-
78
-
79
-
80
-
81
-
82
-
83
-
84
-
85
-
86
-
87
-
88
-
89
-
90
-
91
-
92
-
93
-
94
-
95
-
96
 |
 |
