Optoma CinemaX P2 SmartFIT Installation Guide - Page 16
Most Fixed Frame Screens, including Optoma ALR-101 and ALR-101e
 |
View all Optoma CinemaX P2 manuals
Add to My Manuals
Save this manual to your list of manuals |
Page 16 highlights
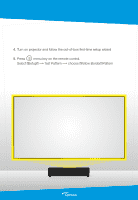
8. Mount the Fixed Frame Screen to the Wall using the yellow screen pattern as a guide. NOTE: Yellow frame MUST be inside of the Fixed Frame Screen. Due to the depth of some screens it may be necessary to move the Projector back an inch or two. 9. Fixed Frame Screen Installation Tip: Most Fixed Frame Screens, including Optoma ALR-101 and ALR-101e include 4 mounting brackets. To ensure the Fixed Frame Screen is flat against the wall and even - use all 4 mounting brackets. 10. Once the Fixed Frame screen has been mounted and secured with all 4 mounting brackets - the projector is ready for viewing.
-
 1
1 -
2
-
3
-
4
-
5
-
6
-
7
-
8
-
9
-
10
-
 11
11 -
 12
12 -
 13
13 -
 14
14 -
 15
15 -
 16
16 -
 17
17 -
 18
18
 |
 |
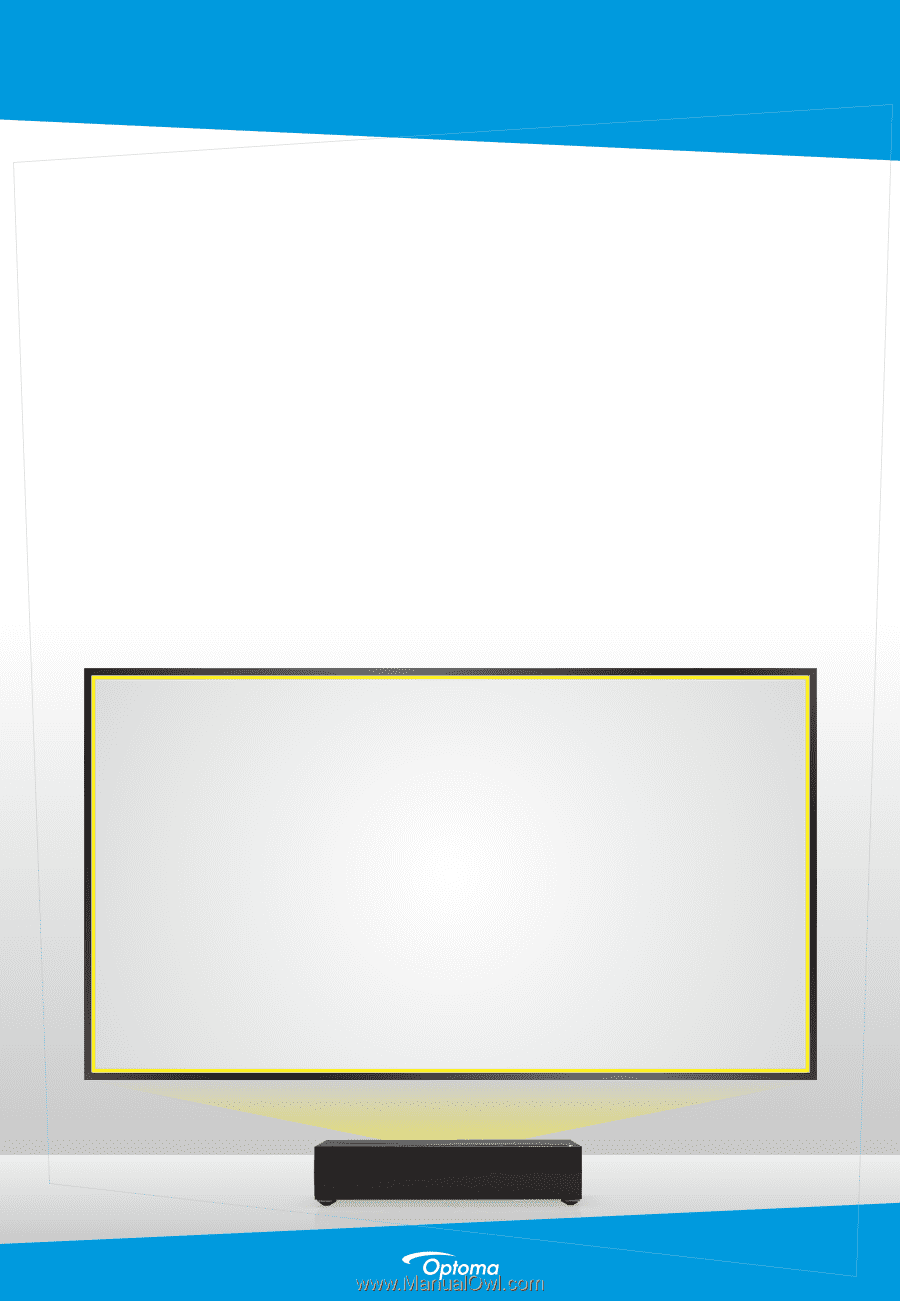
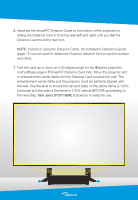
Mount the Fixed Frame Screen to the Wall using the yellow screen pattern as
a guide.
NOTE:
Yellow frame MUST be inside of the Fixed Frame Screen. Due to the
depth of some screens it may be necessary to move the Projector back an
inch or two.
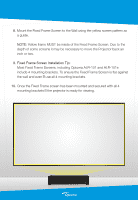
Fixed Frame Screen Installation Tip:
Most Fixed Frame Screens, including Optoma ALR-101 and ALR-101e
include 4 mounting brackets. To ensure the Fixed Frame Screen is flat against
the wall and even – use all 4 mounting brackets.
Once the Fixed Frame screen has been mounted and secured with all 4
mounting brackets – the projector is ready for viewing.
8.
9.
10.