Optoma CinemaX P2 SmartFIT Installation Guide - Page 18
The mount hole pattern and screw size
 |
View all Optoma CinemaX P2 manuals
Add to My Manuals
Save this manual to your list of manuals |
Page 18 highlights
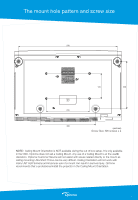
The mount hole pattern and screw size 530 135 256 235 300 (unit:mm) Screw Size: M6 screws x 4 NOTE : Ceiling Mount Orientation is NOT available during the out of box setup. It is only available in the OSD. Optoma does not sell a Ceiling Mount. Any use of a Ceiling Mount is at the user's discretion. Optoma Customer Service will not assist with issues related directly to the mount as ceiling mounting Ultra Short Throw can be very difficult. Ceiling Orientation will not work with many UST ALR Screens and improper use of a mount can result in serious injury. Optoma recommends that a professional install the projector in the Ceiling Mount Orientation.
-
 1
1 -
2
-
3
-
4
-
5
-
6
-
7
-
8
-
9
-
10
-
11
-
12
-
 13
13 -
 14
14 -
 15
15 -
 16
16 -
 17
17 -
 18
18
 |
 |
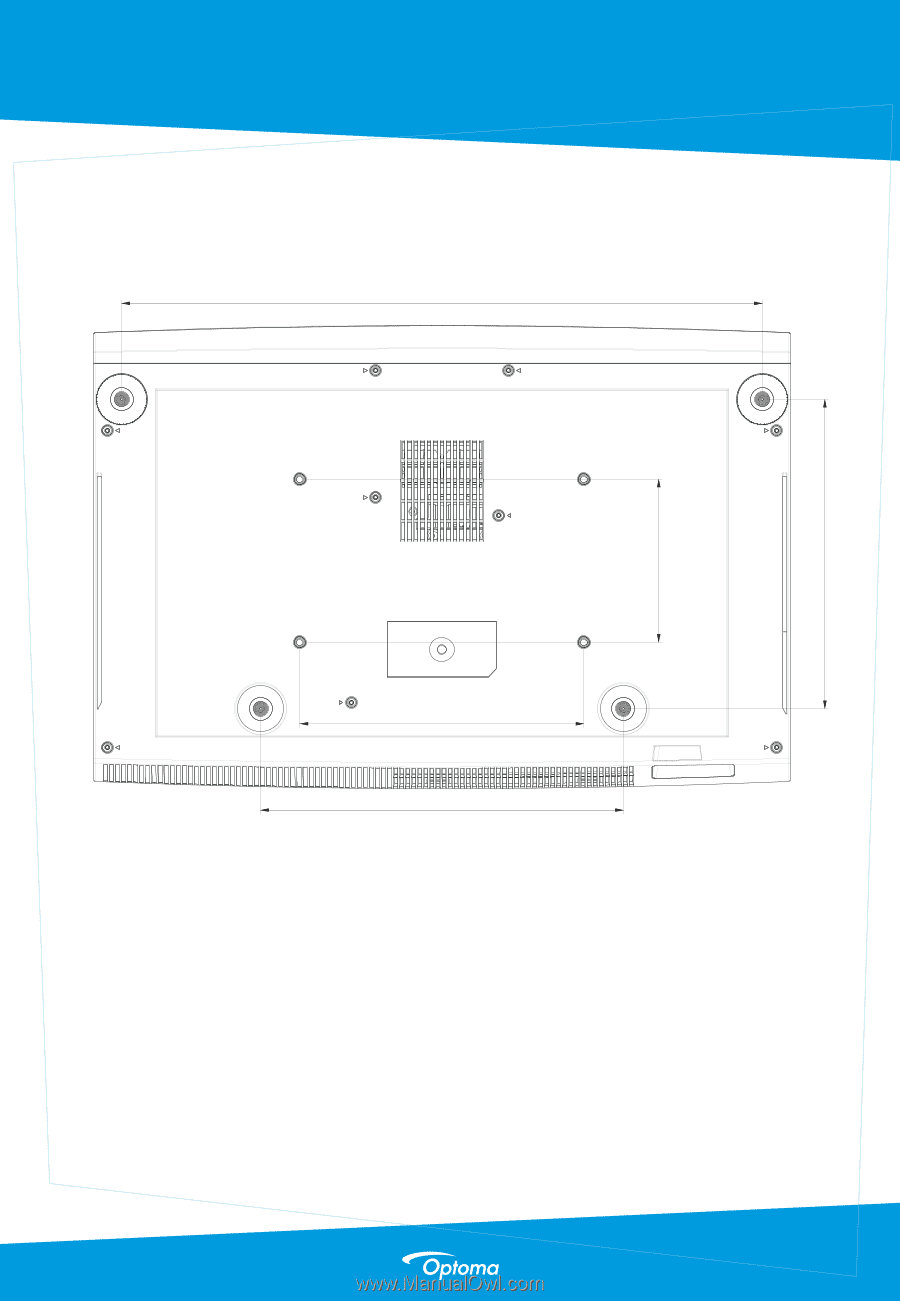
The mount hole pattern and screw size
NOTE :
Ceiling Mount Orientation is NOT available during the out of box setup. It is only available
in the OSD. Optoma does not sell a Ceiling Mount. Any use of a Ceiling Mount is at the user’s
discretion. Optoma Customer Service will not assist with issues related directly to the mount as
ceiling mounting Ultra Short Throw can be very difficult. Ceiling Orientation will not work with
many UST ALR Screens and improper use of a mount can result in serious injury. Optoma
recommends that a professional install the projector in the Ceiling Mount Orientation.
Screw Size: M6 screws x 4
(unit:mm)
300
235
530
135
256