Oregon Scientific WMR100N User Manual - Page 5
Outdoor Temperature / Humidity Sensor, Getting Started, Set Up Remote Wind Sensor, Set Up Remote
 |
View all Oregon Scientific WMR100N manuals
Add to My Manuals
Save this manual to your list of manuals |
Page 5 highlights
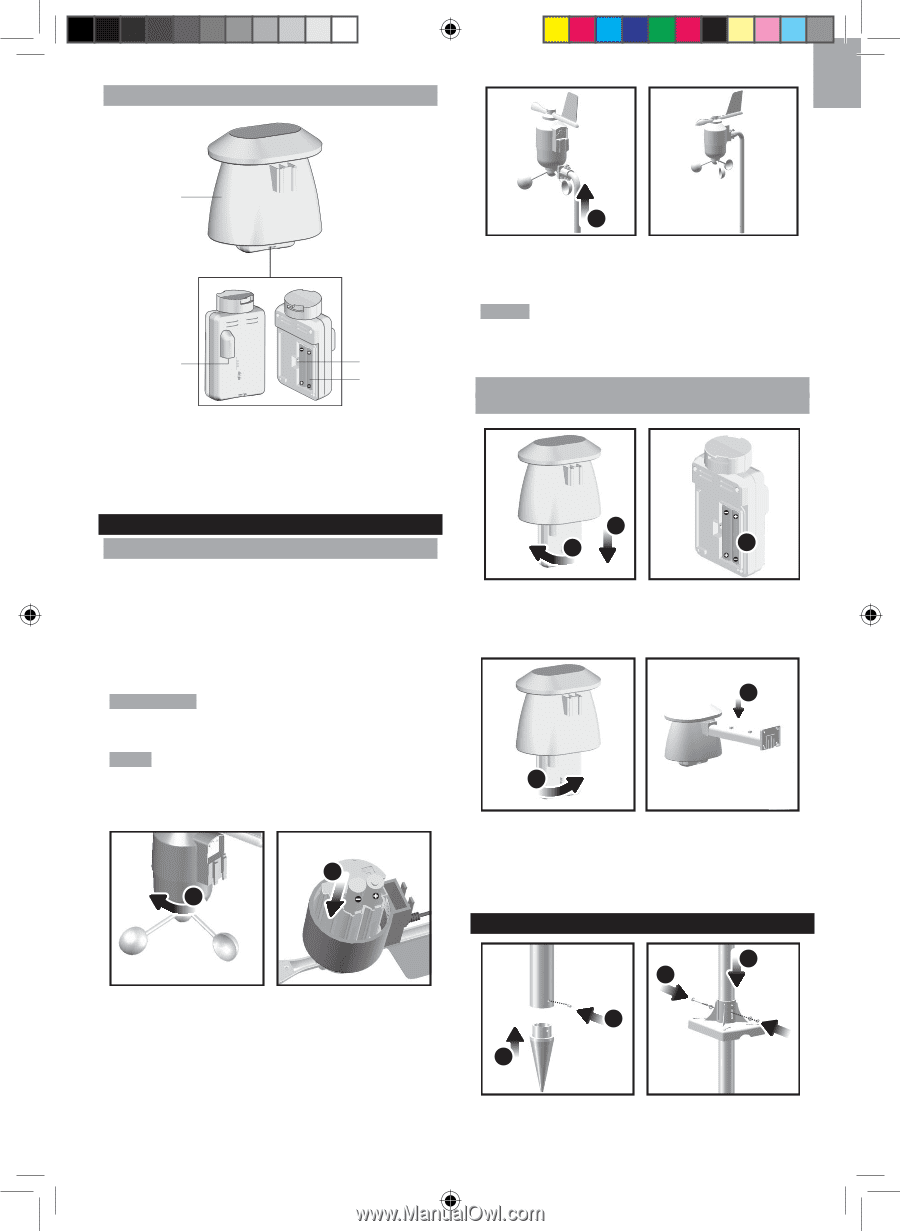
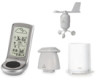
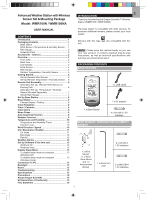
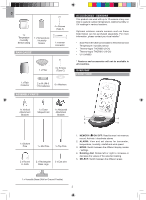
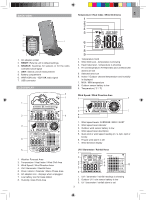
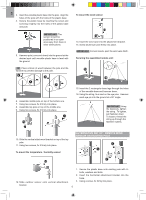
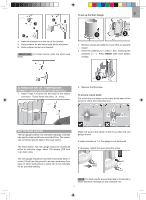
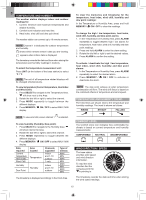
EN OUTDOOR TEMPERATURE / HUMIDITY SENSOR 1 3 3. Slide wind vane onto the end of the plastic attachment located on the aluminium pole. 2 3 4 1. Temperature / humidity sensor casing 2. Solar power socket 3. RESET button 4. Battery compartment GETTING STARTED SET UP REMOTE WIND SENSOR The wind sensor takes wind speed and direction readings. The sensor is battery operated. It is capable of transmitting data to the base station wirelessly within an approximate operating range of 100 meters (328 feet). IMPORTANT Ensure that the wind sensor is pointing North to enable it to record accurate readings. NOTE Use alkaline batteries for longer usage and consumer grade lithium batteries in temperatures below freezing. SET UP REMOTE TEMPERATURE / HUMIDITY SENSOR 2 1 3 1. Holding sensor, twist and click to the left. 2. Pull sensor away from casing. 3. Insert batteries matching the polarities (+ / -). Press RESET after each battery change. 5 NOTE The sensor should be positioned in an open area away from trees or other obstructions. 4 To insert batteries: 2 1 4. Insert sensor into the casing, twist and click to the right to secure. 5. Slide temperature and humidity sensor onto the smaller end of the sensor connector. REMOTE UNIT ASSEMBLY 1. Unscrew the anemometer from the wind sensor carefully. 2. Insert batteries matching the polarities (+ / -) and replace the anemometer. Press RESET after each 1 battery change. 3 4 2 1. Insert the cone-shaped end into the pole. 2. Using 2 screws, fix it firmly into place. 5
-
 1
1 -
 2
2 -
 3
3 -
 4
4 -
 5
5 -
 6
6 -
 7
7 -
 8
8 -
 9
9 -
 10
10 -
 11
11 -
12
-
13
-
14
-
15
 |
 |