Oregon Scientific WMR100N User Manual - Page 7
Alternative Set Up, Temperature, Humidity Sensor Mounted Separately, Set Up Rain Gauge
 |
View all Oregon Scientific WMR100N manuals
Add to My Manuals
Save this manual to your list of manuals |
Page 7 highlights
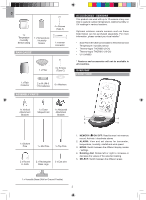
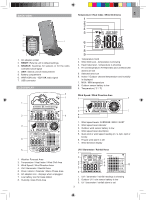
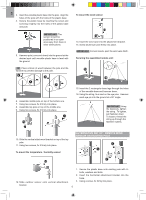
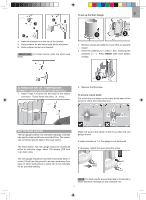
EN 6 146 To set up the Rain Gauge: 5 4. Insert wind sensor into the top of the bracket. 5. Using screws, fix aluminium pole firmly into place. 6. Slide outdoor sensor onto bracket. IMPORTANT For best results, point the wind vane North. 1 2 1. Remove screws and slide the cover off in an upwards motion. 2. Insert the batteries (2 x UM-3 / AA), matching the polarities (+ / -). Press RESET after each battery change. ALTERNATIVE SET UP: TEMPERATURE / HUMIDITY SENSOR MOUNTED SEPARATELY 1. Insert 4 type A screws into the holes of the sensor connector. Screw firmly into place, i.e., fence. 3 3. Remove the fibre tape. To ensure a level plane: Put a few drops of water on the cross at the base of the funnel to check the horizontal level. 1 3 2 4 SET UP RAIN GAUGE The rain gauge collects rain and takes readings of rainfall rate and the total rainfall over a period of time. The sensor can remotely transmit data to the base station. The base station and rain gauge should be positioned within an effective range: about 100 meters (328 feet) in an open area. The rain gauge should be mounted horizontally about 1 meter (3 feet) from the ground in an open area away from trees or other obstructions to allow rain to fall naturally for an accurate reading. Water will pool to the center of the cross when the rain gauge is level. If water remains on 1-4, the gauge is not horizontal. If necessary, adjust the level using the screw. NOTE For best results, ensure the base is horizontal to allow maximum drainage of any collected rain. 7
-
 1
1 -
 2
2 -
 3
3 -
 4
4 -
 5
5 -
 6
6 -
 7
7 -
 8
8 -
 9
9 -
 10
10 -
 11
11 -
 12
12 -
13
-
14
-
15
 |
 |
