Panasonic DMR-ES46VS Dvd Recorder-english/spanish - Page 22
Clock Settings, Select Set Clock Automatically
 |
UPC - 037988254330
View all Panasonic DMR-ES46VS manuals
Add to My Manuals
Save this manual to your list of manuals |
Page 22 highlights
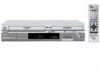
Other settings DVD/VHS POWER POWER DRIVE SELECT TV/VIDEO CH VOLUME TRACKING/V-LOCK 123 CH 456 7 8 9 ADD/DLT CH 0 CANCEL INPUT DELETE SELECT RESET SLOW/SEARCH SKIP/INDEX REW FF STOP PAUSE PLAY TIME SLIP/ JET REW SCHEDULE CM SKIP CH, W, X DIRECT NAVIGATOR FUNCTIONS 3, 4, 2, 1 ENTER ENTER SUB MENU RETURN CREATE AUDIO DISPLAY CHAPTER VCR/TV AB REC REC MODE STATUS F Rec FUNCTIONS RETURN VCR/TV Clock Settings "Clock Settings" made here are applied to VHS as well. [1] While stopped Press [FUNCTIONS]. No Disc FUNCTIONS No Disc Program Copy Other Functions ENTER RETURN [2] Select "Other Functions" with [3, 4] and press [ENTER]. [3] Select "Setup" with [3, 4] and press [ENTER]. [4] Select "Setup" with [3, 4] and press [2, 1]. Setup Channel Setup Disc Video Audio Display TV Screen VHS Off Timer 6 Hours Remote Control Code Set Code 1 Clock Settings Quick Start On Restore Default Settings [5] Select "Clock Settings" with [3, 4] and press [ENTER]. ∫ Set Clock Automatically [6] Select "Set Clock Automatically" with [3, 4] and press [ENTER]. [7] Press [ENTER]. ≥Auto setting starts. This can take some time, up to a few hours in some cases. The following screen appears when setting is complete. Set Clock Automatically Auto Clock Setting is complete. 4/4/2007 11:15 AM DST On Time Zone--------- CST ≥If the time was not set correctly, use manual clock setting or time zone adjust. 22 ≥DST, (Daylight Saving Time) shows the summertime setting. RQTV0141 ≥Time Zone shows the time difference from Greenwich Mean Time (GMT). EST (Eastern Standard Time) l GMT j5 CST (Central Standard Time) l GMT j6 MST (Mountain Standard Time)l GMT j7 PST (Pacific Standard Time) l GMT j8 AST (Alaska Standard Time) l GMT j9 HST (Hawaii Standard Time) l GMT j10 For other areas: xx hr [8] Press [ENTER]. ∫ To cancel in the middle Press [RETURN]. ∫ Adjust Time Zone ≥Follow steps 1 to 5 of "Clock Settings". Adjust the time zone (j1 or i1) if it was not set correctly with auto clock setting. You can set this menu only after "Set Clock Automatically" is completed. [6] Select "Adjust Time Adjust Time Zone Zone" with [3, 4] and j1 press [ENTER]. 0 [7] Select "j1" or "i1" i1 with [3, 4] and press [ENTER]. ∫ To return to the previous screen Press [RETURN].
-
 1
1 -
2
-
3
-
4
-
5
-
6
-
7
-
8
-
9
-
10
-
11
-
12
-
13
-
14
-
15
-
16
-
 17
17 -
 18
18 -
 19
19 -
 20
20 -
 21
21 -
 22
22 -
 23
23 -
 24
24 -
 25
25 -
 26
26 -
 27
27 -
28
-
29
-
30
-
31
-
32
-
33
-
34
-
35
-
36
-
37
-
38
-
39
-
40
-
41
-
42
-
43
-
44
-
45
-
46
-
47
-
48
-
49
-
50
-
51
-
52
-
53
-
54
-
55
-
56
-
57
-
58
-
59
-
60
-
61
-
62
-
63
-
64
-
65
-
66
-
67
-
68
-
69
-
70
-
71
-
72
-
73
-
74
-
75
-
76
-
77
-
78
-
79
-
80
-
81
-
82
-
83
-
84
-
85
-
86
-
87
-
88
 |
 |
