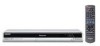
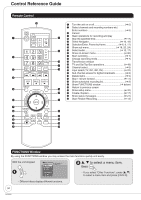
Panasonic DMREZ17K Dvd Recorder - Page 47
Clock Settings, Automatic Off Timer, Automatically, then
 |
View all Panasonic DMREZ17K manuals
Add to My Manuals
Save this manual to your list of manuals |
Page 47 highlights
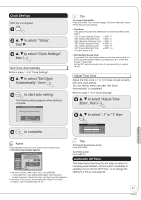
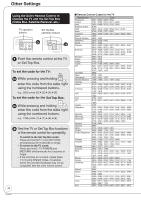
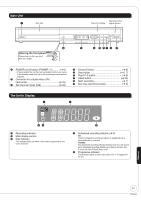
Clock Settings With the unit stopped e, r to select "Setup", then q. e, r to select "Clock Settings", then Set Clock Automatically Perform steps 1-3 of "Clock Settings". e, r to select "Set Clock Automatically", then to start auto setting. The following dialog appears when setting is complete. Set Clock Automatically Clock Setting completed successfully. 4/4/2006 12:15 AM DST On Time Zone.......... EST to complete. Tips To cancel in the middle Press [RETURN]. The unit then displays "Set Clock Manually" screen (➔ 45, Manual Clock Setting). • Time Zone Time Zone shows the time difference from Greenwich Mean Time (GMT). EST (Eastern Standard Time) = GMT -5 CST (Central Standard Time) = GMT -6 MST (Mountain Standard Time) = GMT -7 PST (Pacific Standard Time) = GMT -8 AST (Alaska Standard Time) = GMT -9 HST (Hawaii Standard Time) = GMT -10 For other areas: xx hr • DST (Daylight Saving Time) If you select "On", the clock is advanced one hour starting at 2 a.m. on the second Sunday in March and ending at 2 a.m. on the first Sunday in November. Set the DST period manually when it varies according to regions (➔ 45). Adjust Time Zone Adjust the time zone (-1 or 1) if it was not set correctly with auto clock setting. You can set this menu only after "Set Clock Automatically" is completed. Perform steps 1-3 of "Clock Settings". e, r to select "Adjust Time Zone", then e, r to select "-1" or "1" then Adjust Time Zone 0 Connection and Setting Notes • This may take some time, up to a few hours in some cases. • If the following message appears Setup Channel Setup Disc Video Audio Display TV Screen Set Clock Automatically Setting completed as follows. Finished the setup with this clock time? Note: Selecting "No" will start channel scanning again and renew the clock time. Yes No 12/14/2005 5:28 AM DST Off Time Zone....... EST ENTER RETURN If the time is correct, w to select "Yes", then [ENTER]. - If you select "No", auto setting starts again, then the above screen reappears. Repeat this step until the correct time appears. • If the clock is not correct, set the clock with "Adjust Time Zone" (➔ right) or "Set Clock Manually"(➔ 32). Tips To return to the previous screen Press [RETURN]. To exit the screen Press [SETUP]. Automatic Off Timer This determines how long the unit stays on when it's not being used. Default = 6 hours (then it switches to standby) To turn off the "Off Timer", or to change the setting to 2 hours, see page 32. 47 RQT8850
-
 1
1 -
2
-
3
-
4
-
5
-
6
-
7
-
8
-
9
-
10
-
11
-
12
-
13
-
14
-
15
-
16
-
17
-
18
-
19
-
20
-
21
-
22
-
23
-
24
-
25
-
26
-
27
-
28
-
29
-
30
-
31
-
32
-
33
-
34
-
35
-
36
-
37
-
38
-
39
-
40
-
41
-
 42
42 -
 43
43 -
 44
44 -
 45
45 -
 46
46 -
 47
47 -
 48
48 -
 49
49 -
 50
50 -
 51
51 -
 52
52 -
53
-
54
-
55
-
56
-
57
-
58
-
59
-
60
-
61
-
62
-
63
-
64
-
65
-
66
-
67
-
68
-
69
-
70
-
71
-
72
 |
 |
