Panasonic HC-WXF991K Advanced Operating Manual - Page 50
HDR Movie Mode
 |
View all Panasonic HC-WXF991K manuals
Add to My Manuals
Save this manual to your list of manuals |
Page 50 highlights
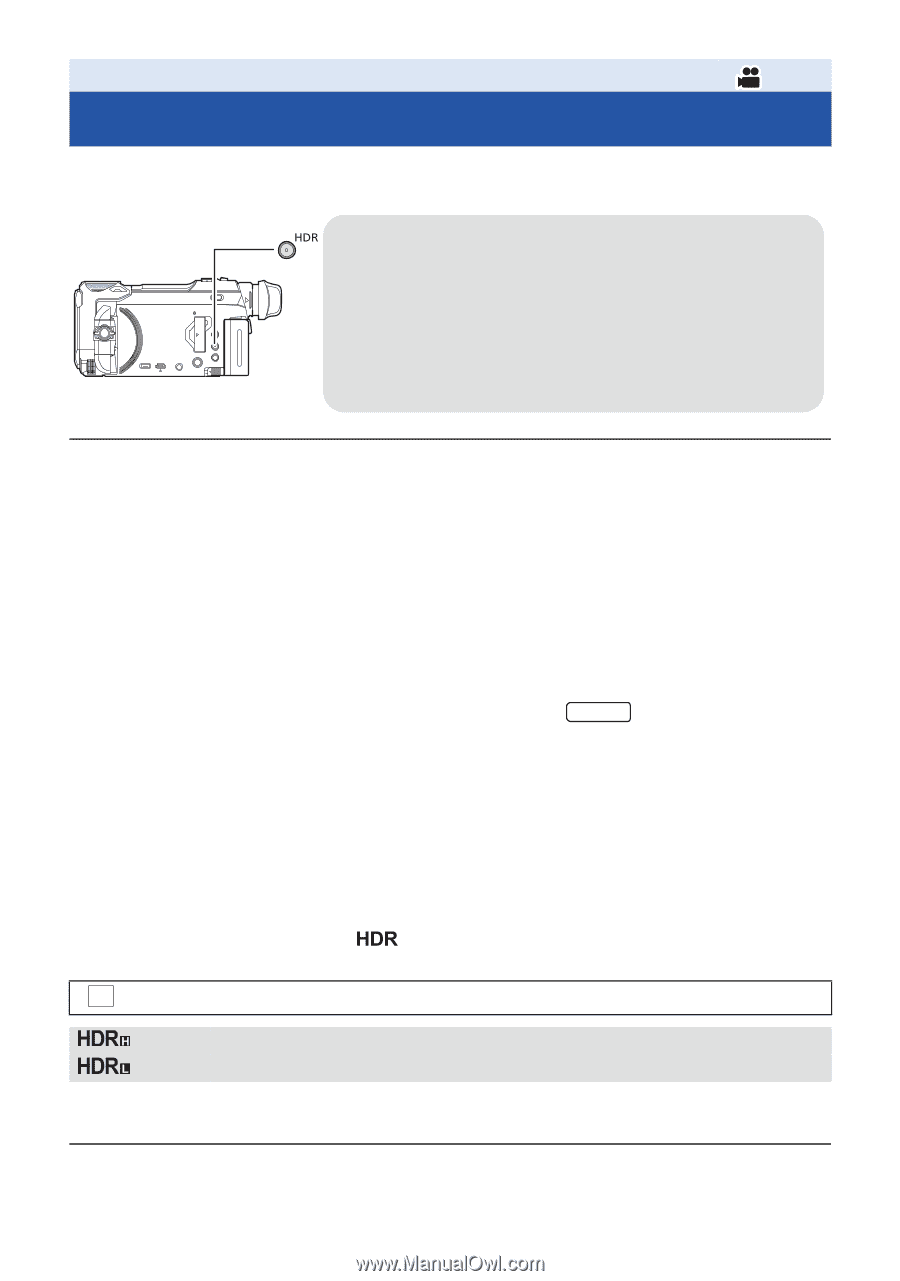
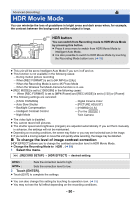
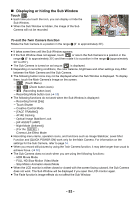
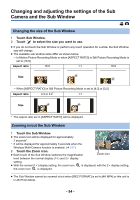
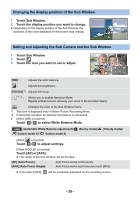
Advanced (Recording) HDR Movie Mode You can minimize the loss of gradations in bright areas and dark areas when, for example, the contrast between the background and the subject is large. ラュン HDR button You can switch from Recording mode to HDR Movie Mode by pressing this button. ≥ Press it once more to switch from HDR Movie Mode to Intelligent Auto Mode. ≥ It is also possible to switch to HDR Movie Mode by touching the Recording Mode button icon. (l 59) ≥ This unit will be set to Intelligent Auto Mode if you turn it off and on. ≥ This function is not available in the following cases: j During motion picture recording j When [REC FORMAT] is set to [4K MP4] or [24p]. j When the Recording Mode is set to 4K Photo Mode j When the Wireless Twin/Multi-Camera function is in use ≥ [REC MODE] is set to [1080/28M] in the following cases: j When [REC FORMAT] is set to [MP4/iFrame] and [REC MODE] is set to [720] or [iFrame] ≥ The following settings are canceled: j [FACE FRAMING] j Auto Slow Shutter j Backlight Compensation j Intelligent Contrast Control j Night Mode j Digital Cinema Color j [PICTURE ADJUST] j [HYBRID O.I.S.] j (For the WXF991 ) Twin Camera ≥ The video light is disabled. ≥ You cannot record still pictures. ≥ The shutter speed and brightness (iris/gain) are adjusted automatically. If you set them manually in advance, the settings will not be maintained. ≥ Depending on recording conditions, the screen may flicker or you may see horizontal bars in the image. ≥ If you record a moving subject or move this unit quickly while recording, the image may be distorted. ∫ To change the level of image contrast correction [HDR EFFECT] allows you to change the contrast correction level in HDR Movie Mode. ≥ Change the Recording Mode to . (l 59) 1 Select the menu. MENU : [RECORD SETUP] # [HDR EFFECT] # desired setting : Sets the correction level to high. : Sets the correction level to low. 2 Touch [ENTER]. ≥ Touch [EXIT] to complete the settings. ≥ You can also change this setting by touching its operation icon. (l 83) ≥ You may not see the full effect depending on the recording conditions. - 50 -
-
 1
1 -
2
-
3
-
4
-
5
-
6
-
7
-
8
-
9
-
10
-
11
-
12
-
13
-
14
-
15
-
16
-
17
-
18
-
19
-
20
-
21
-
22
-
23
-
24
-
25
-
26
-
27
-
28
-
29
-
30
-
31
-
32
-
33
-
34
-
35
-
36
-
37
-
38
-
39
-
40
-
41
-
42
-
43
-
44
-
 45
45 -
 46
46 -
 47
47 -
 48
48 -
 49
49 -
 50
50 -
 51
51 -
 52
52 -
 53
53 -
 54
54 -
 55
55 -
56
-
57
-
58
-
59
-
60
-
61
-
62
-
63
-
64
-
65
-
66
-
67
-
68
-
69
-
70
-
71
-
72
-
73
-
74
-
75
-
76
-
77
-
78
-
79
-
80
-
81
-
82
-
83
-
84
-
85
-
86
-
87
-
88
-
89
-
90
-
91
-
92
-
93
-
94
-
95
-
96
-
97
-
98
-
99
-
100
-
101
-
102
-
103
-
104
-
105
-
106
-
107
-
108
-
109
-
110
-
111
-
112
-
113
-
114
-
115
-
116
-
117
-
118
-
119
-
120
-
121
-
122
-
123
-
124
-
125
-
126
-
127
-
128
-
129
-
130
-
131
-
132
-
133
-
134
-
135
-
136
-
137
-
138
-
139
-
140
-
141
-
142
-
143
-
144
-
145
-
146
-
147
-
148
-
149
-
150
-
151
-
152
-
153
-
154
-
155
-
156
-
157
-
158
-
159
-
160
-
161
-
162
-
163
-
164
-
165
-
166
-
167
-
168
-
169
-
170
-
171
-
172
-
173
-
174
-
175
-
176
-
177
-
178
-
179
-
180
-
181
-
182
-
183
-
184
-
185
-
186
-
187
-
188
-
189
-
190
-
191
-
192
-
193
-
194
-
195
-
196
-
197
-
198
-
199
-
200
-
201
-
202
-
203
-
204
-
205
-
206
-
207
-
208
-
209
-
210
-
211
-
212
-
213
-
214
-
215
-
216
-
217
-
218
-
219
-
220
-
221
-
222
-
223
-
224
-
225
-
226
-
227
-
228
-
229
-
230
-
231
-
232
-
233
-
234
-
235
-
236
-
237
-
238
-
239
-
240
-
241
-
242
-
243
-
244
-
245
-
246
-
247
-
248
-
249
-
250
-
251
-
252
-
253
-
254
-
255
-
256
-
257
-
258
-
259
-
260
-
261
-
262
 |
 |