Panasonic KX-HNS101 Operating Instructions CA - Page 7
Setup, Part names and functions, LED indicator, Setup overview
 |
View all Panasonic KX-HNS101 manuals
Add to My Manuals
Save this manual to your list of manuals |
Page 7 highlights
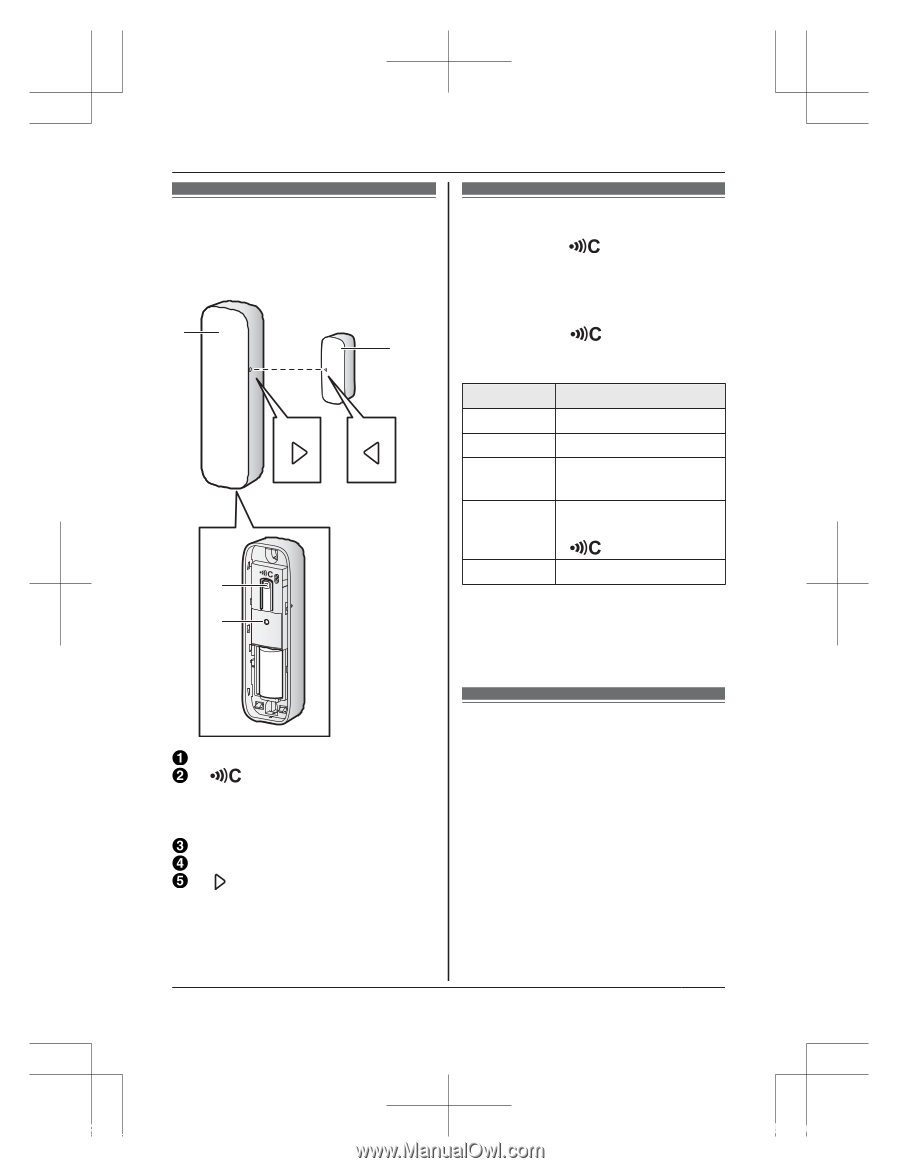
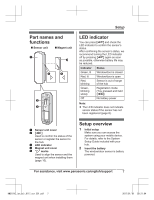
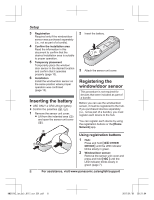
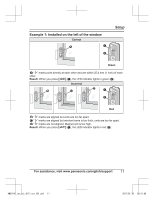
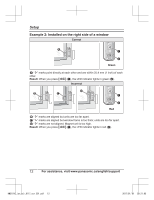
Part names and functions n Sensor unit n Magnet unit A D E E B C Setup LED indicator You can press M N and check the LED indicator to confirm the sensor's status. After confirming the sensor's status, we recommend turning the LED indicator off by pressing M N again as soon as possible, otherwise battery life may be reduced. Indicator Green, lit Red, lit Red, blinking Green, blinking slowly Off Status Window/door is closed Window/door is open Sensor is out of range of the hub Registration mode (You pressed and held M N) No battery power Note: R The LED indicator does not indicate sensor status if the sensor has not been registered (page 8). Sensor unit cover MN Used to confirm the status of the sensor or register the sensor to the hub. LED indicator Magnet unit cover " " marks Used to align the sensor and the magnet unit when installing them (page 10). Setup overview 1 Initial setup Make sure you can access the system using your mobile device. For details, refer to the System Setup Guide included with your hub. 2 Insert the battery The window/door sensor is battery powered. For assistance, visit www.panasonic.ca/english/support 7 HNS101C_(en_en)_0117_ver.201.pdf 7 2017/01/19 20:21:04
-
 1
1 -
 2
2 -
 3
3 -
 4
4 -
 5
5 -
 6
6 -
 7
7 -
 8
8 -
 9
9 -
 10
10 -
 11
11 -
 12
12 -
13
-
14
-
15
-
16
-
17
-
18
-
19
-
20
-
21
-
22
-
23
-
24
-
25
-
26
-
27
-
28
-
29
-
30
-
31
-
32
-
33
-
34
-
35
-
36
-
37
-
38
-
39
-
40
-
41
-
42
-
43
-
44
 |
 |