Panasonic KX-HNS101 Operating Instructions CA - Page 8
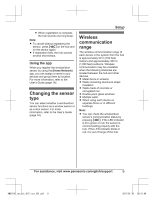
Inserting the battery, Registering the window/door sensor, Using registration buttons
 |
View all Panasonic KX-HNS101 manuals
Add to My Manuals
Save this manual to your list of manuals |
Page 8 highlights
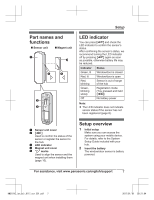
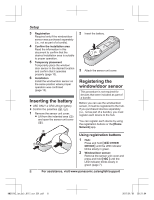
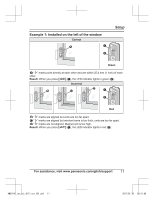
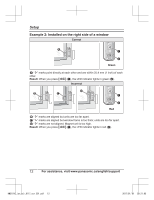
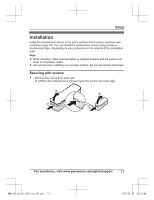
Setup 3 Registration Required only if the window/door sensor was purchased separately (i.e., not as part of a bundle). 4 Confirm the installation area Read the information in this document to confirm that the desired installation area is suitable to proper operation. 5 Temporary placement Temporarily place the window/ door sensor in the desired location and confirm that it operates properly (page 10). 6 Installation Install the window/door sensor on the same position where proper operation was confirmed (page 13). Inserting the battery R USE ONLY a CR2 Lithium battery. R Confirm the polarities ( , ). 1 Remove the sensor unit cover. R Lift from the indented area (A) and open the sensor unit cover (B). 2 1 2 Insert the battery. 3 Attach the sensor unit cover. Registering the window/door sensor This procedure is not required for devices that were included as part of a bundle. Before you can use the window/door sensor, it must be registered to the hub. If you purchased devices separately (i.e., not as part of a bundle), you must register each device to the hub. You can register each device by using the registration buttons or the [Home Network] app. Using registration buttons 1 Hub: Press and hold M OTHER DEVICEN until the LED indicator blinks slowly in green. 2 Window/door sensor: Remove the sensor unit cover and press and hold M N until the LED indicator blinks slowly in green (page 7). 8 For assistance, visit www.panasonic.ca/english/support HNS101C_(en_en)_0117_ver.201.pdf 8 2017/01/19 20:21:04
-
 1
1 -
2
-
 3
3 -
 4
4 -
 5
5 -
 6
6 -
 7
7 -
 8
8 -
 9
9 -
 10
10 -
 11
11 -
 12
12 -
 13
13 -
14
-
15
-
16
-
17
-
18
-
19
-
20
-
21
-
22
-
23
-
24
-
25
-
26
-
27
-
28
-
29
-
30
-
31
-
32
-
33
-
34
-
35
-
36
-
37
-
38
-
39
-
40
-
41
-
42
-
43
-
44
 |
 |
