Panasonic SC-BTT195 SCBTT190 User Guide - Page 36
Speaker settings, Remote Control Code - remote code
 |
View all Panasonic SC-BTT195 manuals
Add to My Manuals
Save this manual to your list of manuals |
Page 36 highlights
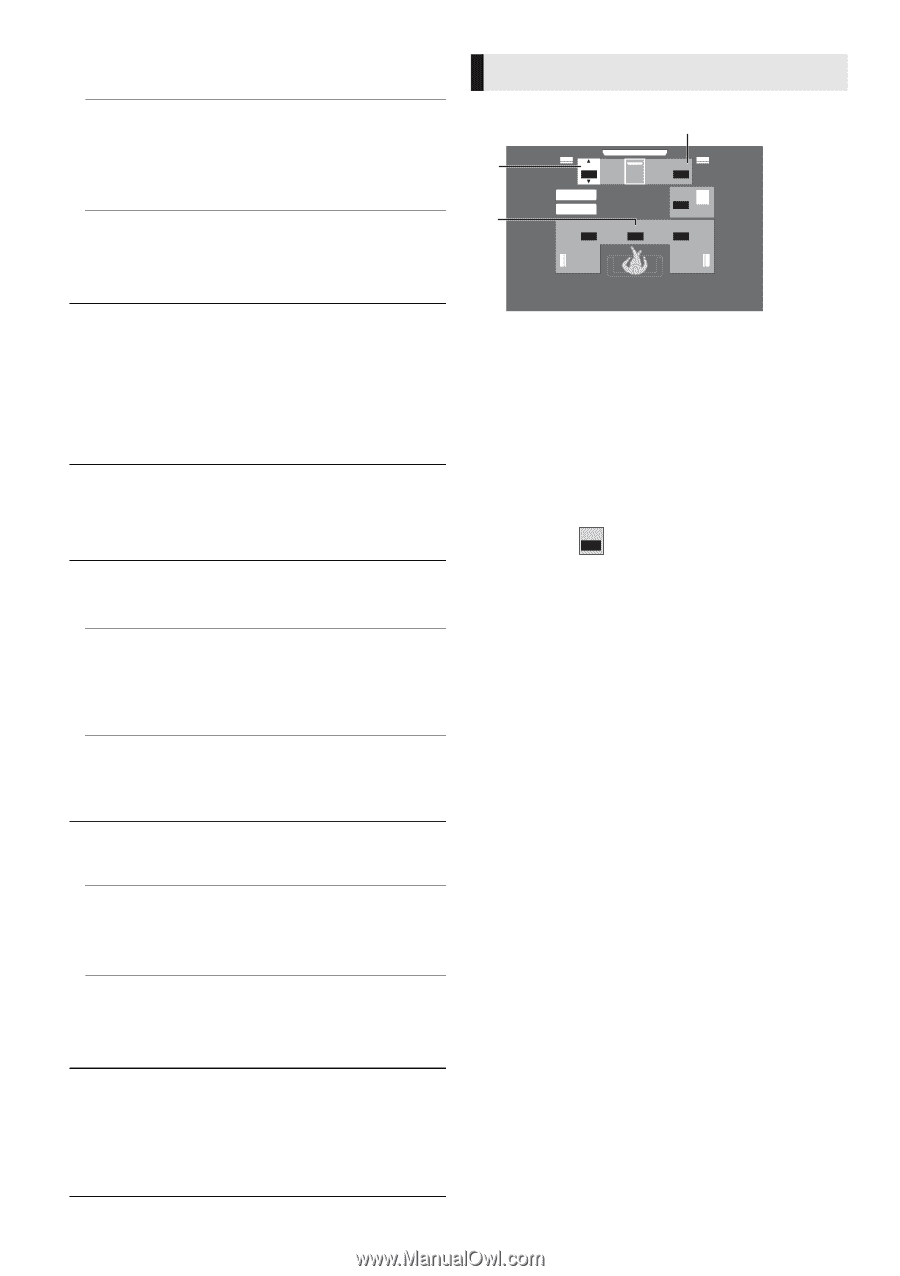
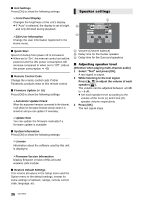
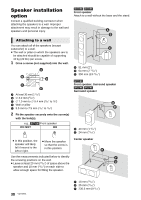
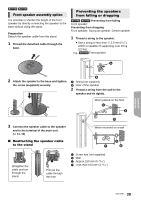
∫ Unit Settings Press [OK] to show the following settings: ¾Front Panel Display Changes the brightness of the unit's display. ≥ If "Auto" is selected, the display is set to bright and only dimmed during playback. ¾Edit User Information Change the user information registered in the Home menu. Speaker settings ms dB L 0.0 C 0R Complete dB Test 0 SW dB ms dB 0 0.0 0 LS RS ∫ Quick Start Speed of startup from power off is increased. ≥ When set to "On", the internal control unit will be powered and the idle power consumption will increase compared to when set to "Off". (About the power consumption > 45) ∫ Remote Control Code Change the remote control code if other Panasonic products react to this remote control. ∫ Firmware Update (> 16) Press [OK] to show the following settings: ¾Automatic Update Check When this equipment remains connected to the Internet, it will check for the latest firmware version when it is turned on and you can update it if necessary. A Volume (Channel balance) B Delay time for the Center speaker C Delay time for the Surround speakers ∫ Adjusting speaker level (Effective when playing multi-channel audio) 1 Select "Test" and press [OK]. A test signal is output. 2 While listening to the test signal Press [3, 4] to adjust the volume of each speaker ( dB 0 ). The volume can be adjusted between r6 dB to s6 dB. ≥ Set each speaker level according to the volume of the Front (L) and Front (R) speaker volume respectively. 3 Press [OK]. The test signal stops. ¾Update Now You can update the firmware manually if a firmware update is available. ∫ System Information Press [OK] to show the following settings: ¾ License Information about the software used by this unit is displayed. ¾Firmware Version Information Display firmware version of this unit and wireless LAN module. ∫ Restore Default Settings This returns all values in the Setup menu and the Option menu to the default settings, except for some settings of network, ratings, remote control code, language, etc. 36 VQT3X51
-
 1
1 -
2
-
3
-
4
-
5
-
6
-
7
-
8
-
9
-
10
-
11
-
12
-
13
-
14
-
15
-
16
-
17
-
18
-
19
-
20
-
21
-
22
-
23
-
24
-
25
-
26
-
27
-
28
-
29
-
30
-
 31
31 -
 32
32 -
 33
33 -
 34
34 -
 35
35 -
 36
36 -
 37
37 -
 38
38 -
 39
39 -
 40
40 -
 41
41 -
42
-
43
-
44
-
45
-
46
-
47
-
48
-
49
-
50
-
51
-
52
 |
 |