Panasonic V4525S PVV4525S User Guide - Page 8
Location of Controls/ Reset All VCR Memory Functions
 |
UPC - 037988971381
View all Panasonic V4525S manuals
Add to My Manuals
Save this manual to your list of manuals |
Page 8 highlights
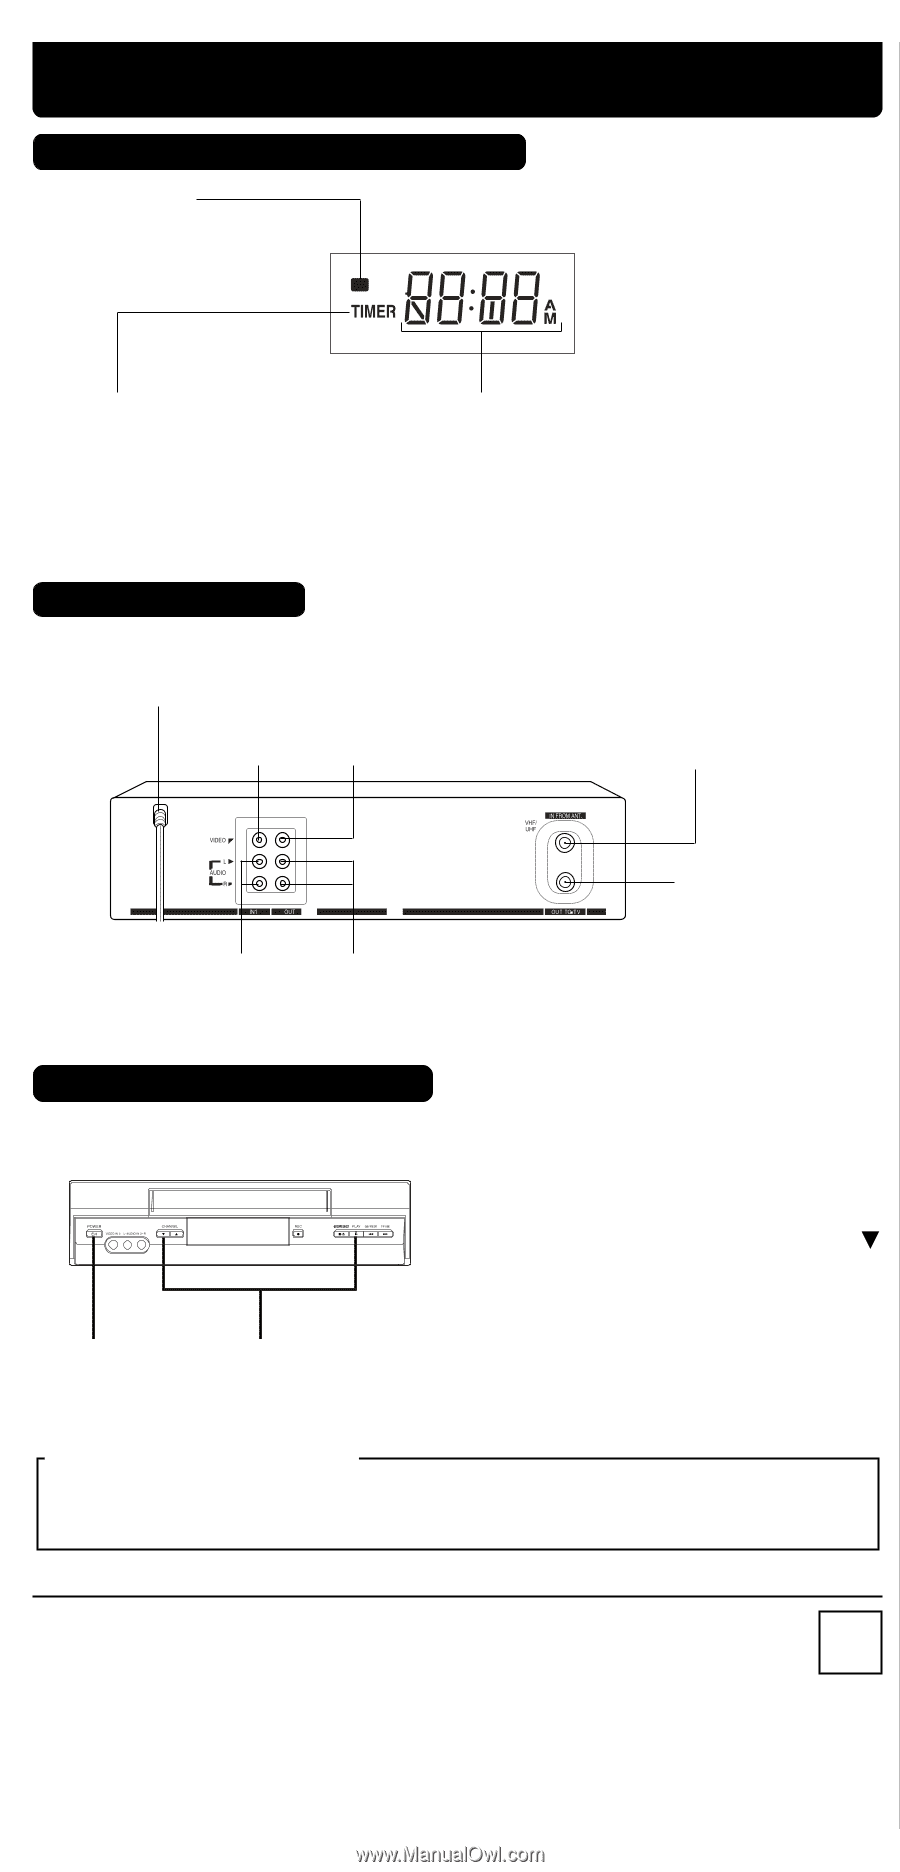
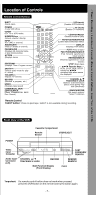
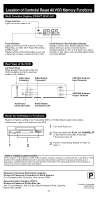
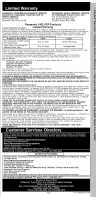
Location of Controls/ Reset All VCR Memory Functions Multi Function Display (FRONT DISPLAY) Power Indicator Lights up when power is on. Timer Indicator Lights up when the VCR is set for a Timer Recording, or when One Touch Recording (OTR) is used. Flashes when a Timer Recording is set, but a tape has not been inserted into the VCR. Clock/ Status/ Channel/ Speed Display Displays current time. Briefly displays VCR status when you press a function button, channel number or "L1" or "L2" when you select channel or line input, and recording speed when you press SPEED. Rear View of the VCR AC Power Plug While plugged into an AC outlet, the VCR consumes 0.9 W of electrical power in off condition. Video Input Connector Video Output Connector VHF/UHF Antenna Input Terminal • • Audio Input Connector (L/R) Audio Output Connector (L/R) VHF/UHF Antenna Output Terminal Reset All VCR Memory Functions Returns to factory setting. Use if relocating VCR, or if Initial Setup needs to be redone. • Make sure a tape is not inserted in the VCR. 1 Turn VCR Power on. 2 Press and hold both PLAY and CHANNEL on the VCR for more than 5 seconds. • The power shuts off. 1 2 3 Perform "Initial Setup (Ready to Play)" on page 4. Note to CABLE system installer This reminder is provided to call the CABLE system installer's attention to Article 820-40 of the NEC in USA (and to the Canadian Electrical Code in Canada) that provides guidelines for proper grounding and, in particular, specifies that the cable ground shall be connected to the grounding system of the building, as close to the point of cable entry as practical. Panasonic Consumer Electronics Company, Division of Panasonic Corporation of North America One Panasonic Way Secaucus, New Jersey 07094 Panasonic Sales Company ("PSC"), Division of Panasonic Puerto Rico, Inc. Ave. 65 de Infantería. Km. 9.5 San Gabriel Industrial Park, Carolina, Puerto Rico 00985 - 8 - P Printed in Indonesia LSQT0864 A S1104-1124
-
 1
1 -
2
-
 3
3 -
 4
4 -
 5
5 -
 6
6 -
 7
7 -
 8
8 -
 9
9 -
 10
10 -
 11
11 -
 12
12 -
 13
13 -
14
-
15
-
16
-
17
-
18
-
19
-
20
-
21
-
22
-
23
-
24
 |
 |