Pfaff creative 2134 Owner's Manual - Page 41
Remove the embroidery unit, Attach the hoop on the embroidery unit, Remove the hoop
 |
View all Pfaff creative 2134 manuals
Add to My Manuals
Save this manual to your list of manuals |
Page 41 highlights
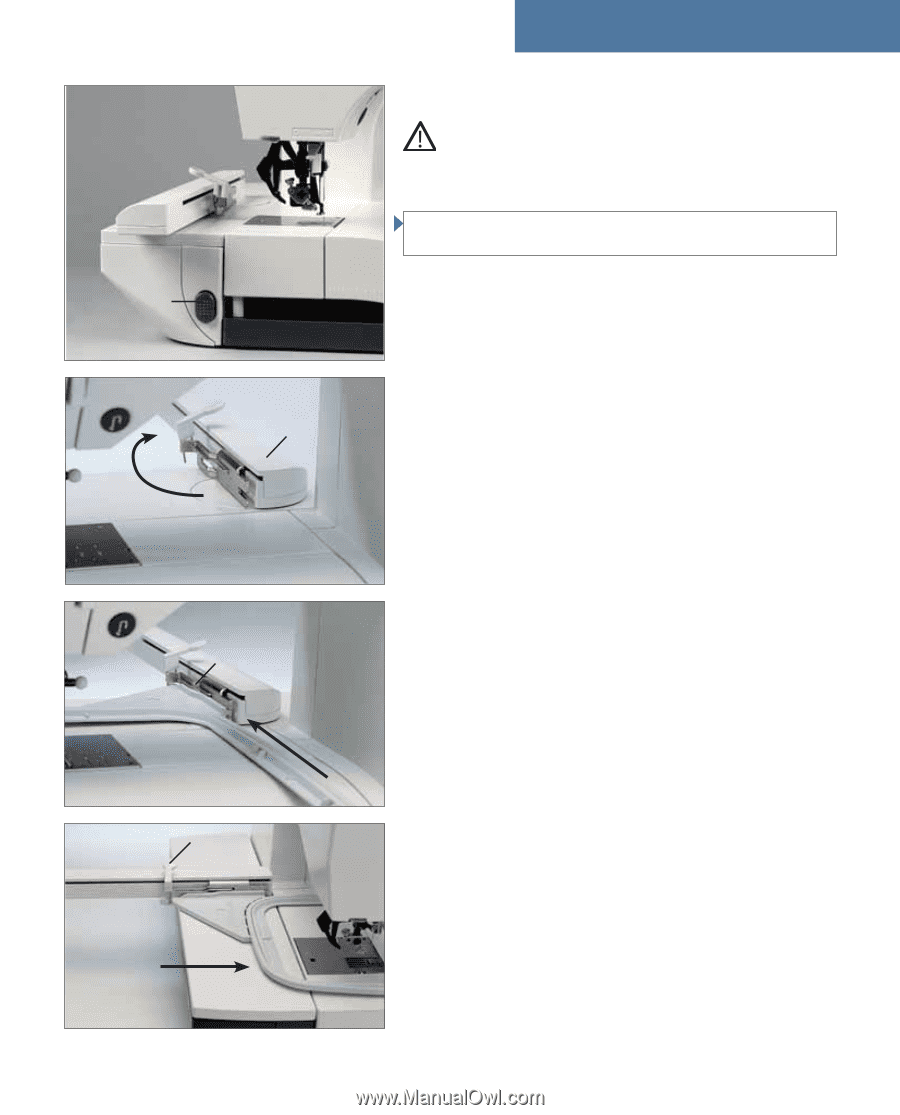
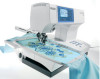
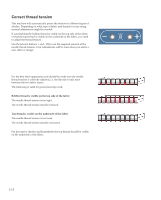
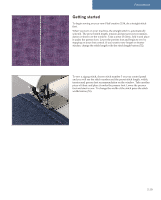
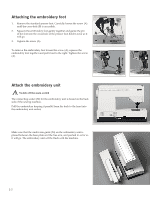
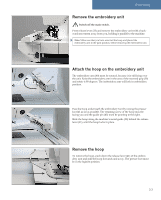
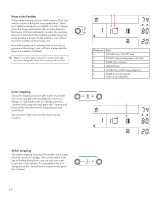
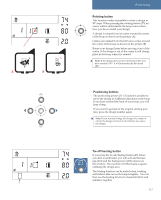
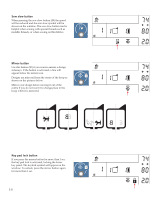
Embroidery Remove the embroidery unit Switch off the main switch. Press release lever (33) and remove the embroidery unit with a backward movement away from you, holding it parallel to the machine. Note: Make sure that you have removed the hoop and placed the embroidery arm in the park position, before removing the embroidery unit. 33 Attach the hoop on the embroidery unit 40 The embroidery arm (40) must be rotated, because it is still lying over the unit. Raise the embroidery arm in the area of the recessed grip (39) and rotate it 90 degrees. The embroidery arm will lock in embroidery position. Pass the hoop underneath the embroidery foot by raising the presser foot lift as far as possible. The retaining screw of the hoop must be facing you and the guide pin (43) must be pointing to the right. 38 Slide the hoop along the machine's metal guide (38) behind the release lever (41), until the hoop locks in place. 41 Remove the hoop To remove the hoop, push down the release lever (41) of the embroidery unit and pull the hoop forwards and away. The presser foot must be in the highest position. 3:3
-
 1
1 -
2
-
3
-
4
-
5
-
6
-
7
-
8
-
9
-
10
-
11
-
12
-
13
-
14
-
15
-
16
-
17
-
18
-
19
-
20
-
21
-
22
-
23
-
24
-
25
-
26
-
27
-
28
-
29
-
30
-
31
-
32
-
33
-
34
-
35
-
 36
36 -
 37
37 -
 38
38 -
 39
39 -
 40
40 -
 41
41 -
 42
42 -
 43
43 -
 44
44 -
 45
45 -
 46
46 -
47
-
48
-
49
-
50
-
51
-
52
-
53
-
54
-
55
-
56
-
57
-
58
-
59
-
60
-
61
-
62
-
63
-
64
-
65
-
66
-
67
-
68
-
69
-
70
-
71
-
72
-
73
-
74
-
75
-
76
-
77
-
78
-
79
-
80
-
81
-
82
-
83
-
84
-
85
-
86
-
87
-
88
-
89
-
90
-
91
-
92
-
93
-
94
-
95
-
96
-
97
-
98
 |
 |