Philips 50PFP5332D User manual - Page 21
Installation menu, Channel menu
 |
UPC - 609585123427
View all Philips 50PFP5332D manuals
Add to My Manuals
Save this manual to your list of manuals |
Page 21 highlights
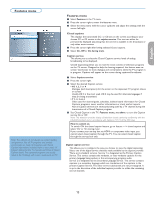
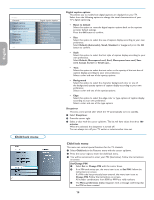
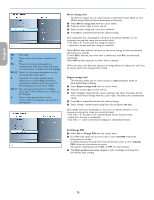
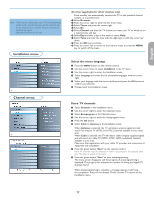
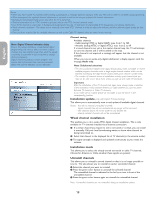
English Française Note: - From now on, every week, your TV will automatically switch to the selected channel, on the selected day, at the selected time, until the On timer function is switched off again. - Only one On timer can be set. Installation menu Channel menu On timer (applicable for off-air channels only) From standby, this automatically switches the TV to the specified channel number, at a specified time. & Select On timer. é Press the cursor right to enter the On timer menu. " Select Timer and press the cursor right. ' Select On. ( Select Channel and then the TV channel you want your TV to switch to on a selected time and day. § Select Day and then a day of the week or select Daily. è Select Time and enter the time with the digit keys or with the cursor up/ down. ! Press the OK key to activate. ç Press the cursor left to return to the Features menu or press the MENU key to switch off the menu. Select the menu language & Press the MENU button on the remote control. é Use the cursor down to select Installation in the TV menu. " Use the cursor right to enter the Installation menu. ' Select Language and enter the list of available languages with the cursor right. ( Select your language with the cursor up/down and press the OK button to confirm you selection. § Proceed with the Installation menu. Store TV channels & Select Channels in the Installation menu. é Use the cursor right to enter the Channels menu. " Select Autoprogram in the Channels menu. ' Use the cursor right to enter the Autoprogram menu. ( Press the OK button. § Select Cable or Antenna in the Installation mode. When Antenna is selected, the TV will detect antenna signals and will search for antenna TV (NTSC and ATSC) channels available in your local area. When Cable is selected, the TV will detect cable company supplied signals and will search for cable TV (NTSC, ATSC, QAM modulated) channels available in your area. Make sure that registration with your cable TV provider and connection of equipment are completed. è Press the green button "Next" on the remote control. Note: All channels must be unlocked in order to autoprogram. If requested, enter your PIN code to unlock all channels. ! Press the green button "Start" to start autoprogramming. The menu screen disappears and the progress of autoprogramming is displayed. The progress bar indicates the number of analog and digital TV channels found. When Autoprogramming is complete, a message appears confirming the completion. Press the red button "Finish" and the TV returns to the Installation menu. Español 17
-
 1
1 -
2
-
3
-
4
-
5
-
6
-
7
-
8
-
9
-
10
-
11
-
12
-
13
-
14
-
15
-
 16
16 -
 17
17 -
 18
18 -
 19
19 -
 20
20 -
 21
21 -
 22
22 -
 23
23 -
 24
24 -
 25
25 -
 26
26 -
27
-
28
-
29
-
30
-
31
-
32
-
33
-
34
-
35
-
36
-
37
-
38
-
39
-
40
-
41
-
42
-
43
-
44
-
45
-
46
-
47
-
48
-
49
-
50
-
51
-
52
-
53
-
54
-
55
-
56
-
57
-
58
-
59
-
60
-
61
-
62
-
63
-
64
-
65
-
66
-
67
-
68
-
69
-
70
-
71
-
72
-
73
-
74
-
75
-
76
-
77
-
78
-
79
-
80
-
81
-
82
-
83
-
84
-
85
-
86
-
87
-
88
-
89
-
90
-
91
-
92
-
93
-
94
-
95
-
96
-
97
-
98
-
99
-
100
-
101
-
102
-
103
-
104
-
105
-
106
-
107
-
108
-
109
-
110
-
111
-
112
-
113
-
114
-
115
-
116
-
117
-
118
-
119
-
120
-
121
-
122
-
123
-
124
 |
 |