Philips 50PFP5332D User manual - Page 25
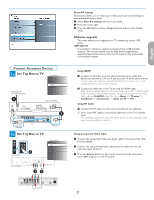
Connect Accessory Device, Set Top Box to TV, Set-Top Box to TV - sound no video
 |
UPC - 609585123427
View all Philips 50PFP5332D manuals
Add to My Manuals
Save this manual to your list of manuals |
Page 25 highlights
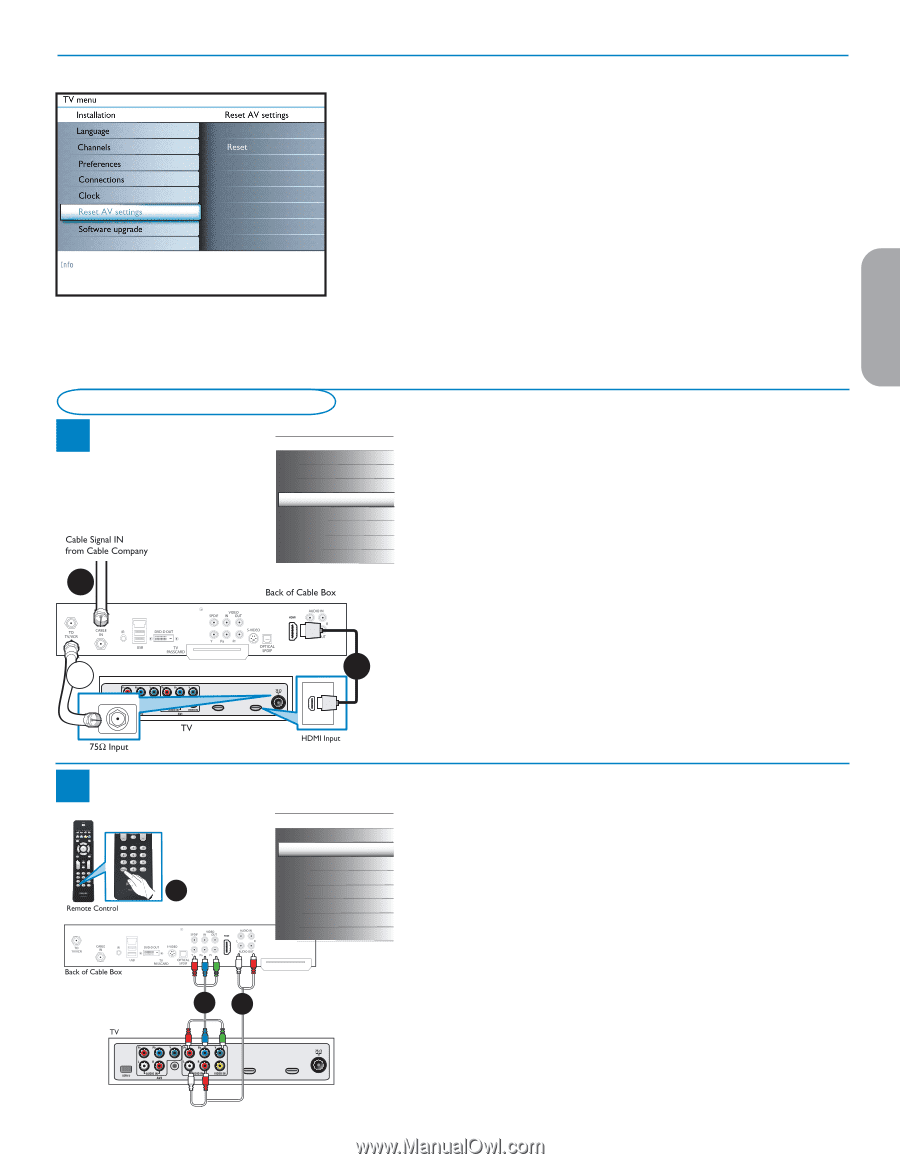
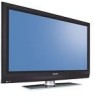
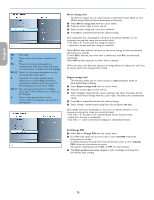
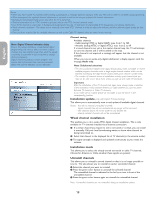
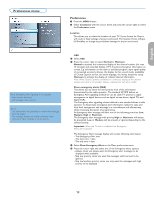
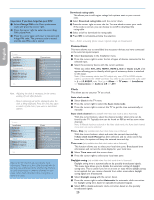
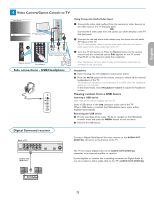
English Française Connect Accessory Devices 1a Set Top Box to TV Next Source TV AV 1 AV 2 HDMI 1 HDMI 2 Side 1 2 AUDIO OUT (DIGITAL) HDMI 2 CABLE / ANTENNA HDMI 1 2 1b Set-Top Box to TV Source Button 3 Next Source TV AV 1 AV 2 HDMI 1 HDMI 2 Side Reset AV settings This function allows you to reset most of the picture and sound settings to their predefined factory states. & Select Reset AV settings with the cursor down. é Press the cursor right. " Press the OK button to erase settings and reset them to their default values. Software upgrade This menu allows you to upgrade your TV software by using a USB device. USB upgrade It is possible to initiate an upgrade procedure from a USB portable memory. The memory device must be filled with the appropriate upgrade image (and structure) which can be found on the www.philips. com/welcome website. Using HDMI & Connect the RF cable from the wall to the back of the cable box. Set the set-top box to CH 3 or 4 and tune the TV to the same channel. In some cases, the cable box will automatically tune to channel 3 or 4. Just change channels until the picture appears. é Connect the cable box to the TV by using the HDMI cable. Note : If the accessory device has DVI output only, use a DVI to HDMI adapter cable to connect to the HDMI connector. You need to also connect the audio cable to L and R AUDIO jacks. Next, go to Menu => TV menu => Installation => Connections => Audio in L/R => AV1. Using RF Cable & Connect the RF cable from the wall to the back of the cable box. 2 Use a second RF cable to connect the cable box to the TV's antenna input. This connection gives mono sound. For stereo sound use also composite audio/ video connection (Refer to panel 3). Using Component Video Input & Connect the Component Video and Audio cable to the back of the cable box accordingly. é Connect the red and white audio cables from the cable box into the audio AV inputs of the TV. " Press the Source button on the remote control until the connected source AV 1 appears on the TV screen. Español 12 AUDIO OUT (DIGITAL) HDMI 2 CABLE / ANTENNA HDMI 1 21
-
 1
1 -
2
-
3
-
4
-
5
-
6
-
7
-
8
-
9
-
10
-
11
-
12
-
13
-
14
-
15
-
16
-
17
-
18
-
19
-
 20
20 -
 21
21 -
 22
22 -
 23
23 -
 24
24 -
 25
25 -
 26
26 -
 27
27 -
 28
28 -
 29
29 -
 30
30 -
31
-
32
-
33
-
34
-
35
-
36
-
37
-
38
-
39
-
40
-
41
-
42
-
43
-
44
-
45
-
46
-
47
-
48
-
49
-
50
-
51
-
52
-
53
-
54
-
55
-
56
-
57
-
58
-
59
-
60
-
61
-
62
-
63
-
64
-
65
-
66
-
67
-
68
-
69
-
70
-
71
-
72
-
73
-
74
-
75
-
76
-
77
-
78
-
79
-
80
-
81
-
82
-
83
-
84
-
85
-
86
-
87
-
88
-
89
-
90
-
91
-
92
-
93
-
94
-
95
-
96
-
97
-
98
-
99
-
100
-
101
-
102
-
103
-
104
-
105
-
106
-
107
-
108
-
109
-
110
-
111
-
112
-
113
-
114
-
115
-
116
-
117
-
118
-
119
-
120
-
121
-
122
-
123
-
124
 |
 |