Philips AD7000W/37 User Manual - Page 13
Scenario 2: Connect to a non-WPS router, Collect settings of your home Wi-Fi, router - setup pc
 |
View all Philips AD7000W/37 manuals
Add to My Manuals
Save this manual to your list of manuals |
Page 13 highlights
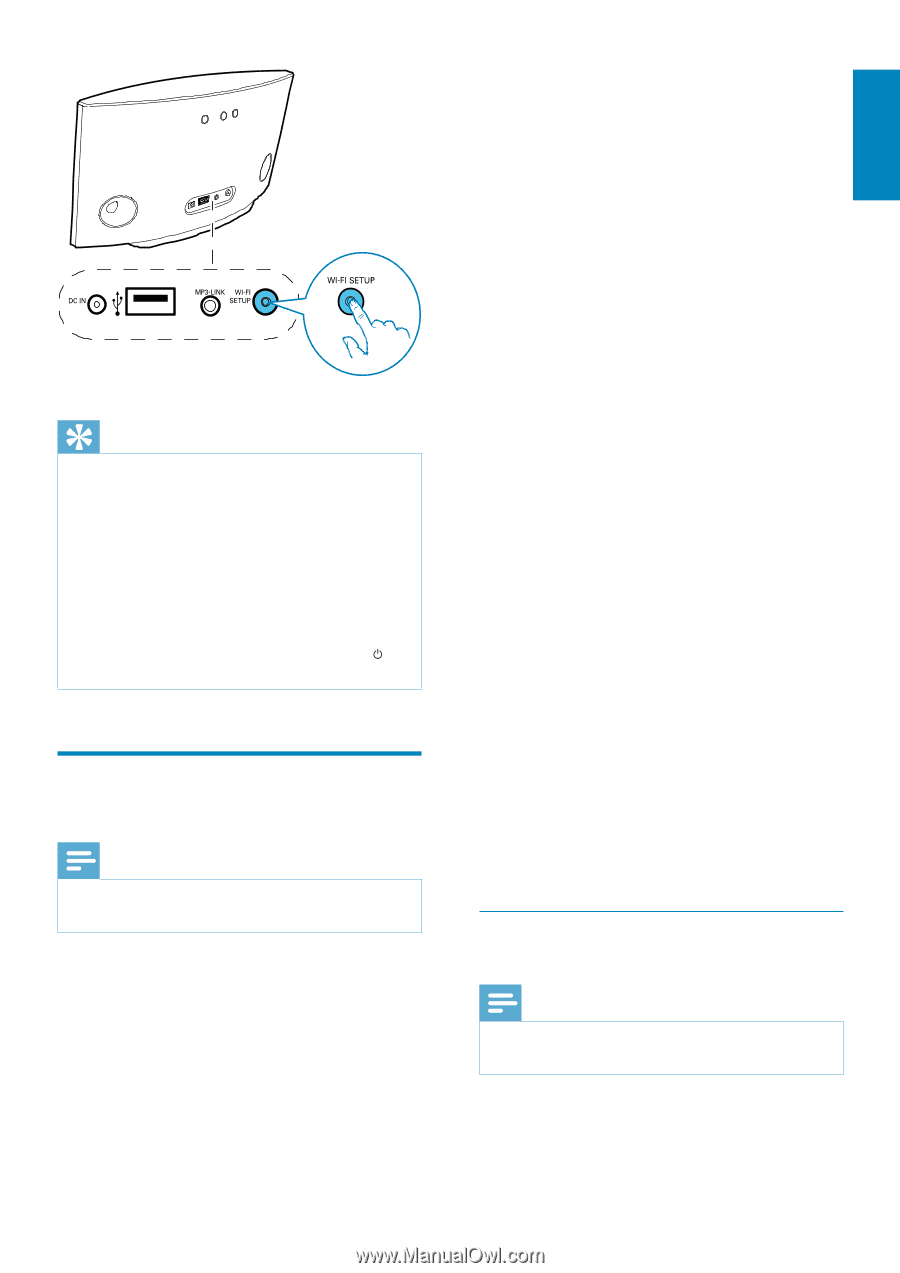
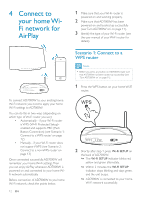
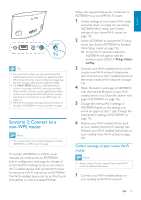
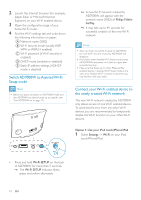
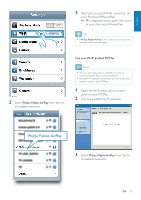
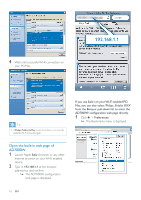
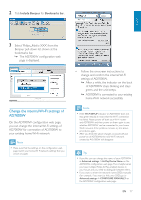
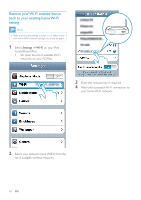
English Tip For some Wi-Fi routers, you may need to hold the WPS button for Wi-Fi connection or enable the WPS If the Wi-Fi SETUP indicator on AD7000W blinks yellow, it means that the Wi-Fi connection has failed. Please wait for 2 minutes and try again. If the problem remains, try to set up the Wi-Fi connection manually (see 'Scenario 2: Connect to a non-WPS router' on page 13). If the Wi-Fi connection fails again, press and hold on the back of AD7000W to reset it, and then try again. Scenario 2: Connect to a non-WPS router Note You can also follow the procedures below to connect AD7000W to a WPS router manually. To connect AD7000W to a Wi-Fi router manually, you need access to AD7000W's its internal Wi-Fi settings.To do so, you need a Wi-Fi enabled device with an Internet browser for temporary Wi-Fi connection to AD7000W. The Wi-Fi enabled device can be an iPod touch/ iPhone/iPad or a Wi-Fi enabled PC/Mac. Follow the sequence below for connection of AD7000W to a non-WPS Wi-Fi router. 1 Collect settings of your home Wi-Fi router and write down on paper for use during AD7000W Wi-Fi setup (see 'Collect settings of your home Wi-Fi router' on page 13). 2 Switch AD7000W to Assisted Wi-Fi Setup mode (see 'Switch AD7000W to Assisted Wi-Fi Setup mode' on page 14). » A new Wi-Fi network created by AD7000W will appear, with the network name (SSID) of Philips Fidelio AirPlay. 3 Connect your Wi-Fi enabled device to the created new Wi-Fi network temporarily (see 'Connect your Wi-Fi enabled device to the newly created Wi-Fi network' on page 14). 4 Open the built-in web page of AD7000W with the Internet Browser of your Wi-Fi enabled device (see 'Open the built-in web page of AD7000W' on page 16). 5 Change the internal Wi-Fi settings of AD7000W based on the settings you wrote on paper at step 1 (see 'Change the internal Wi-Fi settings of AD7000W' on page 17). 6 Restore your Wi-Fi enabled device back to your existing home Wi-Fi settings (see 'Restore your Wi-Fi enabled device back to your existing home Wi-Fi setting' on page 18). Collect settings of your home Wi-Fi router Note Always consult the user manual of your home Wi-Fi router for detailed instructions. 1 Connect your Wi-Fi enabled device to your existing home Wi-Fi network. EN 13
-
 1
1 -
2
-
3
-
4
-
5
-
6
-
7
-
 8
8 -
 9
9 -
 10
10 -
 11
11 -
 12
12 -
 13
13 -
 14
14 -
 15
15 -
 16
16 -
 17
17 -
 18
18 -
19
-
20
-
21
-
22
-
23
-
24
-
25
-
26
-
27
 |
 |