Philips PCVC720K User manual - Page 15
Klwh²%dodqfh, Srvxuh, Hidxowv
 |
View all Philips PCVC720K manuals
Add to My Manuals
Save this manual to your list of manuals |
Page 15 highlights
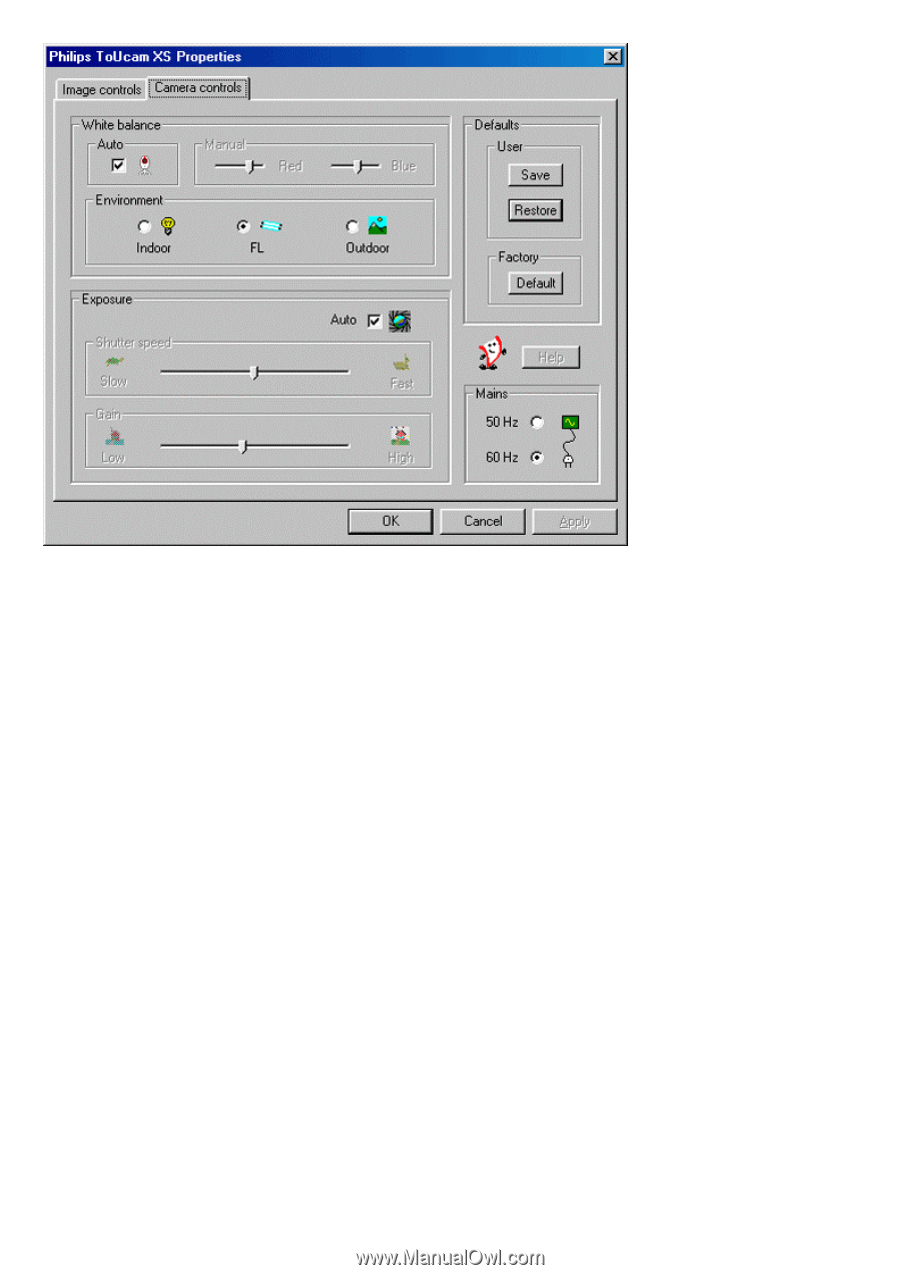
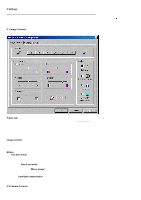
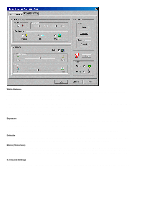
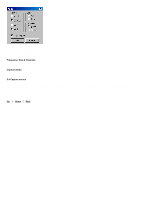
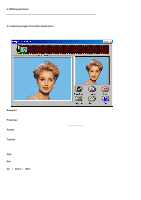
In Auto mode the camera automatically controls the different colour components in the picture to obtain the most natural colour reproduction. This setting is the preferred setting for normal use. Deselect the Auto mode and use the 'Red' and 'Blue' sliders to set a white balance manually. The range of your Auto mode control will be influenced by your Environment setting (Indoor / FL / Outdoor). The Environment setting compensates for the specific colour spectrum of these types of lighting. Only switch off the automatic white balance control when you have a colourful scene and stable lighting conditions. The current colour setting will remain frozen and will not be influenced by the camera's internal controls. The exposure setting determines the amount of light that will fall onto the video sensor chip by controlling the gain and shutter speed. In Auto exposure mode the camera automatically adjusts the gain and shutter speed. In manual mode (no check mark in the Auto checkbox) you can control the setting for gain and shutter speed manually. If you like a particular setting for particular lighting conditions, you can use the Save and Restore buttons to save and restore this preferred setting. Should you wish to restore all standard settings, then click the Default button under Factory. The Flickerless control will be switched on automatically if you have chosen to engage Auto White Balance in combination with fluorescent light conditions (the option FL under Environment) to prevent flickering or strangely coloured video images. Please indicate under Mains whether your mains power frequency is 50 Hz (Europe) or 60 Hz (USA) so the Flickerless control will work correctly. Access to the sound settings is dependent on the application software. But usually it will look something like this when you open a 'Sound Settings' option.
-
 1
1 -
2
-
3
-
4
-
5
-
6
-
7
-
8
-
9
-
 10
10 -
 11
11 -
 12
12 -
 13
13 -
 14
14 -
 15
15 -
 16
16 -
 17
17 -
 18
18 -
 19
19 -
 20
20 -
21
-
22
-
23
-
24
-
25
-
26
 |
 |