Philips PCVC720K User manual - Page 8
Dfn´wr´9/rxqjh
 |
View all Philips PCVC720K manuals
Add to My Manuals
Save this manual to your list of manuals |
Page 8 highlights
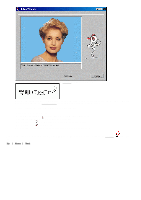
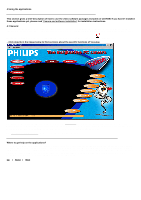
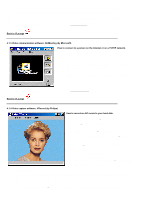
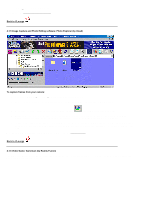
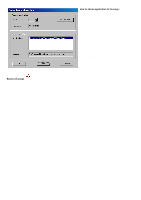
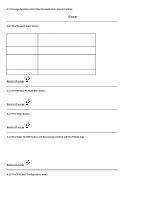
4. Similarly, click the 'Live Webcast' tab to broadcast your PC Camera images and audio 'live' over the World Wide Web. 5. Or create your own 'Web Album' of stored videos and pictures for people to view at their convenience. NOTE: You can make your shows public, for anyone to see, or choose to create a password so that only friends and family can view them. More info: Click 'Help' within the application for assistance or go to: www.spotlife.com 1. Click the telephone icon. 2. Type the name of the person you want to call, or the name of the computer you want to reach. 3. If NetMeeting does not have enough information for the connection, the Advanced dialog box appears automatically. 4. Only two computers in a NetMeeting conference can use audio for communication. All other participants must communicate through other options, like Chat or the shared Whiteboard. More info: Click 'Help' within the application for assistance or go to: www.microsoft.com 1. Choose a file name in the File menu using 'Set Capture File'. 2. Click 'Devices' to set the video and audio source you want to use. 3. Enable 'Preview' in the Options menu to see the live camera preview, then adjust your audio and video settings if necessary. E.g. the Frame Rate setting in the Options - Video Format menu, which determines the frame rate the camera hardware should deliver to VRecord. 4. Use the Capture menu to start or stop capturing a video. Enable 'Capture Audio' if you want to record sound together with the camera pictures. (See below for other capture options.) 5. You can replay the recording by opening the AVI file you selected for your capture file name in the File - Set Capture File menu. Double click this AVI file in Windows Explorer and Windows Media Player will show you the recording. Other capture options are: • The 'Master Stream' option determines the preferred synchronisation between the video stream and the recorded sounds. Choose 'Audio' if you want to make sure that the video rate adapts to the sound recording rate. Choose 'Video' if you want to make sure that the sound recording rate adapts to the video recording rate. If 'None' is enabled, VRecord will adapt both streams to one another whenever necessary. • If 'Use Frame Rate' is enabled in Capture - Set Frame Rate... it determines the software frame rate at which VRecord captures the movie, independently of the hardware frame rate delivered by the camera according to the Frame Rate setting
-
 1
1 -
2
-
 3
3 -
 4
4 -
 5
5 -
 6
6 -
 7
7 -
 8
8 -
 9
9 -
 10
10 -
 11
11 -
 12
12 -
 13
13 -
14
-
15
-
16
-
17
-
18
-
19
-
20
-
21
-
22
-
23
-
24
-
25
-
26
 |
 |
