Pioneer 614MX Operating Instructions - Page 7
Part Names and Function - remote
 |
UPC - 012562732336
View all Pioneer 614MX manuals
Add to My Manuals
Save this manual to your list of manuals |
Page 7 highlights
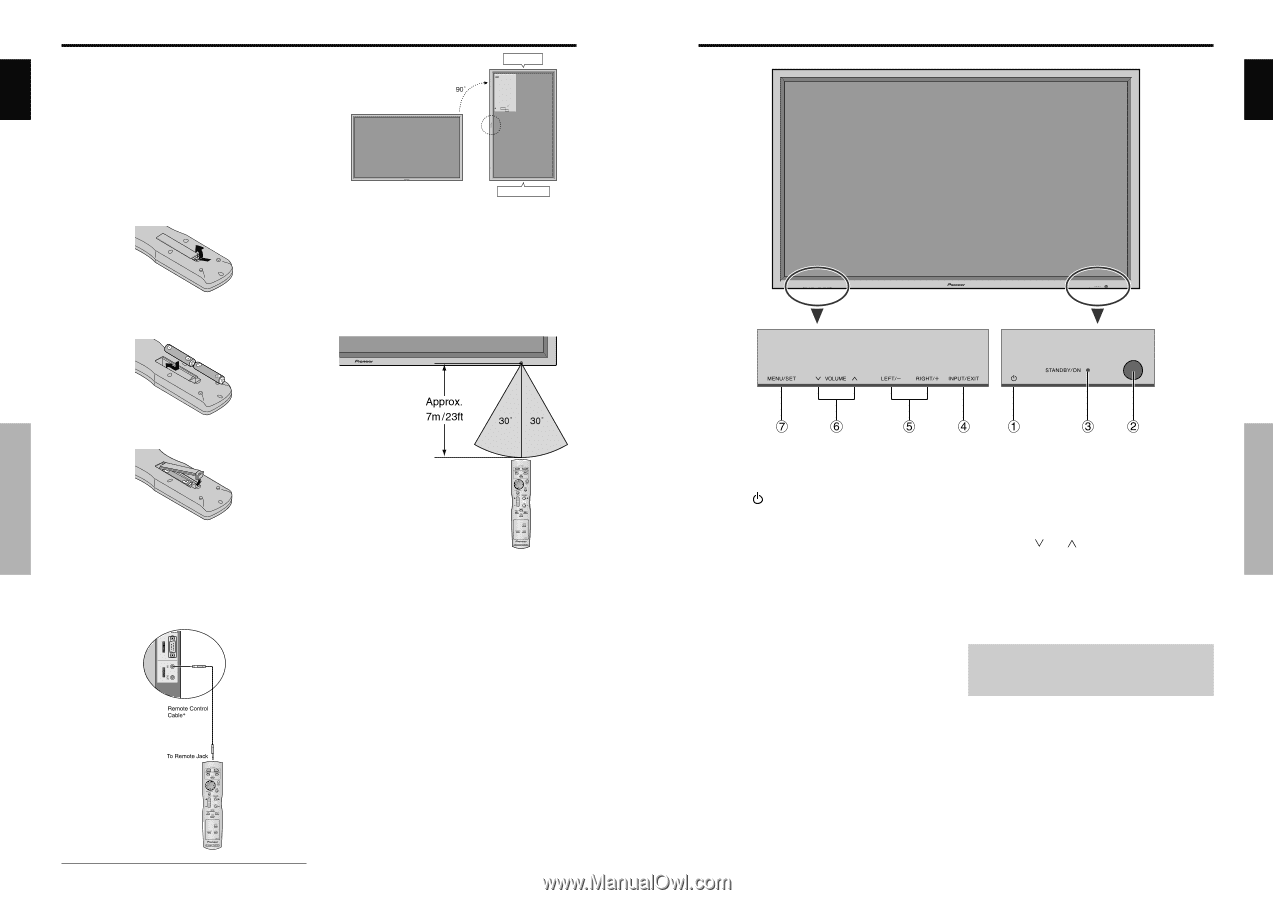
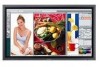
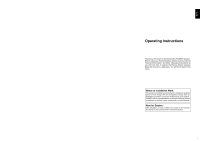
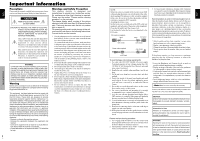
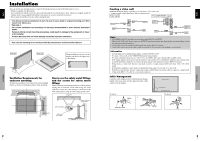
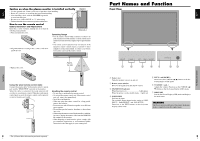
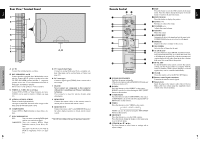
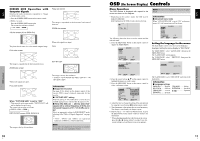
English Caution on when the plasma monitor is installed vertically • Use the optional unit. Contact your store of purchase when installing. • Rotate 90° clockwise as seen from the front when installing. • After installing, check with the PIONEER logo mark as seen from the front. • Be sure to set "OSD ANGLE" to "V" when using. * Failure to heed the above cautions may lead to malfunction. Top side OSD OPTION1 BNC INPUT : RGB D-SUB INPUT : RGB RGB SELECT : AUTO HD SELECT : 1080B INPUT SKIP : OFF ALL RESET : OFF 1024 768 SEL. MENU OK EXIT RETURN How to use the remote control Battery Installation and Replacement Insert the 2 "AAA" batteries, making sure to set them in with the proper polarity. 1.Press and open the cover. 2. Align the batteries according to the (+) and (-) indication inside the case. Bottom side Operating Range * Use the remote control within a distance of about 7 m/ 23ft. from the front of the monitor's remote control sensor and at horizontal and vertical angles of up to approximately 30°. * The remote control operation may not function if the monitor's remote control sensor is exposed to direct sunlight or strong artificial light, or if there is an obstacle between the sensor and the remote control. 3.Replace the cover. Installation Using the wired remote control mode Connect the remote cable* to the remote control's remote jack and the "REMOTE IN" terminal on the monitor. When the cable is connected, the mode automatically switches to wired remote control. When the wired remote control mode is used, the remote control can be operated even if no batteries are loaded. Handling the remote control • Do not drop or mishandle the remote control. • Do not get the remote control wet. If the remote control gets wet, wipe it dry immediately. • Avoid heat and humidity. • When not using the remote control for a long period, remove the batteries. • Do not use new and old batteries together, or use different types together. • Do not take apart the batteries, heat them, or throw them into a fire. • When using the remote control in the wireless condition, be sure to unplug the remote cable from the REMOTE IN terminal on the monitor. • When disposing of used batteries, please comply with governmental regulations or environmental public instruction's rules that apply in your country/area. 4 * The 1/8 Stereo Mini cable must be purchased separately. En Part Names and Function Front View English Part Names and Function q Power ( ) Turns the monitor's power on and off. w Remote sensor window Receives the signals from the remote control. e STANDBY/ON indicator When the power is on Lights green. When the power is in the standby mode ... Lights red. r INPUT/EXIT Switches the input. The available inputs depend on the setting of "BNC INPUT", "RGB SELECT" and "DVI SET UP". Functions as the EXIT buttons in the On-Screen Display (OSD) mode. t LEFT/- and RIGHT/+ Functions as the CURSOR buttons in the OnScreen Display (OSD) mode. y VOLUME and Adjusts the volume. Functions as the CURSOR (L/ M) buttons in the On-Screen Display (OSD) mode. u MENU/SET Sets the On-Screen Display (OSD) mode and displays the main menu. WARNING The Power on/off switch does not disconnect the plasma display completely from the supply mains. 5 En
-
 1
1 -
 2
2 -
 3
3 -
 4
4 -
 5
5 -
 6
6 -
 7
7 -
 8
8 -
 9
9 -
 10
10 -
 11
11 -
 12
12 -
13
-
14
-
15
-
16
-
17
-
18
-
19
-
20
-
21
 |
 |