Pioneer AVIC-7200NEX AVICSYNC Operation Manual - Page 15
Editing an associated iPhone or, smartphone Android, Connecting an associated iPhone, or smartphone - user manual
 |
View all Pioneer AVIC-7200NEX manuals
Add to My Manuals
Save this manual to your list of manuals |
Page 15 highlights
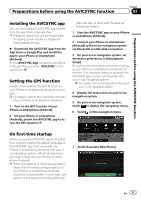
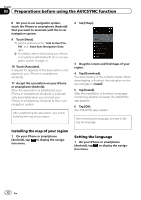
Preparations before using the AVICSYNC function Chapter 03 Preparations before using the AVICSYNC function 8 Set the following options if needed and touch [Next]. Link to User Profile: Your iPhone or smartphone (Android) can be linked to a user profile in your in-car navigation system. Once you link your iPhone or smartphone (Android) to the profile, the linked profile can be selected only when the linked iPhone or smartphone (Android) is connected. To link them, select a user profile that has already been created or newly create a profile on your in-car navigation system. Auto-Sync Navigation Data: If you turn on this option, navigation-related data (saved locations and routes, destination history, current planned route) will be automatically synchronised between your iPhone or smartphone (Android) and your in-car navigation system when your iPhone or smartphone (Android) is connected to the in-car navigation system. p If the downloaded data is large, it will take some time for the data to be transferred to your in-car navigation system with the Auto-Sync function. We strongly recommended that you use a USB connection for the data transfer. 9 Touch [Associate]. A request for approval of the association is displayed on your iPhone or smartphone (Android). 10 Accept the association on your iPhone or smartphone (Android). Once the association is established, your iPhone or smartphone (Android) is automatically associated when you connect your iPhone or smartphone (Android) to the in-car navigation system. Editing an associated iPhone or smartphone (Android) 1 Prepare the AVICSYNC function for use. = For details, refer to Regular startup on page 13. 2 Display the map screen on your in-car navigation system. 3 On your in-car navigation system, touch to display the navigation menu. 4 Touch on the navigation menu. 5 Touch to display the shortcuts. p If you touch [Forget All Phones] in the shortcuts, you can cancel association of all devices. 6 Touch [Edit]. 7 Touch the iPhone or smartphone (Android) that you want to edit. 8 Set the following options. Auto-Sync Navigation Data: Turn on or off the Auto-Sync function. Forget this Phone: Cancels the association between your iPhone or smartphone (Android) currently connected and your in-car navigation system. p Navigation-related data including the map will be deleted from your iPhone or smartphone (Android) 15 days after you cancel the association. If you associate the iPhone or smartphone (Android) again within 15 days, you can use the remaining data. Connecting an associated iPhone or smartphone (Android) manually If you connect another associated iPhone or smartphone (Android), select the one you wish to connect to your system from the list. 1 Display the map screen on your in-car navigation system. 2 On your in-car navigation system, touch to display the navigation menu. 3 Touch on the navigation menu. 4 Touch the name of the device that you want to connect. En 15
-
 1
1 -
2
-
3
-
4
-
5
-
6
-
7
-
8
-
9
-
 10
10 -
 11
11 -
 12
12 -
 13
13 -
 14
14 -
 15
15 -
 16
16 -
 17
17 -
 18
18 -
 19
19 -
 20
20 -
21
-
22
-
23
-
24
-
25
-
26
-
27
-
28
-
29
 |
 |
