Pioneer AVIC-8100NEX Owner's Manual - Page 191
Checking sensor learning, status and driving status, System settings
 |
View all Pioneer AVIC-8100NEX manuals
Add to My Manuals
Save this manual to your list of manuals |
Page 191 highlights
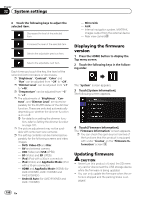
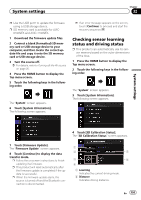
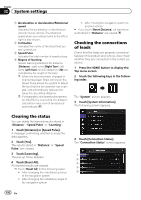
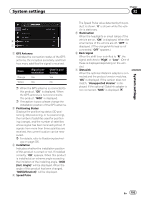
System settings Chapter 32 p Use the USB port1 to update the firmware using a USB storage device. p SD memory card is available for AVIC8100NEX and AVIC-7100NEX. 1 Download the firmware update files. 2 Connect a blank (formatted) SD memory card or USB storage device to your computer, and then locate the correct update file and copy it onto the SD memory card or USB storage device. 3 Turn the source off. = For details, refer to Turning off the AV source on page 25. 4 Press the HOME button to display the Top menu screen. 5 Touch the following keys in the following order. The "System" screen appears. 6 Touch [System Information]. The following screen appears. p If an error message appears on the screen, touch [Continue] to proceed and start the recovery sequence. Checking sensor learning status and driving status p This product can automatically use its sensor memory based on the outer dimensions of the tires. 1 Press the HOME button to display the Top menu screen. 2 Touch the following keys in the following order. The "System" screen appears. 3 Touch [System Information]. The following screen appears. System settings 4 Touch [3D Calibration Status]. The "3D Calibration Status" screen appears. 7 Touch [Firmware Update]. The "Firmware Update" screen appears. 8 Touch [Continue] to display the data transfer mode. p Follow the on-screen instructions to finish updating the firmware. p This product will reset automatically after the firmware update is completed if the update is successful. p When the firmware update starts, the source is turned off and the Bluetooth connection is disconnected. 1 2 5 3 6 4 1 Learning Indicates the current driving mode. 2 Distance Indicates driving distance. En 191
-
 1
1 -
2
-
3
-
4
-
5
-
6
-
7
-
8
-
9
-
10
-
11
-
12
-
13
-
14
-
15
-
16
-
17
-
18
-
19
-
20
-
21
-
22
-
23
-
24
-
25
-
26
-
27
-
28
-
29
-
30
-
31
-
32
-
33
-
34
-
35
-
36
-
37
-
38
-
39
-
40
-
41
-
42
-
43
-
44
-
45
-
46
-
47
-
48
-
49
-
50
-
51
-
52
-
53
-
54
-
55
-
56
-
57
-
58
-
59
-
60
-
61
-
62
-
63
-
64
-
65
-
66
-
67
-
68
-
69
-
70
-
71
-
72
-
73
-
74
-
75
-
76
-
77
-
78
-
79
-
80
-
81
-
82
-
83
-
84
-
85
-
86
-
87
-
88
-
89
-
90
-
91
-
92
-
93
-
94
-
95
-
96
-
97
-
98
-
99
-
100
-
101
-
102
-
103
-
104
-
105
-
106
-
107
-
108
-
109
-
110
-
111
-
112
-
113
-
114
-
115
-
116
-
117
-
118
-
119
-
120
-
121
-
122
-
123
-
124
-
125
-
126
-
127
-
128
-
129
-
130
-
131
-
132
-
133
-
134
-
135
-
136
-
137
-
138
-
139
-
140
-
141
-
142
-
143
-
144
-
145
-
146
-
147
-
148
-
149
-
150
-
151
-
152
-
153
-
154
-
155
-
156
-
157
-
158
-
159
-
160
-
161
-
162
-
163
-
164
-
165
-
166
-
167
-
168
-
169
-
170
-
171
-
172
-
173
-
174
-
175
-
176
-
177
-
178
-
179
-
180
-
181
-
182
-
183
-
184
-
185
-
 186
186 -
 187
187 -
 188
188 -
 189
189 -
 190
190 -
 191
191 -
 192
192 -
 193
193 -
 194
194 -
 195
195 -
 196
196 -
197
-
198
-
199
-
200
-
201
-
202
-
203
-
204
-
205
-
206
-
207
-
208
-
209
-
210
-
211
-
212
-
213
-
214
-
215
-
216
-
217
-
218
-
219
-
220
-
221
-
222
-
223
-
224
-
225
-
226
-
227
-
228
-
229
-
230
-
231
-
232
-
233
-
234
-
235
-
236
-
237
-
238
-
239
-
240
-
241
-
242
-
243
-
244
-
245
-
246
-
247
-
248
-
249
-
250
-
251
-
252
-
253
-
254
-
255
-
256
-
257
-
258
-
259
-
260
-
261
-
262
-
263
-
264
 |
 |
